Chapter 952
Chapter Info
| Volume | 94 |
|---|---|
| Chapter | 952 |
| Japanese Title | 日和と河松 |
| Romanized Title | Hiyori to Kawamatsu |
| Viz Title | Hiyori and Kawamatsu |
| Pages | 17 |
| Release Date | August 19, 2019 |
| Wsj Issue | 2019 Issue 38 |
| Anime | Episode 952 (p. 2-4)Episode 953 (p. 5-17) |
Introduction
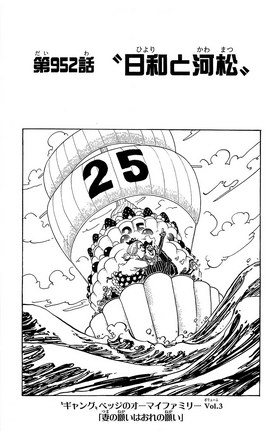
Chapter 952 is titled “Hiyori and Kawamatsu”.
Cover Page
“Gang” Bege’s Oh My Family Vol 3: “My wife’s wish is my wish!” Bege agrees to fulfill Chiffon’s wish.
Short Summary
In Udon, Chopper successfully cures Luffy and the infected prisoners. Tama tames Babanuki and he gives a false report to Queen, keeping him from returning to Udon. Hyougoro also got reacquainted with the four yakuza bosses. Meanwhile, Zoro and Hiyori return to Oihagi Bridge. Zoro fights Gyukimaru again until Kawamatsu interrupts them. Hiyori then reunites with Kawamatsu, but some Beasts Pirates arrive and attack the group.
Long Summary
Two days after his first encounter with Gyukimaru, Zoro has returned to Oihagi Bridge and overwhelms the warrior monk in his quest to get Shusui back. After forcing Gyukimaru to the ground, Zoro asks why the thief steals the weapons of passersby and why he is so adamant about not giving Shusui off. Gyukimaru forces Zoro off of him and says that Shusui is the one blade he cannot let anyone take, as he believes its theft angered the Sword God and spelled the misfortune that caused Wano to become overrun by enemies. Kawamatsu then suddenly comes in and intercepts Zoro, calling the fight between him and Gyukimaru a farce. Hiyori immediately recognizes Kawamatsu and calls out to him, and Gyukimaru expresses shock at seeing him as well.
At Onigashima, Kaidou and Big Mom continue fighting unabated, having been doing so all night. Kaidou’s subordinates get more and more afraid about the condition of the island, and wonder if they should flee. Queen berates them for their cowardice, but then asks if there have been any reports from Udon. Upon hearing that there is still no Tanishi signal, he decides to go and check on it, prompting questions…
Read More about Long Summary
At Onigashima, Kaidou and Big Mom continue fighting unabated, having been doing so all night. Kaidou’s subordinates get more and more afraid about the condition of the island, and wonder if they should flee. Queen berates them for their cowardice, but then asks if there have been any reports from Udon. Upon hearing that there is still no Tanishi signal, he decides to go and check on it, prompting questions from his subordinates about his hypocrisy. Suddenly, Queen receives a call on his Tanishi from Babanuki, who says that communications have been restored.
Queen asks if he needs backup, and Babanuki says that there is no need, as Luffy, Kid, and all the prisoners have been put back in their cells. This disappoints Queen, as he wanted a reason to leave Onigashima. Back in the Prisoner Mines, Babanuki hangs up and is praised by Tama, who has tamed him with her power. Caribou looks forward to surprising the Beasts Pirates during the final battle. The freed prisoners thank Chopper for curing them of the Mummy virus and promise to repay him with their lives if necessary, although Chopper downplays his accomplishment and points them to the rejuvenated Luffy.
Hyougoro is then approached by the four regional yakuza bosses: Omasa, Tsunagoro, Cho, and Yatappe. The bosses are extremely happy to see him again and reverently promise to gather the remaining rebels from Wano’s regions. Luffy laughs at their reverence and refers to Hyougoro casually, causing the yakuza bosses to angrily grab him with the intent to mutilate him. Hyougoro immediately tells them to stop, and the bosses head off, telling Luffy to be more careful in the future. Raizo then says that they can report all this to Kin’emon.
At Port Itachi in Kuri, Kin’emon is ecstatic when Ashura Doji reveals the blueprints for Kaidou’s fortress are in his possession. Kin’emon then receives a call from Raizo, who reveals to him that they have taken over Udon, freed both Luffy and Kawamatsu, and recruited 3,500 soldiers for the battle. However, he does point out that they still have an issue regarding finding weapons for the soldiers, as they are very hard to obtain due to Orochi’s prohibition on them. Kin’emon then prepares to go back to Amigasa Village, telling Raizo to gather as much information as possible while he officially sets up a base of operations. Back on Oihagi Bridge, Hiyori tearfully embraces Kawamatsu, being overjoyed to get the chance to see him again. She confesses that she ran away from him 13 years ago because he always gave the food to her, and she had hoped this would help him survive. Kawamatsu understands her reason, praising it as thoughtful. Suddenly, Gyukimaru notices a group of Beasts Pirates riding toward Oihagi Bridge, but one of them manages to shoot him before he can do anything. The pirates have come to reclaim all the weapons Gyukimaru stole from them, and they decide to kill Zoro’s group as well. Zoro and Kawamatsu then draw their swords and take out the pirates in one fell swoop, and Zoro sees Gyukimaru running away again. As he runs, Gyukimaru says that he is so glad to see Kawamatsu alive and well.
Quick References
Chapter Notes
- Zoro confronts Gyukimaru again.
- Their fight is interrupted by Kawamatsu .
- Hiyori and Kawamatsu reunite.
- Gyukimaru knows Kawamatsu and is happy to see him again.
- Kaidou and Big Mom continue with their fight.
- Tama tames Babanuki and has him give a false report to Queen .
- Chopper develops a cure for the Mummy virus .
- The former Yakuza bosses are introduced: Omasa from Udon , Tsunagoro from Hakumai , Cho from Ringo , and Yatappe from Kibi .
- They leave to recruit the hidden resistance from across Wano Country .
- The blueprint plans for Kaidou’s residence at Onigashima are in the possession of Ashura Doji .
- Raizo reports the recent events at Udon to Kin’emon .
- Kin’emon departs for Amigasa Village .
Characters
Tables
| Category | Details |
|---|---|
| Pirates |
|
| Citizens |
|
Arc Navigation
Wano Country Arc
Manga Chapters
Manga Volumes
| Chapter | Link(s) |
|---|---|
| 90 | View on Wiki |
| 91 | View on Wiki |
| 92 | View on Wiki |
| 93 | View on Wiki |
| 94 | View on Wiki |
| 95 | View on Wiki |
| 96 | View on Wiki |
| 97 | View on Wiki |
| 98 | View on Wiki |
| 99 | View on Wiki |
| 100 | View on Wiki |
| 101 | View on Wiki |
| 102 | View on Wiki |
| 103 | View on Wiki |
| 104 | View on Wiki |
| 105 | View on Wiki |
Anime Episodes
Specials
| Chapter | Link(s) |
|---|---|
| Luffy-senpai Support Project! Barto’s Secret Room! | View on Wiki |
| Zoro and Sanji-senpai Admiring Project! Barto’s Secret Room 2! | View on Wiki |
| A Comprehensive Anatomy! The Legend of Kouzuki Oden! | View on Wiki |
| A Comprehensive Anatomy! Fierce Fight! The Five from the New Generation! | View on Wiki |
| Great Fierce Battle Special! The Straw Hats vs. the Tobi Roppo | View on Wiki |
| Great Fierce Battle Special! Zoro vs. an All-Star! | View on Wiki |
| Great Fierce Battle Special! Alliance Counterattack vs. Big Mom | View on Wiki |
| Luffy-senpai Support Project! Barto’s Secret Room 3! | View on Wiki |
| Luffy-senpai Support Project! Barto’s Secret Room 4! | View on Wiki |
| Special Feature! Momonosuke’s Path to Becoming a Great Shogun | View on Wiki |
Manga Chapters (covers)
| Chapter | Link(s) |
|---|---|
| 948 | View on Wiki |
| 950 | View on Wiki |
| 953 | View on Wiki |
| 954 | View on Wiki |
| 955 | View on Wiki |
| 956 | View on Wiki |
| 958 | View on Wiki |
| 959 | View on Wiki |
| 960 | View on Wiki |
| 961 | View on Wiki |
| 962 | View on Wiki |
| 963 | View on Wiki |
| 964 | View on Wiki |
| 965 | View on Wiki |
| 966 | View on Wiki |
| 968 | View on Wiki |
| 969 | View on Wiki |
| 970 | View on Wiki |
| 971 | View on Wiki |
| 973 | View on Wiki |
| 974 | View on Wiki |
| 975 | View on Wiki |
| 977 | View on Wiki |
| 978 | View on Wiki |
| 979 | View on Wiki |
| 980 | View on Wiki |
| 982 | View on Wiki |
| 983 | View on Wiki |
| 984 | View on Wiki |
| 986 | View on Wiki |
| 988 | View on Wiki |
| 989 | View on Wiki |
| 990 | View on Wiki |
| 991 | View on Wiki |
| 993 | View on Wiki |
| 994 | View on Wiki |