Roronoa Zoro
Statistics
| Japanese Name | ロロノア・ゾロ |
|---|---|
| Romanized Name | Roronoa Zoro |
| Official English Name |
|
| Debut |
|
| Affiliations |
|
| Occupations |
|
| Origin | East Blue |
| Residence |
|
| Alias | “Zoro-juurou” (ゾロ十郎, Zorojūrō?, Funimation: Zorojuro, VIZ Media: “Zolojuro”) |
| Epithet | “Pirate Hunter Zoro” (海賊狩りのゾロ, Kaizoku Gari no Zoro?) |
| Status | Alive |
| Age | 19 (debut) 21 (after timeskip) |
| Birthday | November 11th |
| Height | 178 cm (5’10”) (debut) 181 cm (5’11”) (after timeskip) |
| Blood Type | XF |
| Bounty | 1,111,000,000 320,000,000 120,000,000 60,000,000 |
Portrayal
| Japanese Voice |
|
|---|---|
| English Voice |
|
| Liveaction Portrayal |
|
Introduction
Roronoa Zoro, also known as “Pirate Hunter” Zoro, is the master swordsman (剣豪, kengō?) and combatant of the Straw Hat Pirates, one of the Senior Officers of the Straw Hat Grand Fleet, and is publicly recognized as the right-hand man and number two of his crew’s captain, Monkey D. Luffy. Formerly a bounty hunter, he is the second member of Luffy’s crew and the first to join it, doing so in the Romance Dawn Arc. Born in the East Blue, Zoro is the son of Tera and Roronoa Arashi, the grandson of Shimotsuki Furiko and Roronoa Pinzoro, and the grandnephew of Shimotsuki Ushimaru, making him a descendant of both the Shimotsuki Family of Wano Country and the legendary samurai, Shimotsuki Ryuma. As a master of Three Sword Style, a swordsmanship style which he created during his childhood training in Shimotsuki Village, Zoro is one of the three most powerful combatants of the Straw Hats, alongside Luffy and Sanji, who are aptly referred to as the “Monster Trio”.
His dream is to become the greatest swordsman in the world, to honor a promise he made to his deceased childhood friend and distant cousin, Kuina. In addition to his infamy as one…
Read More about Introduction
His dream is to become the greatest swordsman in the world, to honor a promise he made to his deceased childhood friend and distant cousin, Kuina. In addition to his infamy as one of the Straw Hats and as a former bounty hunter, his sizeable bounty upon arriving at the Sabaody Archipelago caused Zoro, along with Luffy, to be included among the eleven “Super Rookies”, pirates who simultaneously reached the Red Line with bounties of over 100,000,000 shortly before the Summit War. He, the other ten Super Rookies, and Marshall D. Teach would go on to be referred to as the “Worst Generation.” Zoro gained his first bounty of 60,000,000 after the Arabasta Arc. It later increased to 120,000,000 after the Enies Lobby incident, then again to 320,000,000 after the Dressrosa Arc.
Following the Raid on Onigashima, his bounty was augmented to 1,111,000,000. Roronoa Zoro, also known as “Pirate Hunter” Zoro, is the master swordsman (剣豪, kengō?) and combatant of the Straw Hat Pirates, one of the Senior Officers of the Straw Hat Grand Fleet, and is publicly recognized as the right-hand man and number two of his crew’s captain, Monkey D. Luffy. Formerly a bounty hunter, he is the second member of Luffy’s crew and the first to join it, doing so in the Romance Dawn Arc. Born in the East Blue, Zoro is the son of Tera and Roronoa Arashi, the grandson of Shimotsuki Furiko and Roronoa Pinzoro, and the grandnephew of Shimotsuki Ushimaru, making him a descendant of both the Shimotsuki Family of Wano Country and the legendary samurai, Shimotsuki Ryuma. As a master of Three Sword Style, a swordsmanship style which he created during his childhood training in Shimotsuki Village, Zoro is one of the three most powerful combatants of the Straw Hats, alongside Luffy and Sanji, who are aptly referred to as the “Monster Trio”. His dream is to become the greatest swordsman in the world, to honor a promise he made to his deceased childhood friend and distant cousin, Kuina. In addition to his infamy as one of the Straw Hats and as a former bounty hunter, his sizeable bounty upon arriving at the Sabaody Archipelago caused Zoro, along with Luffy, to be included among the eleven “Super Rookies”, pirates who simultaneously reached the Red Line with bounties of over 100,000,000 shortly before the Summit War. He, the other ten Super Rookies, and Marshall D. Teach would go on to be referred to as the “Worst Generation.” Zoro gained his first bounty of 60,000,000 after the Arabasta Arc. It later increased to 120,000,000 after the Enies Lobby incident, then again to 320,000,000 after the Dressrosa Arc. Following the Raid on Onigashima, his bounty was augmented to 1,111,000,000.
Appearance
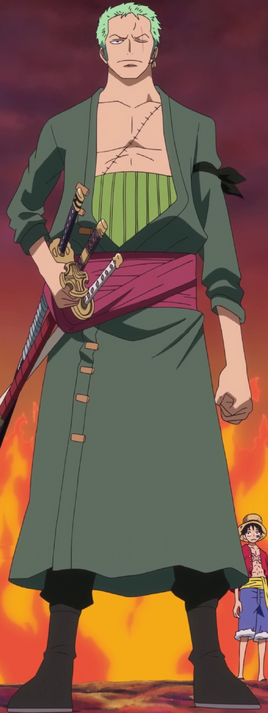
Zoro is a tall, muscular young man with lightly tanned skin. He occupies his three swords along with him, bundled up with a green haramaki over his right hip, allowing him to easily draw them with his left hand. Of the three swords he has on his person, he has always been seen carrying the Wado Ichimonji, while his other two swords have varied over time due to them being destroyed and subsequently replaced with progressively better ones. Although his right hand is usually seen resting over them, he can also use this hand to pull his swords out before sitting down. He has three identical gold earrings on his left earlobe. Zoro normally keeps a black bandana tied around his left bicep and ties it around his head when he fights seriously against an opponent. Zoro’s body is covered with scars from his many battles, most notably the massive scar stretching from his left shoulder to his right hip that he acquired during his loss against the world’s greatest swordsman, Dracule Mihawk, at Baratie. His other visible scars are the scars he inflicted upon his ankles in a desperate attempt to free himself from Mr. 3’s Tokudai Candle…
Read More about Appearance
Zoro is a tall, muscular young man with lightly tanned skin. He occupies his three swords along with him, bundled up with a green haramaki over his right hip, allowing him to easily draw them with his left hand. Of the three swords he has on his person, he has always been seen carrying the Wado Ichimonji, while his other two swords have varied over time due to them being destroyed and subsequently replaced with progressively better ones. Although his right hand is usually seen resting over them, he can also use this hand to pull his swords out before sitting down. He has three identical gold earrings on his left earlobe. Zoro normally keeps a black bandana tied around his left bicep and ties it around his head when he fights seriously against an opponent. Zoro’s body is covered with scars from his many battles, most notably the massive scar stretching from his left shoulder to his right hip that he acquired during his loss against the world’s greatest swordsman, Dracule Mihawk, at Baratie. His other visible scars are the scars he inflicted upon his ankles in a desperate attempt to free himself from Mr. 3’s Tokudai Candle Service Set by trying to cut his feet off at Little Garden. After the timeskip, he gained another scar over his left eye, obtained through unknown means. Zoro’s other remarkable feature is his cropped green hair, which Sanji often teases him about by calling him “marimo” (moss-ball, moss-head in the VIZ manga and Funimation adaptations) due to its similitude to one.
Before The Timeskip
Similar to most of his male crewmates, Zoro has the same outfit throughout most of the series. Before the timeskip, he would consistently wear a white short-sleeved henley shirt, a green haramaki, black pants, and black boots. However, only Zoro’s shirt varies from time to time in the arcs. During the Arlong Park Arc, he disembarked Sanji’s fishing ship,, neglecting to put on a shirt. After beating up most of Arlong’s crew, he wore an opened, navy blue shirt decorated with light blue whirlpools that he stole from one of the fishmen.
Since Zoro received his scar from Mihawk during the Baratie Arc before the Arlong Park Arc, Zoro wore bandages that were visible underneath his shirt. During the Loguetown Arc, Zoro acquired Sandai Kitetsu and Yubashiri to replace the two conventional katanas that Mihawk broke during the Baratie Arc. During the Drum Island Arc, Zoro was bundled up for the winter island but later stripped down after a foolish choice to swim in the frigid water on the island. He remained shirtless and barefoot at the beginning of the arc after getting lost from the Going Merry and left unable to redress himself until he stole a parka from a man in Wapol’s army, which was a hooded, forest green parka with a light green sash and white fur on the cuffs, hood, and hem, as well as a pair of boots. During the Arabasta Arc, he wore an orange keffiyeh with a gold chain on his head, a long-sleeved white coat with black lines all over it, and the bottom of his black trousers were torn above his ankles.
At the end of the arc, he wore a dark gray dress with a henley collar. During the Skypiea Arc, he wore his usual outfit at the beginning of the arc until he took it off after fighting a sky shark to save Chopper from being eaten. Afterward, he wore a dark blue tank top and goggles strapped either on his head or around his neck, which were later broken and discarded. During the Water 7 Arc, he wore his usual outfit until near the end, where he wore an unzipped yellow short-sleeved jacket with a closed pocket flap on each side. He continued wearing this outfit throughout the Enies Lobby Arc. During the Post-Enies Lobby Arc, he wore a black shirt with the Galley-La Company emblem on it in white. At the end of the Thriller Bark Arc, he wore an open, gray shirt. He also replaced Yubashiri, which was rusted away by Shu in the Enies Lobby Arc, with Shusui, which was entrusted to him by the zombie of Ryuma brought to life by Brook’s shadow. During the Sabaody Archipelago Arc, he wore an open white short-sleeved button-up shirt with red stripes. During his time at Kuraigana Island, shortly after being sent there by Bartholomew Kuma, he wore an open, dark blue shirt. Since Zoro was critically injured when he arrived at the island, Perona patched him up, so bandages were all over his body.
After The Timeskip
During and after the two-year timeskip, Zoro gains a new scar running down over his left eye, which is implied to be a permanent injury, as it is always closed. His frame gets larger, showing considerably more muscle mass, and his hair has gotten shaggier, while slicked back. He retains his bandana, haramaki, pants, and boots, but instead of a henley, Zoro now wears a long, open dark green coat closed at his waist, held by a muted red sash, into which his three swords are tucked. He has also grown noticeably taller, as he is similar in height to Robin. Amidst the Punk Hazard Arc, he wore a white furry coat for protection against the cold weather on the COOL side of Punk Hazard, which he took from Brownbeard’s Centaur Patrol Unit.
Within the Dressrosa Arc, he wore a black suit and a white dress shirt with the top button undone. He also wore black sunglasses and a fake white mustache as a disguise. His sunglasses were destroyed in his clash with Admiral Fujitora. Additionally, he discarded the mustache upon his identity being exposed. After the battle against the Donquixote Pirates, Zoro took off his suit jacket and unbuttoned his shirt, leaving his chest and scar exposed.
Over the length of the Zou Arc, Zoro let his coat hang from his waist and put on a blue t-shirt. Spanning the Wano Country Arc, Zoro wore a white yukata with black details and a green cloud pattern on its bottom. He wore a dark green jittoku haori with a mon of a black sun over a khaki gear, and zōri with a black strap. Zoro also styled his hair in the chonmage style. After agreeing to allow Shusui to return to Ryuma’s grave and remain in Wano, Zoro was given the legendary blade Enma in exchange, which was entrusted to him by Kouzuki Hiyori, the daughter of the sword’s original owner, the legendary Samurai, Kouzuki Oden. During the Raid on Onigashima, Zoro donned a black version of his normal coat with a bright red sash. He also briefly wore a Beasts Pirates uniform created by Kin’emon, before he and Luffy were discovered by the enemy pirates. Throughout the Egghead Arc, after reaching the control tower, Zoro changed into a black body jumpsuit with the SSG logo on the side of the left thigh, with a dark-blue coat, blue gloves, and a belt across the upper body to hold his three swords on his back, along with a pair of orange DOM Shoes. During the Elbaph Arc, Zoro has currently received Viking attire due to Road imprisoning him in his Land of Gods. His attire consists of a long-sleeved, green shirt with white and yellow horizontal stripes on the sleeves, long dark pants with a black fur kilt and a large tan leather belt for carrying his swords. The outfit also includes brown leather vambraces, a pair of fur boots tied in leather, a green fur cape with pauldrons, and a pair of mask-shaped googles.
Noncanon
Similar to the main series, Zoro wears his standard outfit in most non-canon material. Starting with One Piece 3D: Straw Hat Chase, his standard wear is completely absent with very few exceptions. In the Clockwork Island Adventure, after the Trump Pirates stole the Going Merry with his clothes inside, he had to wear a black kimono from a wedding store. Then he changes his clothes for an open black jacket, a white scarf, and black pants like the ones he normally wears. In Chopper’s Kingdom on the Island of Strange Animals, he wears an open blue jacket with short sleeves, a white line on the sleeves, short black pants, and still wearing his green haramaki.
Also momentarily, he wears an extravagant penguin costume designed by Usopp. In Baron Omatsuri and the Secret Island, he wears a brown long sleeved v-neck t-shirt with his regular pants and boots. The brown shirt was later switched out for a white dress shirt, which he wore unbuttoned. After the second trial, he put on a black blazer and a gold chain necklace. In One Piece Film: Strong World, before meeting Shiki, Zoro wore a burgundy button-up shirt with one pink and one indigo stripe going over the left shoulder and down to the bottom of the shirt, plus black pants with a vertical yellow stripe going down each outer side and black sandals with blue straps.
After being separated from the rest of the Straw Hats, he wears a brown t-shirt with a deep v-neck and a beige design around the collar, a red headband with a mauve and muted yellow flower-like design, and black cowboy boots, along with his regular haramaki and black pants. During the raid on Shiki’s palace, he wears a black three-piece suit (which he later ditches the jacket of) with a white dress shirt, a black necktie, and black shoes. In One Piece Film: Z, before meeting Z, Zoro wore yellow-tinted sunglasses, a dark gray jacket with a thin light gray plaid pattern, a haramaki in a much duller green, navy blue pants, and black shoes. After meeting Kuzan on Secon Island, he wears a gray blazer with matching shorts, a light gray and white shirt with vertical stripes over a white undershirt, and white shoes. During the final battle against the Neo Marines on Piriodo, he wears a long coat with yellow accents and a similar outfit to his normal one, except with a burgundy coat instead of a green one and an olive green sash instead of a red one.
In the 17th anime intro Wake up!, Zoro wears olive green robes with a thin yellow line along the edge, a green sash, a lime green boa scarf, and a short green cape with fish and a lily pad pattern on it. In One Piece Film: Gold, before entering Gran Tesoro, Zoro was wearing a green cap and white swim trunks with a camo pattern. After boarding the island, he changes into a white blazer, waistcoat, and necktie, a black zip-up shirt with sky blue accents, black pants, black shoes, and green-tinted sunglasses. After the “heist” is done, he changes into a black short-sleeved leather jacket with sky blue accents, black leather pants, black gloves, and black shoes. In One Piece: Stampede, upon arriving at Delta Island, he was wearing a green noragi with a lime green pattern, matching shorts, and brown sandals. During the treasure hunt, he wore a black short-sleeved jumpsuit with two orange lines rounding the right thigh and the word “KATANA” on his back in yellow text with an orange wing on each side and black boots. In the post-credits scene, Zoro wore an outfit almost identical to his main pre-timeskip look, just with a white t-shirt instead of a henley. In One Piece Film: Red, his initial outfit consisted of a white t-shirt with a white, blue, and black diamond shape within a black ring with small white circles within it, a gold necklace with three rectangular pieces, black pants ripped at the knee with a zipper circling the left thigh and a silver ring hanging from the side of each him, and black high-top sneakers. His second outfit, forced onto him by Uta consists of a black leather jacket with a circular pink patch with gray edges on the left arm that has a gray sunflower within it, plus another pink patch on the back with a winged cross with the bottom turned into an arrow shape a white dress shirt, a white cravat, black leather pants, and black boots with silver rings hanging from the top.
Extended Information
Roronoa Zoro › Personality And Relationships
Introduction
Personality
Zoro usually maintains a very stern, serious, and distanced personality, but often loses his temper in a goofy and exaggerated comical style. It would seem however, that this anger is the only emotion that Zoro often feels comfortable showing. Outside of situations where he feels confident in battle, he tends to smile or laugh the least out of the Straw Hats and rarely fools around with the rest of the crew and likes to distance himself more to sleep or train. In fact, his defeat at the hands of Dracule Mihawk and subsequent vow to Monkey D. Luffy is the only time since his friend Shimotsuki Kuina passed that Zoro has been seen crying in the series.
Even in moments that are particularly tough on the crew and would warrant sadness, Zoro chooses to maintain a quiet solemnity rather than outwardly express his emotions. He has been shown to believe to a degree that these emotions can hinder his judgement as a swordsman: when Ohm asked him if he was out for revenge upon discovering Tony Tony Chopper wounded and unconscious, he replied that he does not like to fight for reasons like…
Read More about Roronoa Zoro › Personality And Relationships
Even in moments that are particularly tough on the crew and would warrant sadness, Zoro chooses to maintain a quiet solemnity rather than outwardly express his emotions. He has been shown to believe to a degree that these emotions can hinder his judgement as a swordsman: when Ohm asked him if he was out for revenge upon discovering Tony Tony Chopper wounded and unconscious, he replied that he does not like to fight for reasons like that. Despite this assertion, though, he cares deeply for his crewmates and wishes to protect them at all costs, telling Ohm that in spite of his preference for fighting without a motivation he can feel one coming on. Although Zoro cares for his crew, he can also come off as a very blunt and cold person, especially when he is trying to get his point across. During the Davy Back Fight, when Chopper was forced to join Foxy’s crew after losing an event, Chopper cried and complained, which prompted Zoro to yell at him and stating he was disgraceful.
He reprimanded Chopper, reminding it was his choice to join the Straw Hats and compete in the fight and told him to man up and have faith in the crew to win him back. As with the ordeal when Usopp left the crew, Zoro refused to let him come back and even yelled at Nami to shut up when she tried to say otherwise. Zoro lectured the entire crew reminding them Usopp was the one who picked the fight with Luffy and left of his own free will and they cannot let him come back unless he accepts responsibility for his actions and apologizes for his behavior. Zoro also often reminds others of the harsh facts, which often shocks some of the other crew members, although they usually decide he is right in the end. This is especially true in regards to strangers, as Zoro rarely shows much trust in others.
This was made apparent when Nico Robin joined, and he was the only one to keep his guard up around her due to her being a former enemy. However, over time, he seems to have learned to place his trust in others more, as he agreed with the alliance with Law and believed Hiyori when she revealed her identity to him. Zoro is also very perceptive, something he demonstrates by providing important and logical decisions at critical times and by evaluating the situation from an objective point of view, as he did in Water 7 by evaluating the best way to handle what seemed like Robin’s betrayal. And later again when the crew wanted to bring Usopp back after he challenged Luffy to a duel over the Going Merry and lost, saying that they shouldn’t pity Usopp. Zoro was the one who noted that Usopp was at fault for leaving the crew of his own accord.
Like Nico Robin, Zoro is also easily really sensitive when put into embarrassing situations to where he prefers to object vocally while usually blushing from embarrassment (though Robin usually ignores and lets go of these situations most of the time because of her patience), rather than respond violently like Nami or Sanji. Examples are during the Thriller Bark Arc, Zoro refused to do something stupid like address Franky as “Bro”, or Franky’s later joke technique “Pirates Docking 6: “Big Emperor” where after they disassembled, Zoro felt stupid for agreeing to do it in the first place. In the Dressrosa Arc, Zoro was embarrassed when he had Wicca with him when traveling through town, as trying to communicate with her made the people around them think Zoro was “talking to himself” since they couldn’t see Wicca due to her small size (though it was revealed at the end of that arc that Dressrosa’s citizens were secretly aware of the dwarves’ existence). Also, during anime-only events in the Post-Enies Lobby Arc, when Zoro was forced to help take care of children, he intended to make sure that the crew or any of the town’s residents that knew him personally did not find out about this embarrassing situation, though later was found out by Robin. Zoro does have rare moments of responding violently in these situations, such as choking Chopper during Aqua Laguna for mentioning to Luffy and Nami the embarrassing story of how Zoro got stuck in the chimney of a house which Luffy laughed about (though Luffy was also in a similar situation earlier).
He also seems to be partially irreverent, but not seriously so, simply choosing to focus more on his training and what is clearly in front of him than worry about spiritual matters as well as questions about its mysteries that he cannot truly answer. While he is quite indifferent to the gender or/and age of his opponents, many of his adversaries (like Tashigi and Monet) seem to believe he does not take women seriously when in fact it is only because Tashigi reminded him too much of Kuina and that Monet was merely a distraction. When the latter tried to take advantage of this belief, he cut her down without hesitation, only refraining from killing her because she was too weak to even be considered a proper opponent, using a non-Haki strike in lieu of a blunt attack. During his fight with Miss Monday, Zoro did not hesitate to crush her skull with his bare hands to knock her out. It should be noted that he does disagree to a certain extent about using excessive force against women.
For example, when Nico Robin was violently electrocuted by Enel, Zoro was extremely ferocious at him, reminding the Birkan that his target is a woman. Like Luffy, Zoro shows little interest or attraction to women. He was not enticed or won over by the beauty or charms of Nami or Robin when they joined, did not peep on the women’s bath when Nami and Vivi were bathing, nor does he show interest in overwhelming beauties such as the Mermaid Princess Shirahoshi or Boa Hancock. Zoro seems to rather focus on whatever task is at hand and his own training. Despite this, Zoro has acted flustered around some women, though not in romantic ways. During his childhood, Zoro was seen blushing when Kuina mentioned her figure was beginning to develop. When he first met Tashigi, he was visibly shocked by her strong resemblance to Kuina and whenever he encountered her, he would constantly try to run away unable to face her. This is no longer the case after the timeskip, as he lost his uncomfortable behavior around her and treated her coldly during their fight with Monet and was more irritated when she complained about him carrying her after she passed out. During his interactions with Kouzuki Hiyori, Zoro was very startled to wake up seeing her sleeping on top of his chest and tried to explain to Brook that nothing happened, and more so when she playfully asked if he enjoyed it. Though he rarely uses it, Zoro knows various phases of the traditional warrior’s battle cry of “Sunacchi”; something that he recounts hearing and learning from Shimotsuki Kouzaburou in Shimotsuki Village. He’s never used it personally however but has told Momonosuke about it to energize the latter in his sword training, saying that it would strengthen his heart when his courage falters.
Honor And Loyalty
He has a strong sense of leadership and reasoning. Partially being a descendant of a prominent samurai family, Zoro is a dedicated follower of the samurai philosophy and doctrine of Bushido, such as the code of honor and integrity where he strictly fights fair and square by consistently refusing to attack an adversary whose back is turned, with the only exception being when his friends are in imminent danger of losing their lives in which Zoro would strike the attacker from behind. Zoro himself considers a scar on the back to be a swordsman’s greatest shame. Due to his affinity with Bushido, Zoro chose to disguise himself as a Ronin, a masterless samurai, while working undercover in Wano, adopting the mannerisms and speech pattern of the samurai such as ending his sentences with Degozaru, even employing them when he became a criminal. He also requested Hiyori to allow him to pay his respect to Ryuma, a legendary samurai hero, and is willing to relinquish Ryuma’s parting gift Shusui back to Wano in exchange for Enma, one of the dual legendary swords of another great samurai Oden.
Despite so, Zoro refused to wear samurai armor that Hitetsu provided due to his combat pragmatism as it would hinder his movements. He is also very loyal as he will stand by Luffy’s decisions regardless of whether he personally agrees or not, stepping in only to point out the seriousness of a situation where it has been overlooked by his crewmates, most notably when they wanted to bring Usopp back into the crew after Usopp challenged Luffy to a duel over the Going Merry and lost, even willing to quit the crew himself if Luffy just brushed the incident off and treated it as another joke because it betrayed his strong values in loyalty. Zoro values loyalty highly and will not easily forgive fellow crewmates if they break ties with the crew, first seen when Nami took the Going Merry. Zoro was furious and stated that he never trusted Nami in the first place. When this happened again with Nico Robin and Usopp, Zoro was wary of Robin, questioning whether they should treat Robin as a friend or a foe, and after Enies Lobby, Zoro did not accept Usopp wanting to rejoin the crew saying he stepped on Luffy’s pride. Furthermore, he would not allow the sniper back unless he got down on his knees and apologized for his disrespect to Luffy. This dislike for leaving crewmembers was shown once again in Zou; this time over Zoro’s long-standing rival Sanji. Zoro was angry that Sanji had gone without an apology or a “thank you for everything”, calling Sanji an “idiot” for messing around with Big Mom when they were already facing Kaidou. This cold attitude towards crewmates received negative attention from the crew and will provoke certain crewmembers (mainly Nami) to yell at him. While the crew sails from one island to another, he normally spends time lifting weights, practicing meditation or napping, only to be regularly awakened in a rather violent way by Nami, Sanji, or (accidentally) Luffy. While in his spare time, Zoro takes up hobbies such as fishing, drinking, and training.
Kindness And Morality
Despite his angry and rather cold personality, as well as his fearsome reputation, Zoro has a very kind heart, as he was willing to risk his life for the sake of a little girl he did not know shortly after his introduction. When Rika made him some onigiri, Zoro kindly accepted it and thanked her for the meal. When the meal was stepped on by Helmeppo, Zoro asked Luffy to take it and feed it to him, then tell Rika he thought it was delicious. When Charlos shot an innocent man, Zoro carried the victim to a hospital despite being total strangers. Even though Hiyori and Toko were strangers at first, he did not hesitate to protect them from Kamazo.
When fighting weaker or innocent people, he does try to hold back when fighting and use the dull side of his swords in order not to seriously injure them though as pointed out by Nami, his monstrous strength still manages to cause great damage. A rarely seen aspect of his kindness is that he strongly detests evil individuals with extreme cruelty towards the innocent, as shown when Charlos shot Hatchan, Zoro was silently wrathful, as he fully intended to cut down the World Noble if it were not for Luffy injuring Charlos first. He also held strong fury towards Pica for attacking the injured as well as attempting to kill Riku Doldo III. When Shimotsuki Yasuie was executed by Orochi and seeing the citizens of Ebisu Town laughing along with his daughter Toko, Zoro was furious and only calmed down after Hiyori explained they laugh due to the SMILE fruits having robbed them of their emotions. When Zoro learned how Orochi fed them faulty SMILE fruits to rob them of their ability to express sorrow over the suffering and misery he caused them, Zoro silently angered and stood up trying to kill Orochi when the latter tried to kill Toko.
Zoro is also very humble when it comes to receiving gratitude from others whenever he saves people. Like Luffy, he didn’t care and didn’t like to be called a hero, instead yelling for the fish-men and mermaids to bring him sake instead. This was shown again when he saved Hiyori and Toko from Kamazo and merely desired food and alcohol for protecting them. When in the poverty town Ebisu, Zoro was given a small portion of water despite what little resources they could offer. Seeing their suffering, Zoro politely turned down their offer, knowing how hard it is for them to get by.
Zoro also has a soft spot for children and women. At Upper Yard, he rushed to catch Robin before she could hit the ground after she was attacked by Enel and berated him for attacking a woman, despite ordinarily sharing the self-proclaimed god’s mindset of not holding back against a woman in battle. At Punk Hazard, he did not object to helping save the children Caesar Clown was experimenting on and later agreed to help Kin’emon look for Momonosuke. Also instinctively grabbed Sanji’s hand when he slipped on the snow while Sanji was in Nami’s body. While in Wano, he did not hesitate to protect Tsurujo when she was being attacked by Kaidou’s men and later defended a wounded Hiyori from Kamazo’s attacks despite being attacked by Gyukimaru. Even though he knew that taking down Kamazo would cause problems for him, he still chose to fight him to protect Hiyori and Toko despite not knowing them or their situation. In Onigashima, he initially berated Luffy for causing unnecessary commotion before facing Kaidou, but when he learned how the Beasts Pirates callously wasted food while the poor Wano citizens constantly suffered hunger, Zoro went along with attacking the enemy. He would later get enraged by Queen’s sadistic Ice Oni game, and this not only provoked Zoro into taking down Scratchmen Apoo with a single strike to quickly recover the antidote so he could pass it off to Chopper, but Zoro also destroyed Queen’s gatling gun afterwards to prevent Queen from infecting any more victims angrily stating he came to fight Kaidou and not deal with Queen’s stupid game.
Recklessness
Zoro has been absurdly reckless in the face of major battles, often at the cost of his own well-being. Many times, he has suffered injuries which would kill a normal person and muscled through them through sheer willpower, such as when he was given his gaping scar, which he allowed to be inflicted on himself deliberately, and when he absorbed all of Luffy’s pain from his fight with Gecko Moria after Bartholomew Kuma pushed it out of him and made Zoro take it upon himself in return for sparing his captain’s life, which was so traumatic that his eyes temporarily became bloodshot. As a result, he has often been left very heavily bloodied and bandaged, as well as gained scars more times than anyone else in the Straw Hat Pirates crew, all of which were notably inflicted after joining Luffy on his travels. Despite this, he has a habit of ignoring these dire injuries and continuing to fight, sometimes before he is fully healed. His recklessness extends to the point of self-mutilation, willingly risking a limb by throwing the Sandai Kitetsu in the air while holding out his arm and allowing it to land and see if he could overcome its curse (a successful risk), and slicing up his ankles to escape a deathtrap, which not only failed, but made him lose a lot of blood and gain more scars. Furthermore, Zoro tends to face death in a defiant manner and show no fear of dying even when he is in a gravely injured state. This has threatened his life by causing unhealed wounds to reopen or be strained, leaving him in crippling agony. He can also allow his temper to get the better of him, as after Orochi murdered Yasuie in cold blood and tried to kill his daughter over a trivial matter, Zoro was so furious, he attacked the shogun in a rash fit of rage, completely ignoring the consequences of his actions. He also regularly resorts to drastic measures to solve simple problems, suggesting solutions that others would normally consider to be their last possible, worst-case-scenario choices. When he and Usopp were accidentally handcuffed together, Zoro’s first suggested solution was to cut off one of their hands. In addition, when he, Vivi and Nami were stuck on Mr. 3’s candle set, he actually tried to cut his own feet off in an attempt to escape, and when that failed, decided he would strike a cool pose for his dying moments upon being encased in wax.
Ruthlessness
When Zoro has the intention to fight seriously, he ties his bandana (normally kept tied around his left arm) around his head. Zoro lives for the thrill of combat. Scratchmen Apoo commented on his “insane killing intent”, acknowledging that Zoro was a “real beast”. Indeed, when an average human has the intention of fighting Zoro, his glare alone is usually enough to make them back off. He also has a habit of smiling in satisfaction whenever he faces a particularly skilled opponent, which often unnerves both friend and foe alike.
However, Zoro will still maintain his stern demeanor during the thrill of combat if the stakes are high enough. In his battle with Ohm, the priest stood in the way of him rescuing Nami and Gan Fall from Nola’s stomach. Against Kaku, the ability to save his crewmate hinged on him defeating the CP9 agent in a timely fashion. He instantly lost his cocky attitude against Shu after the latter destroyed Yubashiri, as his katanas were in serious danger. This seems to suit Zoro perfectly as any given moment where Zoro is not in battle, he is typically sleeping, lost, yelling at/being yelled at by someone, or training. Unlike some of the members of the crew, Zoro does not shrink from the idea of using deadly force against dangerous enemies and has been noted by several of his fellow Supernovas to be capable of exuding a tremendous amount of murderous intent. He can be extremely intimidating, easily frightening weaker opponents with just his glare. It has been stated that he has a monstrous killing intent evident from the fact where he almost drew his sword on one of the World Nobles. Furthermore, it has also been stated that Zoro is a born killer capable of showing absolutely no mercy during combat. It has been mentioned that Zoro has killed before joining the crew. Zoro is also not above committing murder if the situation calls for it. When Orochi ruthlessly executed Yasuie and tried to kill his daughter, Zoro furiously attacked the shogun with the intent to kill him.
Belief In Fate
While he can be the voice of reason on some occasions, Zoro rushes into things most of the time and leaves it to fate to decide the details, much to the horror of crew members as he fails to see his own fault. He seems to have a very strong belief in fate and destiny in general. He is even known to resort to methods like drawing sticks or casting lots whenever the Straw Hats need to choose someone to do a particular task. One of the most obvious instances of this is when he took an interest in the cursed blade, Sandai Kitetsu, and left it up to fate to decide if he would wield it by testing his luck against the sword’s curse; he tossed the sword spinning into the air and extended his left arm into its falling path, to see if it would cut him, fully aware that the sword was sharp enough to easily sever his arm. This is later shown again after the two-year timeskip when he tells the pirates of the ship, he had just destroyed to blame fate for him ending up on their ship. When Luffy was on the Execution platform and a lightning struck Buggy’s sword, causing Luffy and the tower to fall down, Sanji asked Zoro if God existed to which Zoro responded that it was nonsense. Such as when Enel posed as God, Zoro was asked by Sanji if he believed in God, but Zoro did not show any devotion toward the idea of one and did not care one way or the other. Also, there have been several instances where Zoro has bluntly stated that he does not believe in God and does not pray. Despite claiming to be an atheist, Zoro showed belief in a paradise after death, though Usopp joked that Zoro’s behavior in his life was not likely to get him into heaven, with Zoro becoming offended because Usopp implied that he would go to hell. Zoro has also prayed at least once, which occurred at the end of the Thriller Bark Arc when laying his sword Yubashiri to rest at the burial site of the Rumbar Pirates.
Running Gags
A running gag throughout the series is that while he is very perceptive during battle (as well as out), his sense of direction is extremely poor, to the point of getting lost on a straight path. This often results in Zoro not understanding directions. In the Arabasta Arc, he mistakes going north for going up. In the Drum Island Arc, he believes that he can keep the ship on course by heading toward a large cloud (which can move and change shape). He is unaware of his lack of direction.
(For instance, in the Enies Lobby arc, when Nami said to go up the staircase, Zoro went to the opposite side instead, and then said that Nami has misguided him) Often when he gets lost, he mutters “the others are lost again”. However, after the timeskip, Zoro is the first Straw Hat to arrive back at Sabaody Archipelago days before the others, shocking Sanji, though it was Perona who helped Zoro reach Sabaody early. He seems to make up for this, though, by confusing a gigantic pirate galleon for a fisherman’s small boat when it is pointed out to him. Even while sitting down on a moving animal, Zoro still got lost while believing everyone else got lost along the way. Furthermore, due to his innate pride, Zoro is unable to admit his mistakes and is defensive when people point out this shortcoming; and if someone is guiding him, he ends up blaming them for “being bad at giving directions”.
It is to the point that people who know him actually wonder if there is something wrong with his brain and that if he’s a fantasista. Another running gag of the series is Zoro’s ability to effortlessly deliver perfectly timed lines in passing or even during battle that are deemed “cool” by other characters, leading him to be borderline worshiped and idolized, especially by crewmates Usopp, Chopper, and Brook. The third running gag is how Zoro keeps untying bandages when he is not fully healed, claiming that they make it hard to move, only to be scolded by Chopper, who tells him that they are there so that he does not move. The fourth running gag are the situations Luffy puts Zoro in. While in midair or far away Luffy tends to grab Zoro with stretched arms and make him fly through the air, crashing with force that would kill any normal person.
Zoro’s usual response to this is that he is one day going to kill Luffy, while Luffy responds only with apologizing to Zoro. Sometimes, Usopp joins in on the idiocy. Like how Luffy tried to invite Zoro to play tag and when he refused Usopp came and infuriated him, making him run around the ship trying to catch the two. And how he hates being called names by the two idiots. The fifth running gag would be how Nami always tried to use Zoro to help out in certain situations. Like how she tried to tell Zoro to help Vivi and get 1,000,000,000, saying to Zoro that he had debt from borrowing 100,000,000 with 300% interest to buy swords, although Zoro didn’t spend the money. Zoro is also somewhat dense, as he thought there was too little notable attributes about King to connect him with the artificial Lunarians, the Seraphim, while listing out many of them that could have easily pieced everything together, something Luffy, Rob Lucci and Kaku called him out for. He also didn’t realize that he had Supreme King Haki and didn’t understand Kaidou’s statement about him having it until he was told by Scopper Gaban who scolded him for not realizing it and told him that it is something he should be meticulous with as his captain is one of the Four Emperors to which Zoro apologized.
Pride
Zoro is very proud of the reputation he has built for himself both as a swordsman and as “The Pirate Hunter”, starting with his 60,000,000 bounty which increased massively since then. He also enjoyed the fact that he always had a higher bounty than Sanji. During the assault on Enies Lobby, one of the Marines referred to Zoro as “Luffy’s underling” much to the delight of Sanji, who quickly became infuriated when Zoro pointed out that Sanji’s lack of notoriety puts him below Zoro in status. Since then, once in a while to anger Sanji, Zoro will refer to him as “Pirate A”. More recently he has been calling Sanji “#7”, referring to his order of arrival at Sabaody.
When Sanji’s bounty initially surpassed Zoro’s, Zoro was annoyed and went as far to attack Sanji with Enma when the cook mockingly pointed out the bounty gap between them. After the raid on Onigashima, Zoro mocked Sanji by calling him “#4”, referring to the new bounties. However, in spite of his personal pride and self-respect, Zoro has shown to be willing to lower himself to the ground in complete humility for the sake of his friends, as was seen when he begged Bartholomew Kuma to spare Luffy’s life in exchange for his own (Zoro’s). And then again when he shamelessly bowed before Dracule Mihawk, begging the Warlord of the Sea who is his enemy, to train him in the ways of the sword. This shows that despite Zoro not being completely humble, he is not overly arrogant. Zoro can also be very vigorous when he is determined to achieve a goal or defeat an enemy. The risks that he will often take to pursue his dream of becoming the world’s greatest swordsman often leave others wondering if he is crazy. As far as Zoro is concerned though, only he has the right to call himself “crazy”. However, he is able to accept defeat when he perceives it to be inevitable.
Tendency To Sleep
Zoro is usually seen nodding off to sleep during his free time whenever he’s not honing his physical abilities.
Love For Alcohol
Zoro loves to drink different types of alcohol and is particularly fond of sake almost to the degree that Luffy loves meat and Nami loves money. When traveling around, Zoro frequently carried around bottles of wine or rum and drink straight from the bottle. In Wano, Zoro attacked some members of the Beasts Pirates simply because he wanted to steal their gourd bottle of sake. When Tsurujo wanted to repay him for saving her, he only wanted more alcohol. Due to his love for drinking, Zoro loathes being deprived of alcohol, evident when Mihawk imposed temperance on him until he mastered coating his swords in Haki as an incentive.
Attachments To Swords
Though not to the same extent as Tashigi, Zoro is extremely attached to his Meito swords primarily due to their sentimental value which were given to him from people he respected, such as Kuina’s Wado Ichimonji, Ipponmatsu’s Sandai Kitetsu and Yubashiri, Ryuma’s Shusui and Hiyori’s Enma. He refused to sell Wado Ichimonji regardless of the price offered, due to his personal sentiment towards Kuina. Zoro often holds them close while napping and was extremely upset when Shu destroyed his Yubashiri, and thus opted to fight Shu using other swords to not risk damaging Wado Ichimonji and Sandai Kitetsu. He continued to carry the destroyed Yubashiri out of respect until he found a replacement, then buried it with a funeral in Thriller Bark with the Rumbar Pirates out of gratitude for its service. Zoro is particularly attached to Shusui which became his favorite sword after the timeskip and stubbornly refused to part with it.
When Wicca stole Shusui, Zoro persistently chased after Wicca endlessly and also sternly rejected Kin’emon’s attempts to challenge him for Shusui. Zoro ruthlessly cut down a corrupt magistrate who tried to frame him in order to claim Shusui for himself. Zoro also chased after Gyukimaru from Ebisu Town all the way to Ringo when the latter stole Shusui. Zoro was deeply annoyed when Hiyori also requested him to return Shusui, a national treasure, back to the Wano Country, declaring that Shusui belongs to him (having earned its bequeathment from Ryuma). Zoro only relented when Hiyori promised to give him Enma, a sword of equal value, in return. Zoro took an instant liking to Enma, seeing its immense difficulty to master as a great challenge to become stronger, which quickly became Zoro’s new favorite as when Sanji insulted Zoro for having a lower bounty, Zoro instantly retaliated with Enma. He was also intrigued when he heard that Enma and Wado Ichimonji were crafted by the same craftsman. On the other hand, Zoro had little attachments to many of his previous swords, as he admitted to Mihawk that he broke many of his own blades up to when he challenged him the first time, including the two katana that Mihawk broke. Mihawk made it part of Zoro’s training to master Haki, so to ensure Zoro would give his swords more protection and care. Zoro’s attachment to swords led him to be able to determine its properties simply by sight, as he saw both Sandai Kitetsu and Nidai Kitetsu as powerful, if cursed, blades, and took particular notice to Shusui upon setting his eyes on it. He was rather aghast that Luffy wielded Nidai Kitetsu with callousness, such as throwing the sheath aside while simply throwing punches while holding the sword without making use of the actual blade.
Relationships
Family
Although a descendant of the Shimotsuki Family, Zoro seems to be completely unaware of his connection to it and its members that he has met in his life. It is unknown what his relationship was like, if any, with his father and mother.
Shimotsuki Koushirou
Shimotsuki Koushirou is Roronoa Zoro’s teacher and Kuina’s father as well his distant relative. On the day after Zoro and Kuina made their vow, Kuina had fallen down the stairs and died. On Zoro’s request, Koushirou handed him one of the Shimotsuki Family’s Meito, Wado Ichimonji. Zoro is grateful to Koushirou for teaching him the sword and giving him the Meito Wado Ichimonji. He states that he cannot lose this sword no matter what. In addition, he remembers his words while he is fighting a tough opponent or while he is on the verge of death. Although he did not understand it at the time, Koushirou taught Zoro that there is much more to being a swordsman than the ability to cut through anything. A sword that can simply harm anything is not a real sword, and there is no sword mightier than the one that protects what it wants to protect. Zoro later remembers Koushirou’s teachings during his battle with Daz Bonez and overcomes his inability to cut steel.
Shimotsuki Kuina
Zoro was childhood rivals and friends with Shimotsuki Kuina, who unknown to Zoro was a distant cousin. He never managed to beat her—having lost 2001 straight matches—and aspired to be just as strong as she was. After their 2001st duel, Kuina admitted that, because she was a girl, she believed that as their bodies matured, she would one day inevitably lose to Zoro in strength, even though she, like Zoro, dearly wanted to become the world’s best. Zoro was annoyed by this thought and firmly believed that if he were to surpass her, it would be because of his own strength and not her body. He made a promise with her that someday one of them would become the world’s greatest swordsman. However, she died soon after in an accident. In response, Zoro called her a coward for running away from their promise at her funeral, but then asked her father for the Wado Ichimonji that she once owned so that he can carry on the dream they both had. To this day, Zoro holds his vow to Kuina dearly and, whenever he comes close to death (such as during the events with Morgan and Dracule Mihawk), he recalls his memory of her to spur himself on.
Shimotsuki Yasuie
Before Yasuie’s identity as the daimyo of Hakumai was revealed, he and Zoro became friends after he saved him from a group of thugs and he in turn paid for Zoro’s sushi meal. When they were in Ebisu Town, Yasuie told him the many benefits of always smiling and not to let things get him down. He even provided his allies shelter in Ebisu Town, just because he was friends with him. After Yasuie died, Zoro attempted to stop the people of Ebisu Town from laughing at his death, only to be told by Hiyori that they were actually crying for him. He also took it upon himself to protect his adopted daughter from harm and going after Orochi for revenge. After escaping, Zoro promised that he would avenge Yasuie’s death. In the Anime Zoro visits Yasuie’s and Pedro’s graves and pays respects to them.
Shimotsuki Kouzaburou
Zoro remembered Kouzaburou as Kuina’s grandfather despite not knowing his real name nor past history and having only met the latter thirteen years ago as a boy. The elder Kouzaburou respected Zoro’s determination to best his granddaughter and gifted two real katanas to him, as well as briefly mentoring him about the nature of swords. Years after Kouzaburou’s death, Zoro learned of his reputation as a samurai and legendary blacksmith from Tenguyama Hitetsu, including his hand in the creations of Wado Ichimonji and Enma. During the fight against King, Zoro came to the realization that Kouzaburou was the same samurai that left Wano Country illegally and founded Shimotsuki Village.
Shimotsuki Ryuma
Zoro met Shimotsuki Ryuma, a distant ancestor of his, on Thriller Bark after he tried to kill Brook. Zoro challenged the zombie samurai and grew to like his sword, the Meito Shusui, and challenged him to acquire it. The two fought fiercely and eventually, Zoro defeated Ryuma. Set aflame, Ryuma accepted defeat and decided to give Zoro his sword, heavily believing that the soul of the sword would be most satisfied to serve under the man who defeated its preceding owner. Zoro then replied that it was alright that the zombie lost as long as he was ashamed. Zoro stated he would have liked to have known Ryuma while he was still alive and accepted the samurai’s sword as a gift of honorable defeat. However, Zoro praised the zombie when he felt he brought shame to the body of a samurai. Even while it was dying, it still retained the honorable spirit of a swordsman. Zoro stated that he will just pretend the fight he had with the samurai’s desecrated corpse never happened. After leaving Shusui in exchange for Enma, Zoro also wished he could visit Ryuma’s grave to pay his respects.
Crew
Though not as much with strangers, Zoro is always ready to protect and save his comrades whenever they are in danger, even at the cost of his own life. For example, in Skypiea, when he noticed the Going Merry being dragged away, he told everyone to leave the ship, saying he would stay back alone and protect it. Furthermore, he was willing to trade his life for Luffy’s when Kuma first attacked the Straw Hats and he knocked Sanji unconscious when the latter tried to intervene. Another example is when Usopp was trying to escape from a Pacifista while dragging an injured Zoro; during which, despite the severity of his injuries, he told Usopp to escape and let him fight, which the latter objected against. Zoro is usually distant with the crew, as he frequently trains in the lookout or sleeps. Only coming out to tell Luffy, Usopp, and Chopper to quiet down or when the crew gathers together, the two crewmates Zoro interacts the most with is Nami and Sanji (by way of arguing).
Monkey D Luffy
Zoro trusts Luffy implicitly and always follows his decisions whatever the consequences, acknowledging it as a captain’s decision, which a crew must carry out without question. When Zoro first joined Luffy, he made it clear that he would turn on or even kill his captain if he ever stepped between him and his dream. However, by the time of the Thriller Bark Arc, Zoro had completely changed his mind about Luffy. He said that he cannot fulfill his dream if he does not help his captain fulfill his. Zoro seems to have the most respect and loyalty for Luffy, not only as a captain but due to their mutual understanding of each other.
This deep respect has been demonstrated on various occasions. For instance, he was willing to throw away his dreams and ambitions for Luffy’s during the appearance of Kuma at Thriller Bark without the slightest hesitation. When he was almost on the verge of death from his wound from “Hawk-Eyes” Mihawk at the Baratie, he tearfully vowed to Luffy that he would never lose again, asking if it was alright with him as Pirate King. He even went as far as to repeat Luffy’s earlier sentiment that as Pirate King, he would be in a “real dilemma” if Zoro did not become the best swordsman. Despite his respect for Luffy, he was willing to fight his captain at Whisky Peak when Luffy gave him no choice though things were cleared up.
During the Long Ring Long Land Arc, after winning the Davy Back Fight contest against the Foxy Pirates, Zoro implied that he would never have become a pirate if it were not for Luffy and commented that he would have no point of being one if he ever left the ship. This respect is not only for Luffy as a person, but also because of his position as captain. When Luffy learned that Usopp was planning on returning to the crew during their time in Water 7 and was immediately ready to welcome him back, Zoro made it clear that a crew member who fought against their captain should not be forgiven so easily. Zoro explained to the others that one should respect their captain unconditionally and he would quit as well if Luffy allowed someone to walk all over him like Usopp, who wanted to rejoin without even apologizing for his actions. When Luffy was distraught after having to defeat Usopp, Zoro reminded him that those hard decisions are part of being captain and that he cannot lose himself.
He reminds Luffy that if he wavers, the crew has no one else they can trust. After the death of Luffy’s brother, Zoro tried to get back to his captain as he was aware of the pain Luffy was going through. During Luffy’s second appearance at Marineford, Zoro begged Dracule Mihawk to train him (despite it not being honorable) in order to become stronger for Luffy’s sake. After the timeskip, Zoro and Luffy still get along though he remains annoyed with Luffy’s stupidity and will not tolerate Luffy calling him out on being stupid. However, he will without hesitation follow the latter’s orders in his serious moments.
After knowing Luffy for a long time, Zoro has come to accept Luffy charging stupidly into battle without a plan and is surprised when Luffy actually sticks around. Zoro also happens to be one of the only two (the other being Sanji) that does not worry about Luffy when he is in battle, often telling the other crewmates to believe in their captain. During the battle against the New Fish-Man Pirates, Zoro was impressed that Luffy was capable of using Supreme King Haki while jokingly stating that if Luffy was not capable of that much, he would have to step down as captain. In the Punk Hazard Arc, it was Zoro who reminded Luffy that being reckless would cost his life since the crew has made it to the New World. Upon meeting Luffy at Wano Country, Zoro was overjoyed at the reunion before being nearly suffocated by Luffy’s big embrace. Luffy in turn, was absolutely delighted to see Zoro again, and wasted no time in happily greeting him. Zoro will get annoyed at Luffy disrespecting katanas as he was shocked that Luffy threw away the Nidai Kitetsu’s scabbard and was further outraged when Luffy did not even use the katana during the fight with Hawkins and instead used punches while holding the katana. After their adventure in Wano, Zoro learned that Luffy’s goal of becoming Pirate King is just a means to an end to fulfil his ultimate dream. When he heard what it was, Zoro was rendered speechless as he thought it was insane. However, he continued his unwavering support to help his captain achieve it. Zoro is willing to harshly criticise Luffy if his behavior doesn’t align with his status, as seen when he labeled Luffy’s grief over Vegapunk pathetic. He also stated that as one of the Four Emperors, Luffy should not mope so much over the death of one old man, completely ignoring the fact he was referring to the smartest man in the world.
Nami
Nami and Zoro are often seen bickering about the smallest and pettiest of things to provide comic relief, though it can also manifest in serious situations, such as Sanji’s sudden disappearance in Zou. As Zoro has known Nami for the longest time being the first two crewmates of the Straw Hats, he is seen interacting with her often, especially before the timeskip, though most of their conversations are disagreements. He is also one of the two, the other one being Usopp, who always reprimands Nami whenever it comes to her shady money-making schemes. The two are also the main two Straw Hats to engage in excessive heavy drinking, as shown in Whisky Peak. Zoro also says he hates to be ordered around by Nami but often eventually does her bidding, just like the times in Whisky Peak and in Punk Hazard when Nami who was in Franky’s body ordered him to go after Sanji who was in Nami’s body and Brook to stop the two from doing anything to her body.
In matters of navigation, Zoro has complete trust in Nami that she would be able to get the Straw Hats to safety. On the other hand, Nami trusts Zoro’s fighting prowess and acknowledges his outstanding swordsmanship. Nami also knows Zoro well, as she was the first one who pointed out that he could not go alone in Punk Hazard. Zoro is also prone to saving Nami, other times, none too gently when the situation calls for it, out of harm’s way, and this rough treatment puts Zoro at further odds with Sanji. Due to Zoro’s simple, direct nature, he is often exploited by the more cunning Nami, particularly in financial matters as seen in the Whisky Peak Arc when Nami insisted that Zoro still owed her 3 times the interest from the 100,000 he had returned her on the same day. Nami also got Zoro into carrying her on piggy-back in Alubarna after their fights with Daz Bonez and Miss Doublefinger, pretending that she was injured when in actuality she could still stand, though Zoro was fully aware of Nami’s state. However, while Nami’s manipulative and scheming nature always victimizes Zoro, just like it does for the rest of the crew, he still cares for her and will risk his life to protect her without hesitation. Zoro often speaks of how he does not care about Nami, but his actions show the opposite and that he does in fact worries about her. A good example of this would be before the Straw Hats entered the Upper Yard in Skypiea, when he discovered that Nami was swallowed by Nola, he said to himself ‘Nami, just hold on a little longer’ and ‘Nami, you better be alive’ indicative of his desire of Nami’s survival and rescuing her after he was done fighting. Nami too cares deeply for Zoro, as while he was recovering after his encounter with Kuma, Nami was one of the Straw Hats who stayed at his bedside during the party and even called him ‘the toughest’ in the Straw Hats and getting angry at Luffy who was about to make Zoro drink booze thinking that it would make him better, another instance was when Zoro was still extremely wounded and Kizaru was about to kill him while he was lying on the ground unable to escape due to his severe injuries, Nami along with the other Straw Hats got scared that Kizaru was about to kill Zoro.
Usopp
Zoro has been good friends with Usopp since the start of their journey. In fact, Zoro was the one to tell Usopp to get on board the Going Merry. Zoro finds Usopp’s cowardly nature disgusting and will always refuse Usopp’s requests to be his bodyguard. Zoro also gets easily annoyed when Usopp hides behind him, and even more so when he tries to lie his way out of a fight, finding it shameful. Zoro is aware of Usopp’s braver attributes after seeing how hard he fought to protect Syrup Village and Kaya and views his sniping skills as dependable.
However, he still openly displays his desire for Usopp to act less like a coward. Despite his views on Usopp’s cowardice, Zoro has displayed a strong amount of loyalty and care for Usopp, and has saved and stood up for him on more than one occasion. The best example of this is during the Arlong Park Arc when Zoro attempts to slash Nami when she lied that she had killed Usopp, before being stopped by the recently joined Sanji. Another example is during the Water 7 Arc when he and the other members of the crew find a beaten and bloodied Usopp. Zoro and the rest of the crew became furious and attacked the Franky Family in retaliation and destroyed their base in the process. Zoro and Usopp occasionally make idiotic decisions during a serious situation such as when they were fighting CP9 and got handcuffed together, causing the swordsman and sniper to run around in a panic. Zoro suggested he cut off one of their arms to which Usopp strongly disagreed, which caused Zoro to come up with a plan to use Usopp as his sword. This plan failed, though they worked better together in the future. Zoro would not forgive Usopp’s desertion from the crew and disrespect towards Luffy and would accept Usopp back only if he bowed his head and apologized. When Usopp finally did this, Zoro was pleased to have him back. After two years, their dynamic has slightly improved, with Usopp now being less cowardly in battles, which Zoro first took note of during the battle against the New Fish-Man Pirates. Zoro has also seemed to have become more tolerant of Usopp’s behavior, but still gets annoyed by it from time to time.
Sanji
Zoro is always shown to compete with Sanji, getting into fights with each other over petty matters, often at inopportune moments. They had some early disagreements with each other during the Arlong Park Arc on how to deal with Nami’s alleged betrayal, but their back-and-forth relationship officially began on Little Garden when the two competed in a hunting expedition. Their rivalry extends to Sanji’s cooking, as Zoro rarely acknowledges its quality, usually just calling it “okay”. Zoro also has a habit of insulting Sanji when he is flirting with Nami or Robin. Both have common insulting nicknames they call each other.
Zoro never calls Sanji by his name, usually calling Sanji “dartboard brow”, “ero-cook”, or “dumbass cook” while Sanji often calls Zoro “marimo” (mosshead), “shitty marimo”, or “shitty swordsman”. This has gotten to the point where Zoro has never actually referred to Sanji by his name. After their return to Sabaody Archipelago after training for two years, Zoro mocked Sanji arriving later to him by referring to him as “Number 7” and himself as “Number 1”. Additionally, after the nose bleeding problem Sanji went through, particularly during their adventures in Fish-Man Island, Zoro invented a new insulting nickname for Sanji “Mr. Nosebleed” which he first used when the battle against the New Fish-Man Pirates began.
In Wano Country, Zoro called Sanji “Browgoro” while Sanji called Zoro “Mossjuro”. After the events of Raid on Onigashima, Zoro invented a new nickname “Fourth Placer” to mock Sanji, as Sanji’s bounty now stands at fourth position among the crew. Despite their comical fights and rivalry, they have an unspoken trust and care between them they would never admit to. In fact, the two warriors understand each other better than other crewmates. Zoro’s trust in Sanji’s strength and character can be seen multiple times.
He smiled when Sanji returned to fight Jabra. When Usopp and Franky were worried about the Sunny crew after arriving at Zou, Zoro stated that they would be okay since Sanji was with them. Despite saying he did not care what happened to Sanji, Luffy caught Zoro listening intently to Pekoms from outside the door showing he still cares for Sanji’s safety. When Luffy pointed this out, Zoro got annoyed. When the pair are forced to fight together against a common foe, they are nearly an unstoppable team, such as their fight against Hamburg, Pickles and Big Pan. Zoro and Sanji are often paired up together during arcs and they are usually presented, visually and narratively, as Luffy’s biggest support. They have also been referred to as the Pirates King’s Wings (海賊王の両翼, Kaizoku-ō no ryōyoku?) Despite their differences, they know they can rely on each other to have their captain’s back as well as each other’s. When Sanji decided to call Zoro after his genetic modifcations had awakened, asking Zoro to kill him if he started to become an emotionless monster like his brothers. A request that Zoro accepted, before asking Sanji not to die until then, showcasing the deep trust and respect between the two men, despite their constant bickering. Whenever new bounties were distributed, Zoro would always be smugly proud that his bounty remained higher than Sanji’s. However, after Sanji’s bounty became higher than his after the events at Totto Land, Zoro became irritated and threatened to fight Sanji over it. When his bounty became higher than Sanji’s once more after the Raid on Onigashima, Zoro did not hesitate to mock Sanji about his lower bounty by referring to Sanji as “Number 4” and himself “Crew’s 2nd”, causing Sanji to fight with Zoro.
Tony Tony Chopper
Chopper is in total awe of Zoro’s strength and “tough guy” attitude. Zoro also appears to have a close relationship with Chopper, seeing as the youngest crewmember runs to him when he is scared or in danger, and the swordsman is the first one to jump into action whenever Chopper falls in the water. During the Arabasta Arc, Zoro carried Chopper on a barrow or on his head when they were crossing the desert and rivers. Zoro also washed Chopper’s back in the large bath in the castle. But the strongest display of Zoro’s care for Chopper was displayed in Skypiea, when he found him seriously injured from Ohm’s Ordeal of Iron and grew angry enough to the point that he fought Ohm for revenge, a concept he normally does not support. This is probably because Chopper seems to care a lot about Zoro as he is usually the one taking the most damage after battle, so Chopper is usually the one healing him. During the Davy Back Fight with the Foxy Pirates, Zoro told Chopper to stop crying when he was claimed by Foxy and to act like a man, which he then does, earning a great amount of respect from the swordsman.
Nico Robin
When Robin had just joined the Straw Hats after the Arabasta Arc, Zoro, Usopp, and Nami (who eventually got bought with money for her cooperation) were the only ones not to trust her. Just like her, he did not initially use her name, referring to her on multiple occasions as simply “that woman”. Zoro also bluntly mentioned to Robin that he still did not trust her and believed that she was hiding her true intentions. Nonetheless, despite his personal opinion, Zoro still saw her as a member of the crew. He also immediately came to respect her intelligence like the others did and did not hesitate to ask her about something he needed to be explained to him.
Despite his doubts, Zoro’s protective nature extended to include her, as later on, he shows willingness to protect her if she is in any danger, such jumping to her aid along with the Monster Trio when she was threatened by Aokiji, implying that despite his lack of trust towards Robin, he will still save her just like the more trusting ones, Luffy and Sanji. When Enel brutally attacked her, he gets angrier than he ever had during that point in the story and attacks the self-proclaimed god to avenge her. He still remained wary of trusting her during the Water 7 Arc. Upon hearing of her alleged assassination attempt on Iceburg, Zoro appeared to be somewhat indifferent, claiming that he had no opinion on whether Robin really betrayed them. Nevertheless, in reality, he wanted to know the truth as much as the others as he becomes more active than he usually is outside of fighting, basically orchestrating the ‘Catch Robin’ mission while leaving all final decisions to his captain.
It is Zoro who reminds everyone that if they failed, they would probably never get a second chance to find Robin. Regardless of promising Nami and Chopper to use the back of his blades against the shipwrights guarding the mayor’s mansion, he still injured them because he was more focused on catching Robin. During the confrontation in Iceburg’s room, Zoro looks noticeably angry when Robin says she was done and would never see them again. Later on, Zoro and all the other Straw Hats became fully dedicated to saving her when they learned of her intention to sacrifice herself for the crew. After defeating marine captain T Bone, Zoro told him that saving Robin was more important than his justice.
At Enies Lobby, it was Zoro who ultimately acquired the key to unlock Robin’s handcuffs by defeating Kaku using a new sword style. He was visibly glad to hear from Franky that Robin had been freed. After the Enies Lobby Arc, Zoro has built a complete trust in Robin and accepted her as a friend. Like the rest of the crew, Zoro would risk his life to protect her. Robin herself is willing to protect him, such as how she caught him after he was knocked into the air by Oars, trying to save him from Kizaru, and stopping him from being killed by the water pressure when he tried to exit the ship on the way towards Fish-Man Island. After Zoro gets severely injured after sacrificing himself at the end of Thriller Bark, Robin eavesdropped on a conversation between Sanji and the Risky Brothers to find out what happened, and afterward decides to keep Zoro’s secret to herself just like Sanji decided. At one point during the party later on, she watches over the injured swordsman, commenting to him how nostalgic Binks’ Sake was to her. Two years later after the timeskip, the two still get along very well. He intercepts a confrontation between her and Hyouzou and fights the merman instead because he wanted to have a decent fight before the crew went to the New World. In Dressrosa, he comes to her aid against Pica so that she and her group could get past the mountain-sized fighter. During the Zou Arc, Zoro could be seen wearing a proud smile on his face when Robin said she is not afraid of being kidnapped because she knew her friends would protect her.
Franky
Zoro like the others (except Robin) was hostile towards Franky from the outset due to the cyborg beating up Usopp and stealing their money but after the events of Enies Lobby and Franky building the Thousand Sunny for the crew Zoro grew to like the cyborg, though Franky’s tendency to cry a lot gets on his nerves. On one occasion at Thriller Bark, when the two traveled to help Brook against Ryuma, after feeling angry for having been caught so easily earlier, Zoro is further enraged by Franky’s suggestion of addressing him as “Bro” since he helped save him earlier. Zoro makes it clear that he will never call him that. Zoro was also moved when Franky built the Mini Merry saying it was the kind thing to do. Franky, though super strong himself, acknowledges that Zoro is superior battle-wise and even claimed to Brook that he is the strongest swordsman. During the timeskip, they rarely interact but are still shown to get along. During the Dressrosa Arc, Franky went along with Zoro’s plan to stop the birdcage. During the battle in the Flower Capital, Franky followed Zoro’s command to block incoming bullets without question. During the battle at Onigashima, after Zoro was rendered in a coma as a result of the side-effects of the Minks’ medicine and the injuries sustained from fighting King, Franky saved Zoro with his extendable arm as he was falling off Onigashima and then went to look for Chopper to have Zoro treated before it was too late.
Brook
Zoro was at first disturbed and confused by Brook’s skeletal appearance, but later on, they get along very well. Brook is in awe of Zoro’s sword skills, despite the fact that Brook is 69 years older than him. They first truly bonded when Brook was paying tribute to the Rumbar Pirates at a graveyard, Zoro apologised for the intrusion, and then buried and paid homage to his beloved katana Yubashiri. Brook brieifly considered telling Zoro that he had witnessed his herioism against Kuma, but finally merely announced that he had joined the Straw Hat crew. Zoro grinned and stated Brook had joined “one hell of a crew” to which Brook only chuckled, their friendship cemented. After hearing about Brook’s connection to Laboon and saving him from Ryuma, Zoro began to enjoy the skeleton’s company. Brook is indebted to Zoro for defeating the undead samurai, which gave Brook back his shadow. Brook was further amazed when Zoro along with Sanji offered their own lives instead of Luffy’s to Kuma. After the timeskip, they still get along and Zoro was impressed when Brook learned to detach from his body. However, Zoro is still annoyed by his jokes. Brook also argued with Zoro on Punk Hazard when the latter called him “grandpa”.
Jinbe
Zoro met Jinbe during the Straw Hats’ visit to Fish-Man Island. Zoro found Jinbe to be a trustworthy ally and offered his aid to help free Fish-Man Island. Jinbe and Zoro fought well together, and Zoro had no objections to Luffy offering Jinbe a place on the crew. Later on, Jinbe was in charge of bringing him back to the Thousand Sunny during their escape from Egghead, something that Zoro was irritated about when Jinbe had to pull him away from his fight with Rob Lucci. However, they would later work together to stop Nusjuro from attacking the Thousand Sunny.
Friends
Rika
At Shells Town, Zoro saved Rika from Helmeppo’s pet wolf, who attempted to attack her. Because of this, Zoro agreed to be tied to a pole for a month. After 9 days, Rika snuck into the Marine base where Zoro was imprisoned to offer him some onigiri since he had not eaten in several days. However, Zoro refused her offer and told her to go away. After Helmeppo forced Rika out of the base and Zoro ate the onigiri, Zoro told Luffy to tell Rika that he ate them all and that they were tasty. Rika was very happy to hear that, and then she explained to Luffy that Zoro is not evil as people say and that he was arrested for killing the wolf while defending her from him. Before leaving Shells Town, Zoro, Luffy, and Koby had lunch at Rika’s home.
Johnny And Yosaku
Zoro used to travel around with fellow bounty hunters Johnny and Yosaku. Zoro seemed to share a good relationship with them as a group of traveling bounty hunters, to the point where he was genuinely worried that Yosaku might actually die from his ailment during their reunion. When his recovery was assured, the pair traveled with and assisted the Straw Hats from Baratie to the Conomi Islands. When Zoro dueled with Dracule Mihawk, they were completely confident that Zoro would win due to his dominance over previous East Blue opponents, though they were ignorant of the fact that the East Blue is the weakest of the world’s seas; but when he was completely outmatched, they asked him to give in. They then cried when they saw him in such a bad state. When they last saw each other, Zoro parted with them on good terms.
Koby
Zoro met Koby while he was imprisoned in Captain Morgan’s base. At first Koby was afraid of Zoro’s bad reputation. However, after finding out Zoro’s kind personality Koby started to admire him. Both of them were glad to see each other at Water 7.
Ipponmatsu
Although he initially tried to rip Zoro off by trying to get him to sell his Wado Ichimonji for far less than it was worth, Ipponmatsu grew to respect the young swordsman upon witnessing him test out the cursed sword Sandai Kitetsu (by tossing it into the air and putting his hand out, risking the chance of losing his arm). Matsu’s respect for Zoro was so strong that he gave him his family heirloom, the Yubashiri, free of charge, as well as the Kitetsu, saying that Zoro was one of the best swordsmen he saw in a long time. Two years later, Matsu placed an image of Zoro on his bathroom wall, signifying his admiration for Zoro.
Nefertari Vivi
He got along well with Vivi, who nicknamed him “Mr. Bushido”. However, he was the least sad of his crewmates to see her leave. Following the Wano Country Arc, when most of the crew were frantic over Vivi’s disappearance after reading the recent news regarding the Levely, Zoro was able to help them calm down, by reminding them that Vivi is strong enough to protect herself, and they shouldn’t worry about her unless if she truly needed their help.
Perona
He also seems to be in some form of alliance with Perona but it is unknown if this extends to friendship. Kuma has honored Perona’s request, having sent her to Kuraigana Island, an island filled with dark and spooky ruins, in addition to the malicious castle. Although she has taken up residence in the castle, Perona is not happy because she has no servants or cute animals. As she laments her situation, wishing she was back on Thriller Bark, Roronoa Zoro then lands nearby her. Since Zoro is the only person there, she decides to save him. She brings him to the castle and treats his wounds but bandages him in a ridiculous manner due to her insufficient medical skills. Later, she helps an apparently injured Zoro read the article about Luffy going to Marineford again by holding it up for him to read. She was complaining that he was taking a long time and that her hands were getting tired. After accepting Zoro’s request for training, Mihawk tells Perona to tend to Zoro’s wounds. Perona tells Mihawk not to order her around. Zoro later explains to her about Luffy’s message. Two years later, Perona helps Zoro return to Sabaody Archipelago and then help him and his crew escape the Marines.
Kinemon
The Straw Hats met a samurai named Kin’emon at Punk Hazard. Zoro, Luffy, Usopp, and Robin first found his legs, his body having been divided up by Trafalgar Law. They soon met up with the other Straw Hats who had his head, and Sanji later helped retrieve his torso from the lake. Kin’emon then demonstrated his swordsmanship on Smiley. By attacking with and cutting fire, he was able to clear the way of the slime and even cut through the subsequent explosion caused by their detonation after being ignited. Zoro developed respect towards the samurai, as both are warriors of honor, and for his skills and way of fighting. His respect for the samurai is great enough for Zoro to offer to help find Kin’emon’s master, Momonosuke, and wishes to learn about his fighting style, Foxfire Style. Kin’emon later became hostile towards Zoro upon discovering that he has the legendary sword Shusui on him, accusing the latter of being the person who stole his country’s prized possession despite Zoro trying to explain the entire situation. In Dressrosa, when Zoro had Shusui stolen from him, Kin’emon made it clear that once they find the blade, he intends to battle Zoro for the sword to return it back to his country. However, Kin’emon remained on friendly terms with Zoro and they did cooperate in slowing down the Torikago to buy Luffy time to defeat Doflamingo. When Zoro returned Shusui in exchange for Enma, per Kouzuki Hiyori’s offer, Kin’emon showed concern that Zoro may not be up to the challenge of taming the sword.
Kouzuki Momonosuke
Due to their affinity for bushido, Zoro and Kouzuki Momonosuke have a mutual respect for one another, with Momonosuke greatly respecting Zoro’s skill as a swordsman. During the Wano Country Arc, Zoro has shown to have enough respect for Momonosuke to give him some advice in training in his swordsmanship, including teaching Momonosuke the old Kuri dialect Sunacchi. Momonosuke greatly admired Zoro’s strength and skills as a swordsman and did not object to his sister’s decision to give one of their father, Oden’s swords, Enma, to Zoro, and Zoro in turn showed a similar level of faith in Momonosuke as Wano’s next shogun, and toward the end of the Arc, was even visibly glad to see an adult Momonosuke’s growth and willingness to fight for his country, happily watching him in secret alongside Luffy, Sanji, and Jinbe.
Inuarashi Nekomamushi
After reaching Zou, Zoro became aquatinted with the two rulers of the Mokomo Dukedom, Inuarashi; the ruler of the Day, and Nekomamushi; the ruler of the Night. Zoro along with the rest of the Straw Hats listened to the story of the two rulers protecting the dukedom and their battle with Jack, and Zoro, like the rest of the crew were latter left stunned by the two rulers’ declaration to Momonosuke, Kin’emon, and Kanjuro that their comrade Raizo was safe and they were waiting for their arrival, despite the previous events that led to the destruction of their dukedom, which also almost led to the deaths of the all the Minks, including the dukes themselves.
Raizo
Alongside Kin’emon and Momonosuke, Raizo was also one of the samurai that traveled to Wano with the Straw Hats. When he first heard about the ninja, Zoro, like the other male members who traveled to Zou, were curious about the ninja (albeit Zoro’s curiosity was purely regarding the ninja’s skills), and when he finally met Raizo, was disappointed by his appearance, but later impressed by the ninja’s agility and skill.
Bartolomeo
Because Zoro is a member of the Straw Hats, Bartolomeo greatly admires him for his strength and sees him as first mate of the crew. Zoro first met the rookie at Dressrosa and was put off by the latter’s excitement to meet him. However, he did appreciate him relaying his message to Luffy for an autograph. They met again when Bartolomeo was flying in the air with Robin and Rebecca, while Zoro was battling Pica and the rookie requested for the autograph again. Zoro protected the trio from the Donquixote executive’s stone statue, much to Bartolomeo’s amazement. Bartolomeo was also later excited to see Zoro destroy the statue and defeat Pica, foaming at the mouth when seeing the display. Bartolomeo even gave the Straw Hats a ride to Zou, while it is shown that Zoro gave him the signature that he requested as Bartolomeo framed it.
Kikunojo
Zoro met the samurai Kiku after reuniting with Luffy in Wano. After meeting and befriending her, Zoro and Luffy were both impressed with her swordsmanship, and Zoro even scared away the sumo, Urashima away when he was harassing her. During the Raid on Onigashima, when Zoro noticed that there was an arm that fell from the ceiling as a result of the battle between the Scabbards and Kaidou, and realized that the arm belonged to Kiku, he became visibly upset and decided to end his battle with Scratchmen Apoo quickly so he could try to go to the roof to help.
Kouzuki Hiyori
Because Zoro risked his life to save Kouzuki Hiyori and Toko from Orochi’s assassin Kamazo, Zoro has earned Hiyori’s respect and gratitude for his actions. He was later shocked to learn that Hiyori is Momonosuke’s younger sister, but after hearing her story about what happened 20 years ago, Zoro was sympathetic with her plight and believed what she said. He has shown to care for her well-being, protecting her from Kamazo despite already in a fight with Gyukimaru and followed her out of concern when Toko ran off to save her father. Hiyori is also shown to be very comfortable around Zoro, going as far as to sleep on his chest during the cold night, and cried in his chest when Yasuie was executed as she held him back from making a scene. She did not object in him carrying her when the Orochi Oniwabanshu were chasing them. After learning that he had Shusui, Hiyori respectfully asked him to return it to Ryuma’s resting place and offered her only heirloom from her father, Enma. She did not question him on how Shusui came into his possession, nor did she accuse him of its thievery, and her willingness to offer Enma as a replacement despite Kawamatsu’s protest exemplifies her trust in Zoro. In the anime, Zoro has a brief conversation with Hiyori expressing respect for her father Kouzuki Oden on being able to tame Enma and that he would eventually get stronger using it.
Toko
Because Zoro saved her from Kamazo’s attempts to kill her, Toko became very grateful towards him and helped Hiyori treat his wounds. She was notably upset when he did not laugh at her jokes like the other crew members did. After she ran off to save her father from his execution, Zoro followed her out of concern. When Orochi attempted to kill Toko, Zoro did not hesitate to step in to protect her from harm and later handed her over to his crew for protection. In the anime Zoro and Toko went to her fathers grave, paying their respects with sake.
Kawamatsu
Zoro and the samurai Kawamatsu first encountered each other at Oihagi Bridge when the former was fighting Gyukimaru to retrieve Shusui. Kawamatsu ended their battle and both impressed and surprised Zoro, not only for his unique swordsmanship, but also because of his claims to being a Kappa, despite Zoro correctly guessing afterwards that he was really a fish-man. Later when Hiyori offered her father’s heirloom Enma to Zoro as a replacement for Shusui, Kawamatsu strongly protested and even considered Zoro delusional when he claimed to have fought Ryuma. Nevertheless, Kawamatsu relented when Hiyori decided to put her faith in Zoro. When Zoro confidently decided to accept Enma as his new sword despite how difficult it was to master, Kawamatsu expressed great praise for him and was surprised to see him using it so well during the Raid on Onigashima. During Zoro’s fight with King, Kawamatsu was watching alongside Hyougoro and the two watched the fight in amazement while commenting on the many similarities Zoro has with Shimotsuki Ryuma and even Shimotsuki Ushimaru.
Enemies
Sham And Buchi
Jango called both Sham and Buchi to fight. While they, at first, acted like cowards, it turned out to be a trick, as Sham took two of Zoro’s swords, giving the cats the upper hand; Kuro, wondering what was keeping them, began to insult the new Black Cat Pirates. Sham and Buchi, thinking that Kuro had grown weak, tried to attack, but Kuro quickly got behind them and threatened them with his cat claws. Kuro then gave the order to kill Zoro, Nami and Usopp in three minutes or die. After Zoro swiftly dealt a powerful blow to the two brothers with his (regained) three swords, Buchi, barely having survived, was hypnotized by Jango into gaining super-human strength and recovery to duel against Zoro a second time; the swordsman quickly defeated Buchi once again.
Daz Bonez
Having a steel body thanks to his Devil Fruit powers, Mr. 1 was able to withstand all of Zoro’s attacks. Despite this advantage, Zoro was also able to withstand Daz’s attacks. As the battle continued, Mr. 1 attacked Zoro progressively more brutally with each attack.
Much to Mr. 1’s surprise, no matter what he did, Zoro would not fall regardless of the wounds inflicted upon him. In the apex of the battle with his opponent completely covered with blood and wounds, Mr. 1 decided to finish Zoro once and for all. However, at that very moment, Zoro was finally able to slash through Mr. 1’s steel body. At the end of the fight, Mr. 1 has a short respectful dialogue with Zoro before falling unconscious.
Ohm
He was defeated by Zoro whom he chased through the Shandia ruins. Despite Ohm using Mantra to predict his attack, Zoro waits for him to attack to give away his position. He then cuts through Ohm’s shape-shifting sword using the Hyakuhachi Pound Ho attack which hits Ohm in the process, defeating him.
Kaku
During the Enies Lobby Arc, Zoro was matched against CP9’s best swordsman, Kaku, who he met and fought previously in the Water 7 Arc. Throughout their heated battle, Zoro and Kaku continually hurled insults at each other, the latter underestimating him until the very end of their fight. When Zoro defeated Kaku, they shared a joke and Kaku, injured but honorable, laughed and handed Zoro his key. Before he passed out, Zoro mused an apology for the fellow swordsman. After the timeskip in Egghead, Zoro meets Kaku again (who attempted to destroy the Thousand Sunny). Zoro and Kaku then clash. After Kaku was subdued by Stussy during their clash he and Lucci opted to form a temporary alliance with Zoro and Luffy to take care of the Seraphim much to their shared disgust. While fighting them he was greatly annoyed along with Lucci, and Luffy when Zoro only just now realized the connection between the Lunarians and the Seraphim even though it should have been obvious. After Zoro went off to deal with S-Hawk, Kaku followed after him annoyed at being ordered to do so by Luffy.
Rob Lucci
Zoro briefly clashed with Lucci when he revealed his CP9 identity, blocking his strike and throwing him away along with Luffy. Two years later, both Lucci and Kaku opted for a temporary alliance with Zoro and Luffy after their arrival on Egghead island. Lucci would shed his façade of an alliance with the Straw Hat’s and attempt to kill Vegapunk, after his attempt on Vegapunk’s life was stopped by Stussy incapacitating her in the process Zoro went to attack Lucci . After a short exchange of words, they would knock each other out of the building they were in and begin fighting. During the fight Lucci would make the claim that killing Zoro would be as satisfying as killing Luffy, a feat he deemed impossible at the moment. However, Zoro would just continue fighting, declining Luffy’s help while dealing with Lucci. The two bantered with each other with Lucci mockingly pointing out their fight was holding up his crew and that they were fools for waiting on him instead of escaping, Zoro responded to the agent that he was not the one in control of their fight. After some time Zoro managed to leave a devastating blow on Lucci before being pulled away from the fight by his ally Jinbe.
Hyouzou
At Fish-Man Island, Zoro also made Hyouzou his enemy. When Hyouzou goes on a rampage after consuming the Energy Steroids and tries to attack Robin, Zoro intercepts the octopus merman before he reaches her. Zoro comments that Hyouzou will be a good warm-up for the New World, but the octopus swordsman was not a match for Zoro who defeated him effortlessly.
Pica
Zoro first confronted Pica inside Dressrosa’s Royal Palace and battled him to allow Luffy and Viola to proceed further. However, Pica abandoned their battle to return to Doflamingo. Later, Pica indiscriminately blew Zoro away when he tried to punch Luffy for making fun of his voice. Zoro again battled Pica soon afterwards in order to get Luffy and Law back to the palace. Zoro openly mocked Pica’s high-pitched voice, causing the Donquixote executive to become enraged at him. However, Pica once again left their battle, this time to attack the wounded Colosseum gladiators, angering Zoro, who yelled at the executive’s cowardice. However, Pica revealed that his true target was Riku Doldo III, and headed to the King’s Plateau to kill the former king. Zoro chased Pica down and cut apart his stone covering, intent on finding Pica’s true body. Pica eventually emerged and prepared to kill Zoro using his Haki, but Zoro’s Haki was stronger, and Pica was cut down. Zoro told his fallen opponent to never mess with his friends again.
Kurozumi Kanjuro
Zoro met Kanjuro during the Dressrosa Arc, and two ended up getting along well after that, seeing that he was the samurai that Kin’emon and Momonosuke left behind before traveling to Punk Hazard. After the revelation that Kanjuro was a traitor and a member of the Kurozumi Family, Zoro had no qualms whatsoever with the other Nine Scabbards decision to fight and even kill him for his betrayal.
Kurozumi Orochi
As an ally of the Kouzuki Family, Zoro was already an enemy of Orochi. However, after Orochi executed Yasuie, whom he became friendly with, as well as learning from Hiyori about how Orochi fed the citizens of Ebisu Town faulty SMILE fruits to prevent them from expressing sadness over their suffering from his tyranny, Zoro developed an intense hatred towards the shogun and stood up against him when he tried to kill Toko. In a rash fit of rage, Zoro tried to attack Orochi until Kyoshiro interfered. Afterwards, Zoro stated that he will never forgive him, and he would definitely go after him to avenge Yasuie’s death.
Kaidou
As an Emperor, the World’s Strongest Creature, and the main enemy of the alliance, Zoro viewed Kaidou as his enemy and expressed an interest in fighting him. When hearing of the Emperor’s history with the Kouzuki Family and his tyrannical occupation of Wano, Zoro’s interest in fighting him only grew, and only after hearing about Enma being one of the only weapons to ever seriously hurt Kaidou, did Zoro choose to abandon his goal of retrieving his blade Shusui, in exchange for the sword. Despite his faith in the Nine Red Scabbards when they chose to battle Kaidou on the roof, when Zoro noticed Kiku’s arm fall from the roof, he angrily finished his previous fight to rush to roof to help fight Kaidou. As such, Zoro assisted Luffy and others of the Worst Generation during the fight against Kaidou and Big Mom, and repeatedly helped Luffy against Kaidou in his Beast Form. Wielding one of Oden’s former swords, Zoro actually caught the Emperor’s attention, who had detected the familiar Haki emanating from it, and even ended up actively avoiding an attack from Zoro due to being disturbed by the presence of the Haki, till he then realized the sword was originally Oden’s, which both angered and excited him. Despite being his enemy, Kaidou praised the swordsman for his skills and strength despite the latter’s eventual loss, and was extremely shocked when Zoro somehow managed to channel Supreme King Haki, and was even more shocked when he managed to slash him across the torso and injured him enough to leave a scar, acknowledging that Zoro had been able to replicate Oden’s feat from two decades ago before his opponent fell unconscious.
King
Zoro engaged in battle against King after taking over his fight with Marco. Zoro quickly deduced that the Lunarian was not a true swordsman, but rather a vicious brute with a very different fighting philosophy than his own. Still, the All-Star proved to be a formidable opponent for Zoro and they began to take a strong disliking for one another as their battle went on; Zoro stated that King trying to kill him with his wings instead of a sword is unforgivable, while Zoro earned King’s wrath by breaking his mask. King claimed he could not defeat him because his species was inferior, and that Kaidou would be Pirate King while Zoro claimed that the Beasts Pirates have reigned long enough, and it was time for a new generation to take the stage. Zoro found a weakness in King’s defense and managed to deal a substantial damage to his opponent. King declared he would remember him as a decent swordsman as he unleashes a finishing blow but was shocked as Zoro sliced though his most powerful techniques and unleashed a devastating attack onto King that cut off half of his right wing in the process and defeated him. In addition, due to having fought King, Zoro gained firsthand knowledge of the abilities that the Lunarian Tribe possessed and was able to pass this knowledge off to Luffy, Rob Lucci and Kaku when he notices the Seraphim possess these abilities during their battle against S-Bear and S-Hawk, allowing them a chance to fight back successfully.
Shawk
Zoro was repeatedly been drawn into direct conflicts with S-Hawk, the Seraphim clone of Dracule Mihawk. During their clash, he pointed out S-Hawk’s difference in humanity to Mihawk, noting S-Hawk looked more human than Mihawk.
Ethanbaron V Nusjuro
During the events of the Egghead Incident, while the Straw Hat Pirates were preparing to depart from Labophase, Zoro met Nusjuro of the Five Elders when he and Jinbe stopped the latter from attacking the Thousand Sunny, where both men noticed they each wielded a Kitetsu blade. Zoro then decided he and Jinbe would hold him off, while the crew on the Thousand Sunny would escape.
Marines
Zoro is considered the largest threat and the most dangerous member of the crew after Luffy. Thus, the Marines consider him as a powerful threat.
Tashigi
Zoro has a unique relationship with Tashigi of the Marines. Tashigi and Zoro met in Loguetown, where she helped him search for a new katana. Zoro defeated her once when she attacked him after finding out that he was a pirate but refused to fight her again in later confrontations due to her uncanny resemblance to his childhood friend, Shimotsuki Kuina. Before the timeskip, whenever he saw her, he would run away claiming that she is the one person he cannot fight. However, after the timeskip, Zoro now seems to have gotten used to her appearance and when they clashed during the Punk Hazard Arc, Zoro did not seem uncomfortable anymore and even commented how she has no will to fight. Due to her resemblance to Kuina, however, he seems to have a soft spot for Tashigi as he saved her from Monet and later again after Tashigi has passed out and poison gas is entering the room by carrying her on his shoulder. Tashigi seems to now see that he will fight women after he injured Monet to intervene. She also seems to have developed a form of respect towards him for his new strength.
Worst Generation
Trafalgar Law
Zoro and Law both share the title of Super Rookie, given by the Marines to them. They first met at Sabaody Archipelago and both sides helped one another fight off the Marines that were attacking them. They met again two years later where Law offered an alliance with them. Zoro trusted Luffy’s judgement enough to go along with this and worked closely with Law in their shared efforts. In the aftermath of the Dressrosa incident and the declaration of the Straw Hat Grand Fleet, Zoro can be seen forcing Law to partake in the festivities. In Wano Country, Law and Zoro’s relationship is slightly similar to the relationship Zoro has with Sanji. Law was annoyed with Zoro not keeping a low profile and not sticking to the original plan, along with him wreaking havoc with Luffy in Bakura Town. Aside from this, Law respects Zoro as a fellow swordsman.
Jewelry Bonney
Jewelry Bonney first encountered Zoro when he stumbled into town and casually addressed Saint Charlos, prompting the latter to shoot. Being unaware of what was happening, Zoro almost killed him in retaliation. Fortunately, Bonney was able to restrain him and diffuse the situation by faking his death. While exasperated at how clueless Zoro could be for not knowing who Charlos was and the repercussions of killing him would be, she became even more confused when he picked up a man who had previously been shot by Charlos and carried him to a nearby hospital.
Killer
Zoro and Killer both share the title of Super Rookie, given by the Marines to them. They didn’t officially meet until at Wano where he met Killer as Kamazo and Zoro fought with him in Ringo to protect Hiyori and Toko and defeated him. During the Raid on Onigashima, Zoro recognized Killer as Kamazo due to his laugh. Killer claimed that if he had used his Punishers the outcome of their fight would be different to which Zoro responded that the outcome would just end the same.
Seven Warlords Of The Sea
Buggy
Buggy was the very first pirate Luffy and Zoro dealt with together. Zoro never held any respect or signs of worth towards the pirate clown. The two have fought briefly, with Buggy being little more than an irritation for the swordsman, mostly because of his devil fruit ability. Even after learning of his history with the Roger Pirates from Silvers Rayleigh, and hearing about his ascension to the statuses of both Warlord and Emperor, Zoro’s opinion on Buggy did not change whatsoever. In fact, he was in complete disbelief after hearing the news about the formation of Cross Guild, simply stating that Dracule Mihawk becoming Buggy’s henchmen was an impossibility, and then shrugged the news off entirely.
Dracule Mihawk
There is only one swordsman who Zoro aims to defeat in order to become the world’s best swordsman and that is none other than Dracule Mihawk. Even though Zoro was outmatched during their battle at the Baratie, Mihawk comes to respect Zoro and allows him to live so he can grow stronger. After the Summit War of Marineford, Zoro is willing to put aside his pride and begged Mihawk to train him in order to become stronger for his crew. Mihawk tells Zoro to go, because he believes that such an idea is foolish, and he assumes that Zoro is simply incapable of defeating the humandrills. However, Zoro had already defeated the humandrills, and wanted Mihawk to train him so that he may one day defeat Mihawk himself. He notices that Zoro is putting his pride aside all for the sake of his captain. Mihawk gives in and tells Perona to heal Zoro so they can begin his training, which takes place during the next two years. Even after training with him for two years, Zoro himself admitted during his fight with Pica that he still had a long way to go before he is ready to fight him again, showing not only his respect for Mihawk as a fellow swordsman, but an understanding and acceptance of the difference in strength and skill between the two, however he still strives to one day defeat him. Zoro’s respect and opinion of Mihawk is very high, so much so that he did not believe that Mihawk was working under the newly crowned emperor Buggy, despite the news of the formation of Cross Guild.
Bartholomew Kuma
Zoro holds a high value of respect towards Bartholomew Kuma. He was the first enemy since Mihawk that completely defeated him in a one-on-one match. When they first met, Zoro knew he had no chance against his superior might after a short fight. He pleaded with the Warlord to spare Luffy’s life in exchange for his. Touched, Kuma obliged and used his powers to sap the pain and damage from Luffy’s unconscious body and gave it to Zoro. Kuma later remarked to himself that Dragon’s son has a good crew. Zoro met Kuma once again at Sabaody Archipelago and thanked him for taking pity on him at Thriller Bark and sparing him. Kuma saved Zoro from Admiral Kizaru, teleporting him far away. Zoro found Kuma to be a very honorable man, especially after learning the truth of why Kuma saved the crew and protected the Sunny for two years from the Marines. Zoro is very likely to be saddened by Kuma losing his humanity and becoming a mindless Pacifista.
Noncanon
The following events are non-canon, and therefore not considered part of the canon story.
Saga
Zoro and Saga were peers and close friends as children. Zoro aspired to be the greatest swordsman alive, while Saga aimed to become the sword of justice. Later in their lives, their paths crossed again, and they worked together to fight pirates. When Saga was lost at sea, Zoro thought he had died until he came to Asuka Island. Zoro quickly realized that Saga was under the Shichiseiken’s influence, and he hated Saga’s corrupted form. He still respected Saga greatly, throwing him a katana to use for their final duel, and he was happy once his longtime friend was freed from the cursed sword’s control. Saga, feeling indebted to Zoro, vowed to become the sword of justice as he had in their childhood. Concludes non-canon section.
Roronoa Zoro › Abilities And Powers
Introduction
Overview
Zoro has devoted his life to becoming the world’s strongest swordsman. Even before joining the crew, he was well-renowned for his outstanding abilities and accomplishments in battle. His skills drastically improved after becoming the combatant of the Straw Hat Pirates and entering a two-year training period under the “Strongest Swordsman in the World”, Dracule Mihawk. By the time he met Luffy, Zoro had established himself as a fearsome bounty hunter in the East Blue, so much so that Koby had heard he was a “demon in the form of a man”. His accomplishments in hunting pirates were significant enough to earn him the epithet of “Pirate Hunter”, which he remains known for even after becoming a pirate.
After his crushing loss to Dracule Mihawk, he vowed never to lose again. Since joining the crew, Zoro has defeated several mighty adversaries (most of whom are fellow swordsmen). Alongside Luffy and Sanji, Zoro is considered one of the Monster Trio (怪物三人組, Kaibutsu San-ningumi?) of the Straw Hats due to his strength. In some instances, he has even been mistaken as the leader of the Straw Hats due to his more extensive reputation; onlookers have also…
Read More about Roronoa Zoro › Abilities And Powers
After his crushing loss to Dracule Mihawk, he vowed never to lose again. Since joining the crew, Zoro has defeated several mighty adversaries (most of whom are fellow swordsmen). Alongside Luffy and Sanji, Zoro is considered one of the Monster Trio (怪物三人組, Kaibutsu San-ningumi?) of the Straw Hats due to his strength. In some instances, he has even been mistaken as the leader of the Straw Hats due to his more extensive reputation; onlookers have also wondered how he could not be the captain after seeing demonstrations of his power. During the crew’s journey, Zoro has come to possess some of the most legendary swords in history and has used them to both improve his skills and develop the most devastating attacks.
Zoro was the second Straw Hat to receive a bounty, and for much of the crew’s existence, his bounty has been the second highest. Zoro was identified as a Super Rookie after obtaining a bounty of 120,000,000 before reaching the Sabaody Archipelago; he was only one of two non-pirate captains (alongside Killer) of the “Worst Generation” to have that distinction. Weaker people are easily intimidated by Zoro, as Koby remarked that he had a “demonic aura” at Shells Town even as he was tied up and starved of food for over a week. This ability has held even in the New World, as when Monet came to suddenly realize the degree of power and killing intent Zoro had, she froze in place as Zoro charged her. After Zoro intentionally performed a harmless attack, she then became seized by fear to such a degree that she was unable to reform her Logia body to its normal state.
When Zoro gets serious in a battle, he usually dons his black bandanna on his head. Ever since entering the New World, he has rarely been wounded or given a serious challenge, defeating Monet with his sheer strength alone without Haki, frightening her to the point of being unable to control her elemental form. His first genuine challenge was a short confrontation with one of the Admirals, Fujitora, who described his slash attack as ferocious despite being held down by gravitational force. As the first showcase of his greatly improved strength and skills, Zoro defeated Pica, one of the Warlord Donquixote Doflamingo’s top three elite officers, in a couple of moves after slicing apart his colossal stone body and figuring out the nature of his Devil Fruit abilities. Zoro suffered his first serious wound in Wano against Kamazo the Manslayer, albeit because he avoided a surprise assault from Gyukimaru, while still managing to defeat the assassin using a single attack (without Shusui at the time). During the Raid on Onigashima, he faced off against the Emperor Kaidou, famed as the world’s “Strongest Creature”, in both his Beast and Human-Beast Forms; wounding him despite the tremendous toughness of his body, then giving him his second scar since Kouzuki Oden, earning his acknowledgment. In his battle against King, Kaidou’s right-hand man and the Beasts Pirates’ head All-Star, Zoro was able to apply advanced Supreme King Haki and Armament Haki to his three swords, defeating the Lunarian in top condition, despite grievous wounds. Due to these events, his bounty was raised to 1,111,000,000; the second highest among the Straw Hat Pirates, ranking just below his captain, Monkey D. Luffy, who was recognized as an Emperor. After arriving at Egghead, Zoro faced Kaku again, who had become an elite CP0 fighter and awakened his Devil Fruit and won again. Soon after, he went on to confront the Seraphim S-Hawk and S-Bear alongside Rob Lucci, Kaku and Luffy. Later, during the Egghead Incident, Zoro fought in single combat against Lucci, an even stronger opponent than Kaku on equal terms, causing him serious injuries and effectively winning the fight.
Intelligence
Tactical Skills
Zoro typically does not plan out actions and strategies ahead of time. Still, Zoro is shrewd and observant, which greatly aid him in his battles against fearsome enemies on multiple occasions, learn all the strengths and weaknesses of an enemy in a short time, and use it to his advantage and can formulate plans that give his friends and allies a fighting chance. He is also a capable leader, being able to take the lead when Luffy is otherwise preoccupied, can adapt to just about any situation. During his fight with the bounty hunters of Whisky Peak, Zoro utilized his environment to his advantage by shielding himself with a table and cutting a hole in the floor right at the spot where several hunters attempted to strike from above. Zoro’s on-the-spot tactical abilities were also shown to a significant degree when he fought Pica on Dressrosa. When Pica inhabited a giant stone golem and moved several kilometers in minutes to attack Zoro’s allies, the swordsman quickly came up with five potential strategies to stop him, and as he was on the move, he easily deduced the strengths and weaknesses of each approach until settling on one that worked. During the Raid on Onigashima, it was perhaps shown most in his battle against King, as he struggled to break through his exceptional durability, paying attention to the flames on his back and noting that his Devil Fruit powers did not appear to be the cause of it, while ruling out him being a fish-man or having giant blood. After numerous clashes, Zoro managed to figure out and exploit the main weakness of the lunarian – his reliance on his back flames to increase durability or speed, which became a crucial factor in defeating him.
Luck
Given that Zoro still has a rash attitude in almost all situations, he has also heavily relied on and frequently benefited from luck and fortune. This was demonstrated in a most extreme fashion at Ipponmatsu’s shop in Loguetown, where Zoro decided to test Sandai Kitetsu’s “curse” on himself by throwing the blade up in a vertical spinning motion and holding his arm in the path of its descent. Miraculously, Sandai Kitetsu spun perfectly around his arm, missing it entirely; Ipponmatsu was left speechless at Zoro’s incredible fortune.
Lack Of Orientation
One of Zoro’s most prominent weaknesses is his utter inability to follow directions, resulting in him frequently getting lost. He only became a bounty hunter after leaving Shimotsuki Village because he lost his way while out at sea looking for Mihawk. He has no knowledge of how to identify cardinal directions and frequently misinterprets them as either right or left; when traveling alone, he tends to frequently change direction without realizing and follow arbitrary indicators of direction like animals. In Arabasta, he even confused the cardinal directions with vertical ones, causing him to scale up Alubarna’s clock tower when told to head north. Generally, the only way to get Zoro to reach a destination is for another person to lead him there; if he is left unattended even briefly, he is extremely likely to wander off regardless of how obvious his path is. In Enies Lobby, Zoro could not even understand directions when going to the courthouse roof; even when Nami guided him and the others up a set of stairs, Zoro ended up going up a different set instead. He was eventually able to make it to the roof by simply moving upwards and cutting through the floors above him, rather than traversing the building’s hallways. While traveling to Oden Castle in Wano, Zoro only had to sit and ride on the steed Komachiyo to get there, but still somehow ended up wandering off on his own.
Physical Abilities
Strength
Zoro possesses immense physical strength and frequently spends his time at sea lifting incredibly large and heavy weights to keep growing stronger. Zoro’s strength plays a large role in his abilities as a swordsman, as his strikes possess a great amount of power and range in their cutting ability. Thanks to his strength, Zoro is capable of clashing equally with superhumanly large and powerful opponents and can send normal-sized opponents flying away with ease. Although he initially had trouble cutting Mr. 1’s skin due to the latter’s Devil Fruit, Zoro’s strikes had enough power to knock the powerful martial artist to the ground.
Zoro could clash with the likes of Kaku, a superhuman assassin whose strength and weight were both dramatically increased by his Zoan powers, and even managed to overpower him after flexing his biceps and performing his Nigori-Zake attack. Zoro’s strength is such that he has picked up, carried, and thrown people and objects that rival him in size multiple times with relative ease, with such instances including carrying a large stone cage on his shoulder with Luffy inside it, throwing Hatchan, a Fish-Man over his shoulder while heavily wounded, and lifting Usopp off the ground with one hand and wielding him like a sword. In Whisky Peak, Zoro easily overpowered Miss Monday, a fighter with considerably above-average physical power, in a match of strength, and when he was tied up by Mr. 9’s iron rope, he was able to use the rope to pull Mr. 9 into the path of his other opponents and their attacks.
During the Davy Back Fight, Zoro picked up the very large Pickles by his ankles and spun him around before launching him a great distance forward, and later he was able to flip Big Pan backwards in midair by grabbing the wotan’s upper jaw. One of his most notable displays of raw strength was in Arabasta, when he picked up an entire collapsed building and held it over his head while injured before throwing it toward Mr. 1. When Zoro attempts to use non-lethal force against opponents he will attack with the backs of his swords instead, though his strength makes these blows extremely powerful regardless. In Orange Town, he used two of his sheathed swords to simultaneously hit the Acrobatic Fuwas and keep them away from Nami.
In Arabasta, he positioned two of his swords backwards under Chopper and Vivi while they were in midair and used them to successfully propel the duo up all the way to the clocktower many meters above him. Zoro also used his sword blades in an unusual manner on Thriller Bark, when he used them to lift the Heavy Nunchaku in order to use them against Oars. Zoro rarely engages in hand-to-hand combat, but his strength makes him quite capable at it, as shown when he easily knocked one of Wapol’s guards to the ground with a punch. simultaneously launched Luffy, Mr. 5, and Miss Valentine into a faraway building with a single kick, and redirected Pickles’ sword swing and body with his No Sword Style.
During the Davy Back Fight before going against the Groggy Monsters, Zoro has shown skilled enough to fight against Sanji, relying on kicks and blocks. Zoro also clashed evenly with Hatchan, who as a Fish-Man is ten times stronger than a normal Human, even while being severely injured, and also equally dueled with Neptune and Pica, two gigantic and mighty warriors whose weapons even dwarf him in size. At Whisky Peak, Zoro was able to equally match the blows of his captain Luffy, who himself is extremely strong, with their clashes causing considerable collateral damage. When he first clashed with Marine Admiral Fujitora on Dressrosa, he resisted Fujitora’s overwhelming gravitational force just enough to unleash a flying slash toward the Admiral to disrupt the force from underground. Even more notably, Zoro demonstrated enough power to redirect a punch from Oars capable of causing massive structural damage, and two years later could use his swords to withstand the teeth of Dragon Number Thirteen, a giant dragon with extreme physical might.
Perhaps his most notable feat of strength yet was when Zoro used his swords to block a combined attack from Kaidou and Big Mom, two Emperors who are among the strongest people in the world, long enough to allow his allies to dodge the attack’s otherwise inescapable attack radius. Despite sustaining heavy injuries from that attack, Zoro mustered enough strength to momentarily clash with and cut deeply into Kaidou’s nigh-indestructible body, to the point of leaving a scar, becoming the second swordsman after Kouzuki Oden to do so, earning the Emperor’s respect. Having recovered, because of Miyagi’s healing medicine, Zoro could momentarily knock down King immediately after recovering; then proceeded to fight him, transformed or not, for an extended period. However, he could not bypass the lunarian’s inhuman resilience until he figured out King’s biology. Later, during the Egghead Arc, he blocked Kaku’s Rankyaku “Amane Dachi” using just one sword, immediately after waking up from a nap, despite him having gotten much stronger since their last fight and became a CP0 Agent. He then fought Kaku in his Awakened Form, even knocking him down without much effort, irriated from fighting Zoan users with irregular transformations. Zoro could clash evenly with S-Hawk, a Seraphim modeled after a young Dracule Mihawk, having abilities similar to the genetic source, with King’s Lunarian abilities, and Daz Bonez’s Devil Fruit powers, without backing down or flinching while clashing. Despite the constant battles, he proved more than capable of matching Rob Lucci in his Awakened Form for an extended period of time, before and after using his King of Hell Three Sword Style before, who previously clashed with Luffy in his Awakened Form, even defeating him. Another feat came when he managed to knock back Nusjuro of the Five Elders in his Awakened Human-Beast Form in an equal clash, despite being weakened from his previous fight, with Nusjuro being leagues stronger than Lucci, toppling Giants and Pacifistas with ease.
No Sword Style
When he lacked his swords during the Groggy Ring event in the Davy Back Fight, Zoro used an ability known as No Sword Style in which he was able to use his body’s physical power to emit shockwaves resembling his sword slashes. By throwing his arms forward, he created a whirlwind force sending Pickles spinning into his teammate Big Pan. Since Pickles was wielding swords, the attack caused him to cut Big Pan numerous times.
Speed And Agility
Zoro has demonstrated tremendous speed and agility to pursue opponents and avoid their attacks. Similar to his crewmate Brook, he can cut opponents in the blink of an eye and even unsheathe and re-sheathe the sword before opponents can react. In his duel with the zombie master swordsman Ryuma, the two of them were able to parry the other’s attacks before the onlookers even registered that they had performed attacks, only noticing once the strikes took effect on their surroundings. At Whisky Peak, he overwhelmed a hundred bounty hunters at once with his speed and was capable of dodging the many bullets they fired at him. Zoro has excellent jumping and climbing power, notably leaping a great distance from one roof to another using a falling ladder as a steppingstone in Whisky Peak.
While fighting Braham on Upper Yard, Zoro ran up the trunk of a large tree before propelling himself into the air with his legs to attack his opponent. On Thriller Bark, Zoro escaped from a collapsing tower and quickly adapted to dueling Ryuma on the steep side of said tower. In the Enies Lobby Courthouse, he got up to the roof by cutting through the ceilings and jumping from level to level, while on Dressrosa he was able to keep up with and eventually catch up to the dwarf Wicca despite having to run across and jump between multiple roofs; later, after being sent plummeting into a deep hole by Fujitora’s gravity, Zoro easily jumped out of it once the gravity stopped. Zoro possesses extraordinarily quick reflexes, as shown in Whisky Peak when he dodged a large variety of attacks used against him by the Baroque Works agents, including gunfire, melee weapons, blinding gas, and even a bazooka, despite numerous attempts by the agents to surround and trap him. In his fight with Braham, Zoro dodged much of the warrior’s shots despite Braham using Flash Dials to obstruct his vision with flashing light, and when he encountered Saint Charlos on Sabaody, Zoro easily dodged the World Noble’s attempt to quickly draw his gun and shoot him.
Zoro showed the ability to keep up with Mr. 1, a martial arts master whose Devil Fruit allowed him to turn any part of his body into a blade, parrying and dodging the majority of his highly varied techniques. Even without Observation Haki, Zoro was able to quickly recognize what the CP9 agents’ Rankyaku attacks would do right as they were performing them and shout at Nami and Chopper to get down to avoid them. Later, Zoro was able to counter Kaku’s attempted strike without issue despite the agent using Soru to move at blinding speed. After the timeskip, with the aid of his Haki, Zoro was quick enough to intercept Batman’s sudden arrow shot with his sword mere centimeters away from the face of Batman’s target Tsurujo. After the timeskip, Zoro has demonstrated tremendous speed swimming underwater, being able to traverse through the depths of the ocean in a small bubble and easily perform a powerful attack against the giant kraken, Surume. Notably, he was able to easily move past Hody Jones and strike him down while underwater, despite Hody being exponentially more powerful underwater as a fish-man. On Punk Hazard, Zoro was able to fight off multiple sharks despite being submerged in the freezing cold center of the lake.
Durability And Endurance
Zoro possesses immense levels of durability and endurance, having survived numerous serious injuries and oftentimes continuing to fight and move around while afflicted with them. One of his greatest assets as a warrior is his inexplicable pain tolerance. This was first shown in Orange Town when he kept fighting after being stabbed in the torso by Buggy, even lifting and carrying a large and heavy cage with Luffy in it. After briefly resting, he fought and defeated Buggy’s top henchman Cabaji; despite Cabaji deliberately trying to target his wound, Zoro one-upped him by cutting his wound open more and remaining steadfast despite the blood loss. During his battle against Mr.
1, Zoro received a rapid series of cuts so powerful that they tore apart the pillar behind him and caused it to collapse. Although Zoro lost a tremendous amount of blood from these strikes, he was not only able to quickly get back up and defeat Mr. 1, but also maintained enough mental clarity to predict where the debris from the destroyed pillar would not fall. Following this battle, Zoro was able to continue fighting against the Baroque Works forces without receiving medical attention. Although Mihawk deliberately left him alive during their duel, Zoro still sustained wounds so severe that they put him on the brink of death, with Johnny noting that such wounds should normally disable a typical man for half a year, if not kill him, and the doctor Nako stating that it would normally take someone two years to fully recover from them.
In spite of this, Zoro began walking around very quickly afterwards with only rudimentary treatment, and fought and easily defeated several members of the Arlong Pirates. When fighting the powerful six-sword wielding Hatchan, Zoro was in constant pain and on the brink of fainting, but despite even taking a headbutt to his wounded area, he was able to muster enough strength to counter Hatchan’s six-sword barrage and defeat the fish-man. After receiving proper treatment in Cocoyasi Village, Zoro was not shown to be affected by Mihawk’s wounds. Zoro’s most extreme display of endurance came on Thriller Bark, which began when he was able to get up after being struck by the attacks of Oars, an ancient giant zombie with the power to destroy entire buildings; this caused Lola to compare him to a zombie. Following the fights against Oars and Gecko Moria, Zoro suffered multiple powerful blows from the Warlord Bartholomew Kuma, including a Pacifista laser blast and a massive shockwave, the latter of which knocked out everyone except him, Sanji, and Brook.
Zoro remained conscious following this and continued attacking Kuma, but then proceeded to make a deal with the Warlord to receive the pain and suffering Luffy had endured in exchange for Kuma letting the rest of his crew live. At that point, Luffy had taxed his body while fighting Oars and Moria to the point that he had fallen unconscious, and both Kuma and Zoro believed that Zoro receiving Luffy’s fatigue in addition to his own would undoubtedly kill him. Upon receiving Luffy’s suffering, Zoro bled profusely to the point where his entire body and many of the rocks around him became covered in his blood. However, Zoro not only barely survived this, but managed to remain conscious until his crewmates came to, where he claimed to them that nothing had happened. Zoro managed to recover after being in a comatose state for three days and receiving medical treatment from Chopper, although it took him a while longer before returning to full strength, as shown during the fight against the Flying Fish Riders and later against the Pacifista on Sabaody.
In Dressrosa, despite taking a direct punch from Pica’s gigantic stone statue, a blow that cracked the second step of a massive plateau and destroyed several buildings, Zoro was able to quickly retaliate and appeared virtually unharmed by the attack. Another more recent display of his endurance came during his fight on the rooftop of the Skull Dome in Onigashima, as he not only withstood the brunt of a combined attack from Kaidou and Big Mom, an attack that encompassed the majority of Onigashima, but did so long enough to allow his fellow Worst Generation members fighting to escape from the attack, despite sustaining serious injuries as a result. Even after being heavily injured by the attack, Zoro managed to continue fighting long enough to help separate Big Mom from her special Homie, Prometheus, continue battling Kaidou, and finally muster the last of his strength to save his captain from Kaidou and even injure him to the point where Kaidou himself said that his attack would leave a scar. Zoro has fallen from rooftops and various other high places multiple times, but has never been seriously affected by such falls, even in Arlong Park where he was flung into the air by Luffy and landed on a hard platform while severely injured. In Skypiea, Zoro fell many meters from the Upper Ruins onto the hard streets of Shandora and had large pieces of rubble fall onto him, but quickly lifted the rubble off him and emerged with little injury.
He remarked that he almost died, and Robin replied that a normal person would have. Due to the lack of serious effect of these falls, they are often portrayed comedically. In his introduction in Shells Town, Zoro had gone nine days without eating in an attempt to do this for an entire month to win back his freedom. However, he retained enough strength that once he freed himself, he was able to withstand an assault from a horde of Marines and battle them alongside Luffy. On the Winter Island Drum Island, Zoro trained his body by swimming in the freezing cold water and meditating. Zoro has an extremely high tolerance for alcohol, being capable of out-drinking 13 bounty hunters in Whisky Peak before pretending to faint in order to intercept a potential attack. When confronting the bounty hunters soon afterward, Zoro showed no sign of being inhibited by alcohol, indicating his true tolerance is far greater. After being struck by KYP gas and sent falling off a cliff by the Yeti Cool Brothers, Zoro was able to remain conscious just long enough to spot the icicle trap that his group was falling toward and destroy it with a sword slash. Despite the animals in Wano Country having powerful toxins in their body due to drinking contaminated water, Zoro ate them as he pleased for several days and only suffered from an upset stomach.
Swordsmanship
Zoro is an extremely skilled and talented swordsman; training at the Isshin Dojo in Shimotsuki Village from childhood, he was able to consistently defeat adult swordsmen in duels, while Kuina being the one person he could not beat. After reaching adulthood, he became a great master swordsman famous for wielding three swords in battle. Since Zoro’s goal is to become the World’s Strongest Swordsman, he devoted himself to swordsmanship, becoming known across the East Blue. When confronting Dracule Mihawk, the current World’s Strongest Swordsman, he was utterly outclassed by the Warlord even just using his Kogatana. However, Mihawk was impressed by Zoro’s conviction and let him live, believing he could reach the top and challenge him.
Several months later, Zoro would train under Mihawk for two years and further increased his abilities exponentially. Zoro has managed to fight off and defeat large groups of skilled opponents on his own, with his most notable accomplishment in this field being when he singlehandedly defeated a group of 100 bounty hunters from Baroque Works, a powerful criminal organization. Weeks later on Kuraigana Island, he managed to fight and eventually defeat a large horde of Humandrills, giant monkeys with advanced combat skills, adaptive learning, and inhuman durability, despite sustaining severe wounds prior to arriving there. Even Dracule Mihawk himself was stunned to learn that the Humandrills had been defeated. Despite being adept at dealing with attacks from multiple opponents simultaneously, Zoro has limits, most so if said opponents are skilled in their own right.
This was shown in Wano, when Gyukimaru’s sudden attack distracted Zoro enough to allow Kamazo to strike him, though he still defeated Kamazo. Although Zoro is famous for wielding three swords, becoming known as the Three Sword Style, he is proficient enough to wield either two swords and even one, the former being his original style. In the event that he either opts to not use Three Sword Style or does not have a third sword, Zoro would instead use Two Sword Style in fighting against an opponent. However, several of Zoro’s finishing moves involve using one sword despite once claiming that he is “not that good at one-sword techniques” against Sham. Having gotten used to One Sword Style, he can defeat multiple powerful opponents, one notable example being the time he decapitated the very large and tough Dragon Number Thirteen with a single strike aimed at its neck.
His swordsmanship incorporates tremendous strength to overpower opponents and cause significant damage and destruction. Zoro has enough strength to release flying slashes to cut and damage things beyond his usual range. During his duels, particularly when wielding all three of his swords, Zoro has frequently defeated his opponents by charging towards them and cutting them with a single attack, rather than managing to find openings to strike them in the midst of a duel; he has also used his strength to gain the upper-hand in deadlock clashes and strike down his opponent. In Thriller Bark, Zoro was noted as matching the destructive power of the legendary swordsman Ryuma. After the timeskip, he cut through a large galleon by himself, then later managed to push through Fujitora’s gravitational pressure, releasing a flying slash despite being stuck in a hole and cutting through the ground to hit the Admiral.
Zoro’s slashes can cleave through entire buildings and other large structures, the most notable being Pica’s giant stone golems, which dwarfed the structures of Dressrosa. Although strength plays a large role in his swordsmanship, Zoro is capable of performing extremely precise cuts; as shown on Whisky Peak, he split Mr. 5’s explosive boogers in midair, causing the two halves to fly past himself and Vivi, exploding without touching either of them. On their way to Enies Lobby, he perfectly cut a Sea Train car lengthwise with a single cut. Zoro’s precision allows him to use his swords to block projectiles, even a rapid series of them like Cabaji’s spinning tops and Kaku’s Rankyaku slashes.
Zoro can cut even when in small confines, including cutting himself free from his rope bindings in Shells Town and cutting apart the chimney he was stuck in in Water 7. Zoro has additionally shown enough skill to unleash cuts on opponents and objects while in midair, including defeating Ryuma and Pica while moving high above the ground at great speed. Notably, in Wano he was able to stop a flying arrow by intercepting it with the flat side of his sword blade, and later he used a sword to deflect bullets shot by Kurozumi Orochi. Numerous times, Zoro has incorporated animal-like spirits which often manifest around him whenever readying an attack, including when using No Sword Style. This aura, however, has no indications of being related to Haki, before or after the timeskip, being the possible manifestation of Zoro’s killing intent or spirit.
Even Kaku, a CP9 agent with superhuman prowess, described this as an ominous beast-like spirit. During his duel with the zombified Ryuma, Zoro’s finishing move manifested the aura of a dragon, and after the cut landed, the wound caught on fire, for unclear reasons. Zoro gained the ability to cut through steel after being heavily wounded by Mr. 1 in Arabasta, where he began hearing the “breath” of objects. Using this allowed Zoro to cut through Mr.
1’s steel body and defeat him using a single strike. Against the Franky Family, he could cut through at least seven iron cannonballs before cutting the entire cannon. On Sabaody before the timeskip, Zoro could only inflict slight nicks on the Pacifista’s special metal exoskeleton, but after the timeskip, Zoro cut through a Pacifista with one attack. He has cleaved through two of Hyouzou’s swords, alongside Kin’emon sliced through a giant iron shutter immune to bazookas leading into Caesar Clown’s lab, and then cut through Goki’s enormous metal club with ease. After the timeskip, Zoro has demonstrated the ability to use other kinds of blades to compensate for losing one of his swords and execute his attacks. In Wano, as a ronin, he sliced through part of an entire building from several meters aways from him with a hiltless tanto intended meant to commit seppuku. Later, after losing Shusui, he incorporated a large scythe into his Three Sword Style and then used it to defeat Kamazo. After receiving the powerful Meito Enma, Zoro unwittingly cut off an entire chunk of a coastal cliff while attempting to cut through a tree. During the Raid on Onigashima, Zoro has demonstrated the ability to replicate and incorporate the sword styles of other swordsmen through observation alone, almost perfectly replicating Foxfire Style without prior instruction in it.
Three Sword Style
Three Sword Style is Zoro’s main style of sword fighting. Unusual for a human, he wields three swords simultaneously, holding one in each hand and one in his mouth. Many of Zoro’s Three Sword Style attacks use all three of the blades to strike opponents, cutting them numerous times or cutting multiple opponents at the same time. When performing flying slashes with Three Sword Style, Zoro can create whirlwind-like attacks that have shown the ability to catch and strike dozens of opponents at once. He is also able to effectively use all three of his swords to parry attacks and can even counter attacks performed by multiple opponents at once. Zoro has shown little issue dueling against opponents wielding more swords than him, particularly the six sword-wielding Hatchan and the eight sword-wielding Hyouzou, viewing the latter as not even worth his time.
King Of Hell Three Sword Style
During the Wano Country Arc, Zoro developed the King of Hell Three Sword Style (閻王三刀流, En’ō Santōryū?), a vastly enhanced version of Three Sword Style, where he goes all out using Armament Haki and Supreme King Haki; significantly increasing his techniques’ power and range more than either of his prior styles, which could wound and defeat one of the last surviving Lunarians, King, whereas before he shrugged off his strongest techniques thus far. However, because using the King of Hell Three Style Sword is based on Zoro allowing Enma to drain his Haki reserves, he is not able to maintain this for that long before running out of Haki and would need time to recover it.
Two Sword Style
Two Sword Style is Zoro’s original fighting style in his childhood before he started practicing Three Sword Style. Like Three Sword Style, Zoro has immense mastery of this style of sword fighting, dual-wielding two of his swords in battle with great power and skill, even incorporating unsheathing and re-sheathing techniques as well as flying slashes. On Thriller Bark, before he acquired Shusui as a replacement for the destroyed Yubashiri, Zoro could dual wield both Wado Ichimonji and Sandai Kitetsu with incredible power and precision, able to fight equivalently with Ryuma, an extremely powerful samurai zombie imbued with Brook’s swordsmanship skills through the Kage Kage no Mi for a majority of their battle before switching to use One Sword Style to finish off the undead warrior. Using Two Sword Style, he was able to fight Monet, a Logia user and an officer of the Donquixote Pirates who he finished off using One Sword Style as well as Gyukimaru, an extremely powerful warrior monk, without using his full strength. He was also able to defeat several members of the Orochi Oniwabanshu, the strongest ninja of Wano Country, with ease despite only having two swords at the time. With two swords, he could block and repel a charging beak attack from King after the All-Star assumed his massive Beast Form. Later, during the Egghead Arc, Zoro clashed with Nusjuro in his Awakened Human-Beast Form, who in turn was wielding a Kitetsu hardened with Armament Haki, despite being weakened and managed to knock him back.
One Sword Style
One Sword Style is a sword fighting style that Zoro began to perfect and then master. Like the previous styles, Zoro has exceptional skill in One Sword Style and has repeatedly used this style to perform finishing moves against a vast range of enemies. Similar to Two Sword Style, flying slashes and various unsheathing and re-sheathing techniques are used in this style, mainly to defeat or injure powerful opponents with a single strike. This style could hold off the Nyaban brothers of the Black Cat Pirates and take down several of the lower-ranked members of Arlong’s crew. While journeying through the Grand Line, Zoro’s prowess with One Sword Style has improved tremendously; he struck down Mr. 1, the strongest officer agent of Baroque Works, sliced through half of an enormous beanstalk, finished off Ryuma, a powerful samurai and zombie, incapacitated a fish-man such as Hody Jones underwater, decapitated a massive dragon, and even cut off one of the Skull Dome’s right horn; in the anime, it scratched Kaidou’s cheek. Using it, Zoro dispersed Kaku’s Rankyaku “Amane Dachi” using a single attack from one sword, whereas before he needed the Nine Sword Style, a notable feat as the former CP9 agent soon joined CP0, consisting of Cipher Pol’s Strongest Agents in an instant after waking up.
Nine Sword Style
Nine Sword Style is the most extreme application of Zoro’s spirit projection abilities. With sufficient anger, a dark aura surrounds him and somehow managed to create a solid illusion of himself with multiple heads and arms that can actually slice though even the strongest of opponents, giving him the essence of nine swords. Despite its seemingly purely spiritual nature, Zoro’s attack power increases threefold, letting him disperse Kaku’s Rankyaku “Amane Dachi”, his strongest Rankyaku and cut him several times in an instant. This form is used very rarely in canon, having been shown first against Kaku on Enies Lobby and later against PX-4 at the Sabaody Archipelago. It was used for the first time after the timeskip against Kaidou alongside Armament Haki, which was powerful enough to inflict a permanent scar on him. According to the Emperor, Zoro also used Supreme King Haki when performing the attack, though Zoro had no idea. In the anime, Zoro uses Ashura without the three sword style to drink and eat at the same time.
Foxfire Style
Originally, Zoro first developed an interest in the Foxfire Style, the unique sword style of Kin’emon, the Nine Red Scabbards’ Leader, when he first saw Kin’emon use it against Smiley at Punk Hazard. Later during the battle against Kaidou and Big Mom at Onigashima, it was revealed that Zoro “stole”, this technique. As such, he can cut through flames, as shown when he bisected the Sun Homie, Prometheus, hurting him. Despite being his first time using it, Zoro has proven himself quite adaptable in using it, slicing through Kaidou’s Bolo Breath, then incorporating it into his sword styles without much difference between them. Zoro then sliced through King’s strongest technique, Omori Karyudon, and then the lunarian himself, thus defeating him.
Haki
Zoro is one of the very few people in the world who can use all three types of Haki.
Supreme King Haki
Zoro possesses the ability to use Supreme King Haki, a very rare form of Haki whose users are stated to have the qualities of a “king”. This power has laid dormant within Zoro and he was unaware he possesses it. He was first noted to have it by Kaidou after the Emperor was struck by Zoro’s Ashura Bakkei: Moja no Tawamure. During Zoro’s battle against King, in deciding to go all out using Haki, he ended up using it to knock out multiple low-ranked Beasts Pirates, causing him to acknowledge he possessed it. At the same time, he ended up using its advanced application, “infusing” it into his three swords, with all three emitted streams of black lightning signifying its infusion. As their battle continued, Zoro managed to gain conscious control over the advanced technique, infusing it into all three swords, or infusing it into Sandai Kitetsu to deal significant damage to King. However, prior to Scopper Gaban revealing it to him, Zoro was unaware that this power is Supreme King Haki, leading to the belief his previous usage against King was on instinct. In the anime, Zoro’s first usage of Supreme King Haki occurs much earlier, while blending in with a group of Beasts Pirates, enraged over their mockery of the suffering of the residents of Ebisu Town and Okobore Town, he releases a burst of Haki knocking several out, with him simply attributing them fainting as due to drinking too much fine liquor.
Armament Haki
Zoro is an extremely skilled user of Armament Haki. It became his main expertise, having learned it from Dracule Mihawk, mastering both hardening and imbuement during the two-year timeskip, turning them black. Despite this, hardening is often used during serious battles, as well as using this Armament Haki to harm Logia users, as seen when he imbued it into a flying slash, wounding Monet. At Dressrosa, against Pica, Zoro hardened all three of his swords, cutting apart the mountain-sized stone giant, surprising the members of the Nine Red Scabbards, Kin’emon and Kanjuro. He later cut through the Elite Officer, who had hardened himself using Armament Haki, similar to Vergo, proving that his Armament Haki mastery was superior to his. Two of his hardened swords could hold back the Torikago’s strings, which could slice up buildings and meteorites. In Wano, Zoro once again showed his mastery through Enma’s test, a Meito notorious for draining the “Ryuo”, their term for Armament Haki from weaker swordsman, turning them into a husk. It, in fact, drained the Haki from him, emaciating his right arm, however, Zoro retook all the drained Haki seconds later. During the Raid on Onigashima, he managed to gain some control over Enma, emanating a flame-like aura, and to wound Kaidou’s dragon form, same as Kouzuki Oden, the Nine Red Scabbards, and Luffy. It was not until Zoro wielded his Armament and Supreme King Haki together, strengthening his Nine Sword Style, that he was able to permanently scar Kaidou in his Human-Beast Form. Against King, Zoro used Armament Haki to defend himself from a point-blank fiery explosion that covered a section of the Skull Dome.
Observation Haki
Zoro is a very skilled user of Observation Haki, as shown when he was asked by Luffy if he could sense a “wild beast” in the Ryugu Palace, which he stated he could. This was demonstrated further on Egghead, when he was capable of sensing Jaygarcia Saturn’s arrival from a distance. Later Zoro sensed the presence of the rest of the Five Elders, noting their Haki could be felt all over the island.
Weapons
Currently, Zoro is known to have owned seven swords, all of them katanas and has briefly borrowed multiple other swords and weapons when necessary. Due to his Three Sword Style, he usually owns three swords at a time.
Current Swords
These are the swords that Zoro currently owns.
Former Swords
These swords were once owned by Zoro, but were either destroyed or removed from his possession.
Situational Weapons
These weapons were used by Zoro for extremely brief periods, usually to allow him to use Three Sword Style when he lacked one or two of his swords.
Roronoa Zoro › History
Introduction
Past
Zoro was born 21 years ago in the East Blue to Tera and Roronoa Arashi, a descendant of the Shimotsuki Family. By the time Zoro was 8 years old, his father had already been killed in a battle against pirates threatening Shimotsuki Village, and his mother had died of illness, leaving Zoro orphaned. At the village’s dojo, he trained to be a swordsman. Even as a child, Zoro was strong enough to defeat most adults, but could not defeat Kuina, the daughter of the dojo’s master, Koushirou. During a training session, Zoro met and talked with Kuina’s grandfather, Shimotsuki Kouzaburou, who gifted him a pair of swords to aid in his practice.
The following year while both Zoro and Kuina were training, the Revolutionary Army stopped by their dojo. At some point Zoro came to Koushirou asking if it was true if swordsmen could cut through anything and even steel to which Koushiro confirmed. He then demonstrated to Zoro a piece of paper that he cut without it splitting confusing Zoro, Koushiro then explained to Zoro that part of swordsmanship lies within a sword understanding the will of what the swordsman wishes to protect and what and…
Read More about Roronoa Zoro › History
The following year while both Zoro and Kuina were training, the Revolutionary Army stopped by their dojo. At some point Zoro came to Koushirou asking if it was true if swordsmen could cut through anything and even steel to which Koushiro confirmed. He then demonstrated to Zoro a piece of paper that he cut without it splitting confusing Zoro, Koushiro then explained to Zoro that part of swordsmanship lies within a sword understanding the will of what the swordsman wishes to protect and what and when he wishes to cut. Further telling Zoro that a sword that cuts and injures anything it touches isn’t a real sword, Zoro then told his sensei he would strive to become a swordsman that could cut through anything making Koushirou question if he was listening at all. After Zoro and Kuina’s 2000th fight (and Kuina’s 2000th victory), Zoro, now 10 years old, questioned why he still could not win against her to which Koushirou suggested it could be due to their age difference to which Zoro denies as he was able to defeat adults.
At night he challenged her in private for one more match—with real swords. Although he had improved tremendously since their first match, he still lost and cried with frustration, telling Kuina about his dream of becoming the world’s greatest swordsman. Hearing this, Kuina confided in Zoro, telling him that she shared the same dream but knew she could never attain it. Her father had told her that girls could never be true sword masters, and that her fighting potential would decrease as her body matured. Zoro, annoyed by her defeatist attitude in spite of repeatedly winning against him, told her that one day he would beat her because he was more skilled, not because she was a girl.
The two made a promise—that either of them had to become the world’s best swordsman. The next day, Kuina suffered a fatal fall down the stairs of her dojo, much to Zoro’s anger and disappointment. Realizing that she would never have a chance to fulfill her dream, Zoro took it upon himself, asking Koushirou for her sword, Wado Ichimonji, and began working to develop his signature Three Sword Style, holding his own two swords in each hand, and Kuina’s clenched between his teeth. Eventually, Zoro learned of Dracule “Hawk-Eye” Mihawk, who held the title of the greatest swordsman in the world. He set off to sea, searching for Mihawk in order to challenge him to a duel.
However, he lost his way and could not find his way back home. In order to survive on his own, he took on bounties to pay for living expenses. He quickly built a famous reputation for himself as a “Pirate Hunter” in the East Blue and even in the Grand Line as Baroque Works had heard about him. He was even considered the greatest swordsman of East Blue. During that time, he met two bounty hunters, Johnny and Yosaku. Because of his reputation as a bounty hunter, Zoro was offered a position as a numbered agent within Baroque Works. He replied that he would accept only if he became the leader of the organization, which they refused. He then killed Mr. 7, the agent who offered him the position, in self-defense. During his journey, Zoro arrived in Shells Town where Helmeppo, the spoiled son of the corrupted Marine captain, Axe-Hand Morgan, released his pet wolf in town. It attempted to attack a girl named Rika, but Zoro saved her by killing it. Based on Rika’s story, it is presumed that Helmeppo told Zoro to agree to be tied to a pole for a month to gain amnesty which would preserve his reputation in the Marines’ eyes.
East Blue Saga
Romance Dawn Arc
On the ninth day of Zoro’s restraint, Koby and Monkey D. Luffy arrived in Shells Town with the intentions of Koby joining the Marines and Luffy inviting Zoro to be his first crewmember. They eventually arrived where Zoro was being held, in time to witness Rika trying to feed him some onigiri which Zoro refused, most likely to avoid the girl being caught as there was a sign forbidding anyone to aid Zoro. The food ended up being stomped badly by Helmeppo because it was sweet while onigiri is supposed to be salty. After they left, Luffy asked Zoro to join him but he flatly refused to become a pirate.
He asked Luffy to feed him the dirtied onigiri, and then told Rika that the food was delicious, revealing his kindness. Later in town, Rika explained to Luffy and Koby the reason for Zoro’s capture, which only reinforced Luffy’s decision to have him as his crewman. When Helmeppo stated that he would execute Zoro in three days time, Luffy angrily punched him for breaking his promise, which sent Helmeppo scurrying to his father, seeking revenge. With the assumption that Zoro would join his crew if he got Zoro his swords back, Luffy went to the Marine base. Luffy caught Morgan’s wrath by crushing his new-built statue and forced Helmeppo to show him where Zoro’s swords were.
Meanwhile, Koby explained the situation to Zoro while trying to untie him. Luffy came back just in time to save them from a firing squad. Refusing to die, Zoro accepted Luffy’s invitation and revealed his unique fighting style. He also revealed his dream of becoming the best swordsman in the world, which Luffy supported, believing that the Pirate King should have the best in his crew. Luffy then proceeded a fight with Morgan.
However, when Helmeppo threatened to kill Koby, Luffy knocked him out while Zoro defeated the Marine captain. The Marines, seeing their tyrant leader finally defeated, rejoiced and allowed Luffy and Zoro to go free. However, since they were pirates, the Marines asked them to leave the island but promised not to report them to headquarters. As they were leaving, Commander Ripper asked about Koby’s past. To help Koby hide it, Luffy provoked him into starting a brief fight between them. Zoro stopped the fight before it could get too serious, but it was enough for Koby to muster up the courage to ask Ripper if he could join the Marines, for which Ripper granted permission. Upon leaving, Luffy and Zoro were saluted by Koby and the Marines for their efforts. Luffy and Zoro then sailed onto their next destination.
Orange Town Arc
After leaving Shells Town, Zoro and Luffy realized that they had no knowledge on navigation, and began searching for a navigator. Luffy then managed to get his head stuck in the beak of a giant bird, leaving Zoro to paddle after him. Zoro came across three pirates adrift at sea, and told them to get on quickly because he was not stopping. The three were revealed to be pirates working for Buggy the Clown and planned to rob or kill Zoro. Once they discovered Zoro’s identity, they began rowing for him, though the commotion caused Zoro to lose track of Luffy’s location.
In Orange Town, Luffy managed to get tricked by Nami, tied up, and put into a cage with a cannon aimed at him. Zoro showed up just in time to save Luffy and Nami from Buggy’s crew. Zoro appeared to slice Buggy into several pieces. However, Buggy is revealed to be immune to blades due to his Devil Fruit powers. Buggy then stabbed Zoro from behind, heavily injuring him.
Despite this, Zoro managed to flip the cannon aimed at Luffy to point it at Buggy and his crew instead. Once the cannon was fired at them, Zoro picked up the iron cage Luffy was stuck in and dragged him for a few blocks. After being taken in by Boodle, the mayor of the town, Zoro was taken care of and slept at his house. However, the house was soon demolished by Buggy and the Buggy Balls that were unleashed upon the town. Zoro rose from the debris with no injuries.
The crew soon decided to make a stand against Buggy. Zoro was pitted against Cabaji, Buggy’s Chief of Staff. Zoro fought Cabaji, who fought dirty by striking Zoro’s wounds whenever he had the chance. He also created flames through his breath and breathed it directly into Zoro’s face. However, once Cabaji was knocked off his unicycle, he became angered and attacked with a slew of spinning tops and more deadly acrobatic maneuvers.
Buggy tried to help him by sending his arm to help hold Zoro in place for Cabaji’s strike, but Luffy did not allow Buggy to interfere in Zoro’s duel. Zoro then took his own sword and slit his own side to ensure that he could battle Cabaji evenly when he was greatly injured. Cabaji recognized Zoro’s honor and thought of this as the perfect opportunity to take him down. Zoro declared that if he could not topple all men who called themselves swordsmen, such as Cabaji, then he should give up his own dream to become the greatest swordsman. Cabaji was then defeated by Zoro’s “Oni Giri”, which cut open his chest. After Cabaji fell to the ground, Zoro also collapsed, claiming that he needed a rest after the grueling struggle. As he fell to the ground, Cabaji was stunned that he, along with Buggy’s deadly crew, were all defeated by “common thieves”. Zoro responded by saying they were not common thieves, and they were pirates. Zoro fell back asleep while Luffy battled against Buggy. As the trio started to relax, the townspeople came back into the town, and seeing their mayor knocked out, demanded answers. Luffy replied that the three were pirates, and the townspeople chased them out of town, though the three managed to lose them thanks to Shushu’s intervention. Nami agreed to temporarily team up with Zoro and Luffy, and the three sailed off in the two small boats they obtained.
Syrup Village Arc
The crew then came upon the Island of Rare Animals. Zoro slept in the boat, while Luffy and Nami explored the island and met Gaimon. The crew later arrived at the Gecko Islands. Upon landing, they met Usopp, the local troublemaker of Syrup Village and leader of the Usopp Pirates. After some misunderstanding about coming to the island, they discovered that Usopp’s wealthy friend Kaya was bedridden, but was well-provided for by her two butlers, Merry and Klahadore.
Luffy believed Kaya would be able to give them a boat, so they moved forward to visit her. The group was sent flying into the backyard (by Luffy) only to intrude on an argument between Usopp and Klahadore, who insulted Usopp’s father and forced the group away from the house. While Usopp and Luffy bonded, Nami, Zoro, and the Usopp Pirates came across the backwards-walking hypnotist, Jango. After Usopp ran past them hysterically screaming that Klahadore was a pirate, they went in search for Luffy. Luffy confirmed that Klahadore was actually Captain Kuro, who planned on killing Kaya and getting all her money.
Usopp returned but told the boys that it was just a lie, making them disappointed at Usopp for lying to hurt people and not to entertain. The Straw Hats gained a great deal of respect towards Usopp for tricking the boys to protect their well being and planning to take on an entire pirate crew. Thus, he agreed to help him. Usopp planned to have an oil slip to stop the pirates, to which he could snipe them with ease. However, the four were shown to be on the wrong side of the island.
Nami fell into the oil slick but managed to switch spots with Zoro and ran off to fight. Luffy became lost on his dash causing Usopp and Nami to initially fight the pirates alone. Just before the two could be killed, Zoro and Luffy arrived to fight the Black Cat Pirates. Jango hypnotized the crew to increase their strength but accidentally hypnotized Luffy, and Jango was forced to hypnotize Luffy to sleep again, but accidentally caused the crew to be knocked out by the ship’s stempost, which Luffy was holding onto when he fell asleep. Meanwhile, Jango summoned the Nyaban brothers, Buchi and Sham, who started a fight against Zoro.
Disarmed of all but one sword, Zoro must fight an uphill battle against the team-work of Buchi and Sham. Zoro exclaimed it was difficult to defeat them without all three of his swords. Zoro prevented Usopp from helping him by taking a hit from his Lead Star to keep him from getting dragged into the fight. Kuro then appeared disgusted by how the Black Cat Pirates were getting beaten by children and gave the Nyaban brothers five minutes before he kills everyone. Zoro was helped by Nami, who was able to recover Zoro’s swords and kicked them back to him, allowing Zoro to defeat the Nyaban brothers, but Buchi got back up and was in turn hypnotized by Jango, which injured Zoro faster.
Nami then ran to wake Luffy up, and Jango tried to stop her with his chakram, but at the last second, Nami stepped on Luffy’s face. Luffy got up in time to stop the chakram with his rubbery body. Usopp ordered his crew to take Kaya and flee. The three then took Kaya into the forest, while Kuro sent Jango after them. Zoro finished off Buchi.
He then headed out with Usopp as his guide on his back to rescue Kaya and the boys (since Usopp could not move due to his injuries and Zoro needed him to navigate through the forest), while Luffy dealt with Kuro and his lightning-fast movements and ten deadly finger-blades. Eventually, Jango caught up with his target and easily overpowered the boys. Kaya then threatened to kill herself with Jango’s chakram to stop Jango from hurting Usopp’s crew. Jango promised to leave the boys unharmed in exchange for her to sign the will that would allow Kuro to “legally” acquire her wealth. Zoro and Usopp caught up, and Usopp aided Zoro in defeating Jango and rescuing Kaya and the boys with his sniper skills. Usopp decided during the aftermath that news of a real pirate attack might be too upsetting for the villagers and would affect their peace of mind since pirates do not normally come to an out of the way village. Therefore, he ordered everyone to keep it a secret, which Kaya and his crew agreed with. Kaya was grateful to the Straw Hat Pirates and gave them her ship, the Going Merry. Usopp was grateful to them as well, and now had the confidence to disband his pirate crew and strike out on his own to be a real pirate. Usopp bid the Straw Hat crew farewell, who became confused and told him to stop and get on their boat with them instead as he became a part of their crew.
Baratie Arc
The crew met Johnny and Yosaku, Zoro’s former bounty hunter companions, and they set sail for the Baratie restaurant in search for a cook. Luffy began his job as a chore boy to pay for the damage he did to the Baratie for Zeff, and tried to convince Sanji to join his crew. Gin returned to the Baratie with his also-starving captain, Don Krieg, to whom Sanji once more gave food, but Don Krieg betrayed the cook once he regained energy and attacked the Baratie, despite the cooks’ best efforts to stop him. It was then revealed that the Head Chef, Zeff, was a great pirate known as Red-Leg Zeff, who traveled the Grand Line for a whole year before heading back into the East Blue. Gin explained the catastrophe Krieg’s fleet met in the Grand Line when they encountered Dracule Mihawk, and Don Krieg attempted to take control of the Baratie.
Mihawk had returned to finish the job with Don Krieg’s Pirate Armada, but Zoro challenged him to a duel in order to achieve his dream. Mihawk easily fended off all three of Zoro’s swords with the tiny cross dagger he kept around his neck. Zoro, wanting to finish the fight, unleashed his Oni Giri, but Mihawk easily stopped it as well, stabbing directly towards his heart. Zoro, not wanting to back down because of his pride, piqued Mihawk’s curiosity. Mihawk stated that he would remember his name and as a testament to Zoro’s willpower, Mihawk unsheathed his black sword. Zoro unleashed a secret technique, Sanzen Sekai, against Mihawk, but Zoro was utterly defeated, and both his unnamed swords were destroyed in the process. Sheathing Wado Ichimonji and turning to face Mihawk, Zoro claimed that a scar on the back of a swordsman is shameful. With that, Mihawk grinned and slashed Zoro down, causing a large scar going from his left shoulder all the way down to his right hip, ending the duel. Mihawk left after defeating Zoro as Don Krieg continued his invasion on the Baratie. Johnny and Yosaku left with Usopp and the wounded Zoro to go after Nami, who had stolen their ship and left.
Arlong Park Arc
Sometime after Yosaku left to inform Luffy of Nami’s destination, Usopp, Zoro, and Johnny arrived at the island. As they approached the island, they tied-up Zoro to keep him from harming himself by foolishly attacking fish-men who were fabled to be 10 times stronger than humans. However, they spotted three fish-men as they pulled close to shore. Usopp and Johnny quickly abandoned the ship, leaving Zoro defenseless. Zoro was then brought to Arlong Park, where he found out Nami’s allegiance to Arlong.
After some banter, Arlong proudly stated that Nami was the type of person who would betray even her own family for the sake of riches, which visibly disturbed her. To test Arlong’s statement, Zoro threw himself into the water. Nami saved Zoro but beat him to reassure that she was still part of Arlong’s crew. While Arlong was away at Nami’s village, Zoro broke free from the dungeon he was being held at (with some help from Nami, who cut his ropes) and struck down the fish-men stationed at the park to kill some time. He then met the octopus fish-man, Hatchan, who was outside the park fishing, clearly oblivious of what had just went down on the other side of the wall.
Thinking Zoro was a guest, Hatchan towed him to Cocoyasi Village. When he arrived, however, he discovered that Arlong had already returned to Arlong Park. Luffy, Yosaku, and the newly recruited Sanji were hurled towards the island by their temporary chariot led by the sea cow Momoo. They fell from the sky only to meet up with Zoro. Johnny found them as well and told them that he saw Nami stabbing Usopp.
Not long after, they came upon a defiant Nami, who tried to convince the Straw Hats that she was only in it for the treasure. She then told them to take their ship back and get off the island. Luffy refused, causing Nami to angrily walk away. Johnny and Yosaku also split off, not wanting to be killed by the fish-men. Zoro said that he never expected Nami to murder someone, and that she was only a small-time criminal.
Sanji became enraged at the comment and the two started to fight, only to have Usopp’s face taking the impact of both. Usopp woke up and told them of what really happened. Nami’s adoptive older sister, Nojiko, found them and agreed to tell them the reason behind Nami’s motives. Luffy then left to take a walk and Zoro fell asleep, while Sanji and Usopp (as well as an eavesdropping Johnny and Yosaku) listened to the story of how Arlong took over the island and killed Nami and Nojiko’s adoptive mother, Bell-mère, and how Nami was working for Arlong as a cartographer and stealing from other pirates to buy back their village. Once Nami broke down after Arlong had his accomplice, the corrupted Marine Captain Nezumi, take all the money she had been saving for her village, she tearfully asked Luffy for help.
Zoro, Sanji, and Usopp joined him on the march to Arlong Park, where Johnny and Yosaku were stopping Cocoyasi’s villagers from entering as they waited for the Straw Hats. After entering, the Straw Hats managed to beat almost all the fish-men with the exception of the officers. Luffy stuck his feet into the ground to beat Momoo and was later thrown into the water by Arlong. Zoro warned Sanji that they could not immediately jump in to save Luffy. He reminded them that the fish-men would be faster and more powerful underwater so they must move to defeat them on land quickly.
Zoro squared off against Hatchan and found it to be challenging due to his previous injuries against Mihawk. When Sanji attempted to defend Zoro, Sanji was knocked away by Kuroobi and was too distracted with his battle to help Zoro. Despite his wound and fever, Zoro borrowed Johnny and Yosaku’s swords and managed to win against Hatchan’s Six Sword Style, breaking his swords and defeating him. Sanji defeated Kuroobi and Usopp defeated Chew outside of Arlong Park. After Sanji assured Zoro that Luffy was alive, he and Sanji then fought against Arlong, but were both defeated and agreed that only Luffy could win.
While Zoro kept Arlong distracted, and with minor interference by Hatchan, Sanji dove back into the water and freed Luffy’s body. On land, Arlong ripped the bandages off of Zoro’s chest, injuring him even more and shocking everybody. Luffy then rose from the water (with help from Genzo, Nojiko, and Sanji) and traded places with Zoro by tossing him high into the air. He fell into the sea and fell asleep after pulling himself out of it. When Luffy destroyed Arlong Park and defeated Arlong, Zoro woke up just in time to beat Nezumi, who came to take the credit for defeating Arlong. Nami made Nezumi return all the money and help fix up the island. Humiliated, Nezumi left and reported the incident to Marine Headquarters, ensuring that Luffy would receive a high bounty. Back in Cocoyasi Village, Dr. Nako tended to the wounds of Zoro, Luffy, Yosaku, and Johnny. To celebrate their freedom, the entire island threw a big party. When the party was finally over, Nami rejoined the crew and the Straw Hats sailed towards their next adventure.
Loguetown Arc
Since Luffy had defeated Buggy, Krieg, and Arlong, the Marines issued Luffy his first bounty. Luffy, Usopp, and Sanji started to discuss Luffy’s wanted poster. Meanwhile, Zoro pointed out an island he had spotted. Nami explained about the island’s major city, Loguetown, the city of the beginning and the end, where the Pirate King Gold Roger was born and executed. Arriving at Loguetown, Zoro stated that he wanted to buy something, so he asked Nami for some money.
While walking down the street, Zoro witnessed Tashigi, a Marine swordswoman who looks exactly like Kuina, beating some pirates. Upon entering the weapons shop, Zoro looked for two swords. The owner of the shop, Ipponmatsu, tried to trick Zoro into selling the Wado Ichimonji for far less than its value, but Tashigi rushed into the shop and accidentally ruined the owner’s ploy. Tashigi pointed out a cursed sword named Sandai Kitetsu to Zoro. Ipponmatsu told them about Kitetsu’ curse-line, which interested Zoro, who then decided to buy the sword and test his luck against the sword’s curse.
He threw the sword up and held out his arm, but the sword circled around Zoro’s arm and left him uncut. After witnessing Zoro’s caliber, the owner gave Yubashiri to Zoro for free, saying that he passed his dream to him. After leaving the shop, Zoro reunited with the crew, except Luffy, who was in trouble. Zoro and Sanji rushed to the execution platform and started to fight off Buggy’s crew, hoping to save Luffy, but the latter was saved by lightning that struck the platform. Zoro, Luffy, and Sanji fled from the execution site to reach the Going Merry, but Tashigi and Smoker intercepted them. Tashigi engaged Zoro in battle, and Smoker battled Luffy and Sanji. Zoro defeated Tashigi, and Dragon saved Luffy from Smoker. Finally, the Straw Hats reached their ship and left Loguetown. Following this, the Straw Hats made promises about their dreams and set sail to the Grand Line.
Arabasta Saga
Reverse Mountain Arc
Heading to the Grand Line, Nami had to search for more information about it. The Straw Hat Pirates then gathered and Nami explained about the only way to reach Grand Line, which is the Reverse Mountain. The Straws Hats arrived at Reverse Mountain through the storm, though they were nearly blown off course and into the Calm Belt, but they eventually reached the entrance of Reverse Mountain and managed to climb its uphill rapids despite some tricky close calls. As they came down, they heard a noise and noticed something was blocking their path. They identified the obstacle as a huge whale, which was threatening to crush the Going Merry.
Luffy managed to keep the ship from crashing into it, but seeing the bow broken off enraged Luffy and he attacked the whale. The whale swallowed the Going Merry and the crew, except for Luffy, who managed to escape onto the whale’s back. Inside, the Straw Hats suddenly found themselves in what looked like an outside setting with a house in the middle of the water where they met an old man named Crocus. Sanji tried to get information from Crocus, who took long periods of time to reply, causing Sanji and Zoro great, comical frustration. Eventually, Luffy reunited with the Straw Hats and it was revealed that the strange setting is in fact the whale’s stomach.
Crocus revealed that the whale’s name is Laboon and that he often cried, trying to run into the mountain in order to break it because of a promise made 50 years ago and that two mysterious people named Mr. 9 and Miss Wednesday were there just to kill the whale to feed the people in their town, but they were later knocked out by Luffy. Once they exited Laboon, the Straw Hats threw Mr. 9 and Miss Wednesday on the sea. Luffy made a promise to the whale hoping to solve its past problem. The crew was making the preparation for their journey when Nami realized that the compass does not work there, to which Crocus explained that they needed a Log Pose to travel through the Grand Line and gave one to them. Also, Mr. 9 and Miss Wednesday asked the Straw Hats to take them to their town. Since everything was ready, they set sail to the first Grand Line island.
Whisky Peak Arc
As the crew was sailing in the Grand Line, they were forced to deal with rapid weather changes. Usopp attempted to wake Zoro, who was sleeping, but to no avail, and Zoro continued sleeping even as it began to snow on him. Eventually, after the weather calmed down and the rest of the crew was left unable to move from exhaustion, Zoro woke up and, noticing the others lying around the ship, claimed they were being too lazy despite the good weather. Upon noticing Miss Wednesday and Mr. 9 aboard their ship, Zoro confronted them and claimed their names sounded familiar, only to be interrupted when Nami hit him for sleeping while they were hard at work.
When the Straw Hats saw Whisky Peak was nearby, Luffy said they should go there even though it might take some time for the Log Pose to record, prompting Zoro to agree with him. Later, Zoro stood by as the crew was greeted by the townspeople. That night, the townspeople threw a party for the Straw Hats, and Zoro managed to out-drink several people before seemingly passing out at the 13th person. However, he later confronted the townspeople planning to capture the Straw Hats, where he claimed that a true swordsman never lets himself be controlled by alcohol. Zoro noted that Whisky Peak was nothing more than a den of bounty hunters who took advantage of inexperienced pirates entering the Grand Line before addressing the 100 bounty hunters assembled before him as Baroque Works.
When a shocked Mr. 9 wondered how he knew the name of their organization, Zoro revealed that a member of Baroque Works once tried to recruit him, though he refused, before detailing the secrecy enforced by the members. Deciding that Zoro must be eliminated for knowing this, Mr. 8 ordered the bounty hunters to attack him, but Zoro managed to move into the crowd of bounty hunters before they could notice him. After causing several of the bounty hunters to accidentally shoot each other, Zoro moved to Mr.
8, causing the remaining bounty hunters to focus fire on him. Zoro moved away when Mr. 8 blasted the bounty hunters away with Igarappa and noted he would have to avoid that shotgun attack. Zoro noted it was a good chance to test out his new swords before rolling inside a house to avoid gunfire from a bounty hunter above him. Defending himself from several more bounty hunters with a table, Zoro decided to test out Yubashiri first before cutting down the bounty hunters in a single rush.
Zoro noted Yubashiri was a very light and fine blade before climbing up a ladder to avoid more bounty hunters, only to be confronted by four men on top of the building. After dodging a cannonball, Zoro cut a barrel of alcohol thrown by Miss Monday into fourths, which hit the four bounty hunters behind him, before noticing another bounty hunter attacking him with a stone axe and countering him with Sandai Kitetsu. Upon noticing that his sword cut through the stone axe, Zoro cut down the bounty hunter while noting that Sandai Kitetsu was going to be a problem child if it was going to cut things he did not wish to cut before nearly attacking a young boy armed with a knife. When a nun attempted to trick and blind him, Zoro knocked her and the boy out with the back of his sword while telling them to try a more gullible man next time. Upon being pursued by more bounty hunters up a ladder, Zoro pushed the ladder off the side of the building before using it as a stepping stone to reach the next building, where he cut down the bounty hunters present with Taka Nami.
Hearing a cry, Zoro cut a circle in the roof he was standing on before walking away as several female bounty hunters pounced on it and fell through the roof. Though he was seemingly caught off guard and defeated by Miss Monday, Zoro managed to knock her out by clutching her head with his hand before asking the remaining Baroque Works agents if they were ready to continue. Zoro rolled backward to avoid Mr. 8’s Igarappa, prompting the other agents to begin pursuing him as well. As Zoro expressed confusion at Miss Wednesday and Karoo’s antics, Mr.
9 began attacking him with his steel bats, but Zoro easily intimidated him by repeatedly jabbing at him with Sandai Kitetsu. After Mr. 9 accidentally fell off the building they were fighting on, Zoro was confronted by Miss Wednesday, who made him dizzy with Miwaku no Memai Dance before attempting to finish him off. However, Karoo went the wrong way and fell off the building as well along with Miss Wednesday, leaving Zoro to state he felt embarrassed fighting these people. When Mr.
8 attacked him once more, Zoro cut a hole in the roof to escape and moved to an alleyway, where he wondered how he was going to get past Mr. 8’s shotgun. He was interrupted when Mr. 9 reappeared and bound his arm with the iron wire in one of his bats. As Zoro noticed Miss Wednesday had taken a sleeping Luffy hostage as well, Mr.
8 opened fire on him with Igarappappa, prompting Zoro to pull back in order to avoid the bullets before slamming Mr. 9 into a nearby building and then into Miss Wednesday and Karoo, who were sent flying away. With his left arm freed, Zoro used Luffy’s stomach to propel himself toward Mr. 8 before cutting him down as well and noting he was finally done. After pushing the unconscious Mr.
8 and Miss Monday off the building, Zoro sat down to drink and noted it was a quiet night once more before hearing something in the distance. When Mr. 5 and Miss Valentine confronted the defeated agents, Zoro noticed Luffy was out in the open, and soon dragged him out of the way while telling the agents to continue fighting among themselves. Upon witnessing Mr. 5’s Nose Fancy Cannon defeating Mr.
9, a shocked Zoro commented on its power before being interrupted by Igaram, who begged him to protect Nefertari Vivi from Mr. 5 and Miss Valentine in his stead. After Nami arrived, she successfully negotiated a contract with Igaram to save Vivi and deliver her to the Arabasta Kingdom in exchange for 1,000,000,000, she ordered Zoro to go rescue Vivi, prompting Zoro to express outrage at her trying to use him for her schemes. Zoro and Nami bickered over why Zoro should or should not fight, but eventually Nami used the fact that Zoro still owed her money from when he bought his swords in Loguetown to force Zoro to fight in order to pay off the debt, prompting Zoro to angrily tell her that she would not have a peaceful death as he walked away. Soon after, when Mr.
5 attacks Vivi with Nose Fancy Cannon, Zoro appeared and cut the booger in half before complaining about how he had to do something so ridiculous. When Vivi, believing he was still after her life, attempted to attack her, Zoro grabbed her arm and revealed he had come to save her. As Zoro prepared to fight Mr. 5 and Miss Valentine, he was confronted by Luffy, who proclaimed he could never forgive Zoro for what he had done. When Luffy accused him of having cut up the friendly townspeople who gave them food to eat, a stunned Zoro acknowledged that he had cut them up before attempting to explain the situation to Luffy, who attacked him before Zoro could finish.
After Luffy punched and kicked through several walls, Zoro realized he was serious about killing him and tried to get him to calm down by kicking him, which resulted in Luffy slamming into Mr. 5 and Miss Valentine and crashing into a building. When Miss Valentine began preparing to attack Zoro, Vivi tried to warn him, but Zoro claimed he did not have time to listen to either of them as Luffy emerged from the building with the defeated Mr. 5. Zoro told Luffy that all the townspeople were actually bounty hunters and thus their enemies, but Luffy refused to believe him on the grounds that no enemies would feed them.
Casually avoiding Miss Valentine’s 10,000 Kilo Press, Zoro realized Luffy was not going to listen to him and resolved to fight him to the death. Zoro used Oni Giri to match Luffy’s Gomu Gomu no Bazooka and stated that this was a good chance to see whose fighting style was stronger. As Zoro and Luffy continued to clash, Mr. 5 and Miss Valentine attempted to attack them, but Zoro and Luffy intimidated them with a simple glare before effortlessly defeating both of them with one attack. After wondering who Mr.
5 and Miss Valentine were, Zoro and Luffy attempted to resume their fight, only to be interrupted by Nami, who beat both of them up while berating them for almost costing her 1,000,000,000. Eventually, Zoro explained the situation to Luffy, who admitted that he thought Zoro cut them up because they did not prepare his favorite food. When Vivi explained the situation in Arabasta and the reason why she infiltrated Baroque Works, Zoro commended her for being so brave, and when she accidentally revealed Mr. 0’s identity, Zoro was the first one to point out that she did this. As Zoro and Luffy expressed interest in meeting and fighting a Warlord of the Sea like Crocodile, Igaram arrived and asked Luffy if he had decided whether or not he would take Vivi to Arabasta, which prompted Zoro to explain to Luffy that he wanted them to take her home.
After explaining that he would be acting as a decoy so that Zoro and the others could escape, Igaram left Whisky Peak on a ship with three dummies, only for his ship to explode in a massive fireball, to the shock of Zoro and the others. After confirming that the Log Pose had finished recording, Zoro told Luffy to wake up Sanji and Usopp and bring them back to the ship. On board the Going Merry, Zoro pulled up the anchor before informing Luffy, who had just arrived with Sanji and Usopp in tow, that they were ready to leave at any moment. After Zoro revealed that Karoo was already on the ship to Nami and Vivi, the Straw Hats set sail, and upon hearing Sanji and Usopp protesting their departure, Zoro asked Nami to explain the situation to them, prompting Nami to shut them up by hitting them. Soon after, Zoro was shocked when Miss All Sunday suddenly appeared on the Going Merry and drew Wado Ichimonji in an attempt to attack her, only to stop upon seeing Usopp and Sanji pointing a slingshot and a pistol, respectively, at her head. When Miss All Sunday threw Usopp and Sanji onto the deck seemingly without touching them, a surprised Zoro wondered if it was a Devil Fruit. After mocking Vivi and the Straw Hats, Miss All Sunday gave them an Eternal Pose that would allow them to sail to Nanimonai Island so they could avoid detection by Baroque Works, which prompted Zoro to state it was probably a trap. After Luffy destroyed the Eternal Pose and Miss All Sunday departed, Zoro noted that they had someone just as incomprehensible as she was on their crew. Soon after, Zoro was confused when Luffy mentioned it snowing on board the ship in the middle of the ocean.
Little Garden Arc
Zoro and crew sat ashore on Little Garden, a prehistoric island inhabited by dinosaurs and giants. Zoro, ordered by Sanji to gather some food, has challenged him to a competition on who would be the one to bring the largest piece of meat. Little do the Straw Hats suspect that Officer Agents of Baroque Works were on their tail. Having subdued the giants, Baroque Works made their move. Mr.
3 introduced Zoro, Nami, Vivi, and Brogy to the slow torture of becoming living statues of wax. Agreeing with Brogy that the only way to die was to go all-out honorably, Zoro attempted to cut his feet off, but Luffy arrived to the scene, so Zoro left the rest to him. Luffy attempted to rescue his friends, but it only accelerated the deadly waxing process, prompting Zoro to strike an honorable pose should he die. To make matters worse, Miss Goldenweek interfered and revealed her own terrifying ability. Usopp freed Luffy from Miss Goldenweek’s control by burning Luffy’s shirt.
With Karoo’s help and Mr. 3’s unwanted assistance, Usopp and Luffy rescued Zoro, Vivi, and Nami. The newly liberated crew took on Mr. 5 and Miss Valentine. While Luffy and Karoo pursued Mr. 3 and Miss Goldenweek into the forest, Zoro was able to save Usopp from Mr. 5. The crew then left Little Garden while being propelled through the Island Eater and they then set sail for Arabasta.
Drum Island Arc
Nami grew sick while they were out at sea. Zoro took over as a temporary navigator and performed daily training exercises again while looking for a doctor. Nami over-exerted herself to help Zoro steer clear of a cyclone and the crew headed towards a nearby island. The crew soon met the pirate Wapol, who attacked them, but only made Luffy send him flying. They arrived at last to an island only to find out that they were not welcome.
The Straw Hat crew managed to gain the trust of the people that attacked them, and were taken to the village. Zoro and Karoo stayed behind to guard the ship. Zoro decided to train in the icy cold waters since his injuries from Little Garden had healed. A shirtless Zoro was later found buried in snow by Vivi and Usopp after an avalanche. He told them he was training and was unable to escape.
They headed back to town together and found they had returned to Bighorn. Zoro helped out the locals by attacking the king’s army in order to save Dalton. Zoro obtained one of their warm coats in the process to warm himself back up. The villagers along with Zoro, Vivi, and Usopp started their ascent to the castle. They climbed a ropeway and arrived just after Luffy defeated Wapol. After finally been convinced to join the Straw Hat crew, Chopper announced his intentions to Dr. Kureha, who did not take it too well. After escaping from the castle, she had decided to give the whole Straw Hat crew a farewell gift and used Hiriluk’s dust to create sakura-like snow. On the way out of the island, the crew discovered Karoo frozen in the water and rescued him. Chopper translated that Karoo jumped in the water to save Zoro when he saw him disappear, causing an angry Nami to hit Zoro on the head because he was at fault for this mishap.
Arabasta Arc
The crew was starving for food and was trying to fish. Vivi saw a shocking sight to which Nami explained it was just steam coming from an underwater volcano. While fishing, they met Mr. 2 Bon Kurei, who showed off his Devil Fruit power. Later, after Mr.
2 left the ship, they saw a Sea Cat. They tried to capture it, but Vivi stopped them because it is sacred. Upon learning Mr. 2’s abilities, they planned to make an “X” mark on their right arm to know their true identity. When the crew landed in Nanohana, they encountered Smoker and Tashigi.
A powerful pirate named Portgas D. Ace appeared, and was revealed to be Luffy’s older brother. Ace fought Smoker while the Straw Hats ran for their ship. Luffy reunited with his brother and together they took down agents of Baroque Works. Ace departed from the crew and left Luffy with a piece of paper.
The crew found out that the Rebel Army had moved out of Yuba and headed to Katorea, and that the rebel leader Koza was determined to attack. The crew traveled to the city of Rainbase to take down Crocodile and Baroque Works, but ran afoul of Smoker and Tashigi. Zoro, Luffy, Nami, Usopp, and Smoker were trapped by Crocodile. Chopper distracted Crocodile while Sanji freed the rest of the crew, but found themselves trapped yet again. After escaping from Rain Dinners by swimming underwater with Zoro carrying Smoker, Zoro admitted to Smoker that while he did save his life, he only did it because Luffy ordered him to due to Smoker’s inability to swim because of his Devil Fruit powers.
The crew and Vivi then crossed the desert to Alubarna, where the final battle would eventually take place, though Luffy remained behind to fend off Crocodile. The crew excluding Luffy proceeded to Alubarna. As they reached the destination, they split up to distract the Baroque Works agents to engage them in separate battles. While Miss Doublefinger’s fight with Nami was challenging, Zoro was having an even more difficult time fighting Mr. 1: a man who can change his entire body into steel—something that Zoro could not cut.
As Zoro neared death, he heard “the breath of all things”. He then proceeded to defeat Mr. 1, finally learning how to cut steel. After their battle, the other Straw Hats hurried to locate the bomb before it went off. Vivi found the bomb, and called the Straw Hats together.
The bomb was inside of the clocktower, but the Mr. 7 pair of Baroque Works agents were there to protect it. Vivi defeated them, but she realized that the bomb could not be stopped so easily. It had a timer, and right before it blew up, Pell showed up and took it into the atmosphere, where he seemingly sacrificed himself to save Alubarna. When the battle finally had ended, the outcome was tallied.
Igaram appeared with proof of Cobra’s innocence, and Koza explained everything. When Luffy awakened from his battle with Crocodile, a magnificent banquet was thrown for the pirates, and the Straw Hats were then invited to enjoy the hot spring steam room inside the palace. It was later revealed that Zoro gained a bounty of 60,000,000. The day for Vivi’s speech had come and so had her decision to not continue traveling with the Straw Hats. Meanwhile, Bon Kurei and his crew attempted to protect the Straw Hats from Hina. When Vivi arrived at their location to say farewell, the entire Straw Hat showed off their “X” marks to symbolize their friendship with Vivi. The Marines failed again to catch the Straw Hats. After escaping from the Marines, Nico Robin (Miss All Sunday) appeared from inside of the Straw Hats’ ship and managed to persuade the crew to let her join, although Zoro was the only one to remain suspicious of her intentions.
Sky Island Saga
Jaya Arc
Nami’s Log Pose began to point to the sky. After that, a 200-year old galleon fell from the sky, leading the crew to explore it and discover a map of an island named Skypiea. They competed with the monkey-like Masira’s salvage crew while they searched for more clues on how to get there. The Straw Hats then decided to go to Jaya to look for information on Skypiea. Jaya’s main town was full of famous pirates that were constantly brawling with each other.
Luffy and Zoro had a run-in with a pirate known as Bellamy the Hyena, who ridiculed their dreams and beat them up. On Luffy’s behest, Zoro did not fight back. Luffy, Zoro, and Nami also met the man who was later revealed to be Blackbeard. They left Mock Town and got into a fight with Masira’s brother Shoujou, another salvage monkey. The Straw Hats met up with Mont Blanc Cricket on another part of Jaya.
Cricket is a descendant of Mont Blanc Noland, an infamous “liar” who told of a gold city on Jaya and Cricket was exiled for looking for artifacts of the gold city. He was actually the only person who knew how to get to Skypiea. Cricket explained how the Straw Hats could ride a dangerous vertical current called the Knock Up Stream to get to Skypiea. However, they first had to catch a South Bird to point them toward the point where the stream would erupt from the ocean. While the Straw Hats were looking for a South Bird, Bellamy and his crew attacked Cricket’s house and stole the gold artifacts he had collected over the years from his salvage work. When the Straw Hats returned and saw what happened, Luffy decided to take a side trip back to Mock Town to return Cricket’s artifacts. Bellamy got his comeuppance in the form of Luffy’s fist after speaking badly of Cricket. Upon Luffy’s return, the Going Merry had been refitted by Masira and Shoujou to be more flight capable. Before the Straw Hats caught a ride on the Knock Up Stream toward Skypiea, Blackbeard and his crew arrived and Zoro learned of his bounty as well as Luffy’s new bounty. Zoro was pleased to hear he became a wanted pirate worth a large amount. Blackbeard came to capture them only to miss them before their ascent. The Straw Hats then arrived in an ocean above the clouds.
Skypiea Arc
As the Straw Hats admired the beautiful cloud ocean, they sailed on and soon came to a gate. The Watcher at first demanded they pay a fee, and then told them they may go even when Nami apologetically stated they had no money. When the crew arrived on a beach in the clouds, they encountered a Skypiean and her father. The Straw Hats started talking to her, particularly about the versatile Skypiean Dials. The Skypiea police, the White Berets, suddenly turned up.
They told the Straw Hats that they were illegal trespassers and had to pay ten times the entrance fee immediately. It turned out to be 70,000,000, far too high to pay. The crew was then sentenced to a form of Death Penalty. Luffy, Zoro, and Sanji swiftly took out the White Berets. As the crew prepared for their adventure in Skypiea, An enormous shrimp attacked the Going Merry.
The Skypiean man explained to Usopp, Sanji, and Luffy that the others on the Going Merry would be taken to the Sacrificial Altar. The three decided to rescue their friends, despite the man warning them about God Enel living in the place they were headed. While Luffy, Sanji, and Usopp looked for the others on the Going Merry, Zoro killed a vicious fish shortly before it could take them to the Altar. Zoro, Nami, and Robin sat off into the forest (Zoro brushed off Chopper’s objections by stating he does not even believe in God). After a while, the entire crew was reunited at the Going Merry, and Zoro used his swords to help Sanji prepare food.
The next day, the Straw Hats decided to split into two teams. The second team, consisting of Zoro, Chopper, Luffy, and Robin, encountered an enormous snake and were all separated after it attacked. Zoro soon encountered a Shandia warrior named Braham, who attacked him. Braham used powerful Dials and pistols to attack. Though Zoro was caught off guard at first, he managed to defeat Braham by using his powerful Sanjuroku Pound Ho.
As Zoro was enjoying his lunch, he winded up being carried away by a South Bird. The bird soon dropped Zoro right in the middle of the confrontation between Ohm, The Knight of the Sky, and Wyper. Zoro fought Ohm, who was revealed to be a great swordsman using a blade with a Dial placed inside the hilt. The blade shape changed to block Zoro’s attacks and was strong enough to even stop his Sanjuroku Pound Ho. After a lengthy struggle, Zoro defeated the Priest with an incredibly powerful Hyakuhachi Pound Ho.
Enel then struck the ground using his lightning, and caused Zoro to fall to the ruins where Enel, Wyper, Gan Fall, Nami and Robin were. Upon “almost successfully predicting the five survivors”, including himself, Enel offered Zoro, Robin, Gan Fall, and Wyper to join him, provided that Nami was to be eliminated. When all four openly refused his invitation by proclaiming that Enel himself would be eliminated, Enel proceeded to knock Gan Fall down with his powers. Enel then went on to harm Robin. Zoro furiously attacked him in retaliation, but failed in harming him at all. Enel then injured Zoro, who tried to attack Enel once more, but he was shocked into unconsciousness when Enel struck him with Kiten. Later after regaining consciousness, Zoro attempted to cut down the beanstalk near Luffy and Enel upon Nami’s request. He managed to cleave some of it apart, but he was then struck into unconsciousness again by Enel. Wyper then finished the job and was able to cut down the beanstalk. After Luffy defeated the tyrannical Enel and finally rang the Shandorian Golden Belfry Bell, Zoro joined the other Skypieans in drinking and celebrating.
Water 7 Saga
Long Ring Long Land Arc
After returning from Skypiea, the Straw Hats came across a mysterious pirate ship with no captain and navigator after they tried to escape from a giant wave. They soon arrived at an island with some strange long animals, the so-called Long Ring Long Land island. As Luffy, Usopp, and Chopper went on board, Zoro, Sanji, Nami, and Robin were challenged by the Foxy Pirates to a Davy Back Fight. Luffy accepted the challenge with a gun shot. When Foxy decided to take Chopper after the first round, the “Donut Race”, Chopper cried and said that he only went out to sea because he was asked to be a member of the Straw Hat Pirates.
Zoro lectured Chopper and told him that he had to be a man and that he was responsible for becoming a pirate. In the second game, called the “Groggy Ring”, he and Sanji were partnered. They were fighting over who should be the ‘ball man’ until Sanji took the position at Nami’s request. The referee told them that weapons were prohibited in the game, so Zoro was forced to use No Sword Style. They defeated the Groggy Monsters and won after a decisive battle and allowed the Straw Hat Pirates to reclaim Chopper.
The last game, “Combat”, was a fight between the two captains. Luffy defeated Foxy and chose to take Foxy’s pirate flag rather than taking a crew member. Luffy made them a new flag, which ended up being hideous because of his poor artistic ability. After having returned to Tonjit’s hut, the Straw Hats met a Marine Admiral named Aokiji (in the anime, they met him on a different island). Aokiji told the crew that he was only there to confirm that Robin was still alive. He then used Ice Saber and proceeded to slice up Robin, but Zoro stopped him. During the fight, Zoro’s right shoulder was frozen by Aokiji. After the crew returned to the Merry, Zoro and Sanji immediately jumped into the ocean when Chopper said it would unfreeze them. After treatment, Zoro thought to himself that Luffy needed to get stronger to fight a stronger enemy.
Water 7 Arc
As the Straw Hats continued their journey, they encountered a sea train on their way. They stopped at a train station and asked an old woman named Kokoro where they could repair the ship and recruit a shipwright. Kokoro gave them a picture of a person named Iceburg and told them this was the person for whom they were searching. They set sail and opened the picture only to find it was just a drawing. When they arrived at Water 7, Zoro pulled out the sail and accidentally broke it, not realizing how poor its condition was.
Soon Luffy, Nami, and Usopp disembarked to hire a shipwright. Robin and Chopper then went shopping, followed later by Sanji. Zoro remained sleeping and guarded the ship. When he woke up, the ship was surrounded by mysterious strangers called the Franky Family. They attacked but were easily defeated by Zoro.
When a man named Kaku, a shipwright from the Galley-La Company, arrived to check the ship, he mistook him for Usopp due to his long nose. Upon completing the inspection, Kaku stated that the ship could not be repaired anymore, a statement Zoro vehemently disagreed with. The carpenter soon returned to the shipyard. In a monologue, Zoro asked the Going Merry if this would really be its last voyage. Zoro later joined Chopper, Sanji, and Luffy to look for Usopp and their stolen money.
They found Usopp unconscious outside of the Franky House. The four then attacked the Franky Family and destroyed their base, more so for beating up Usopp than for stealing their money. By then, their money had already been taken by Franky to an unknown location, so they could not get it back. While Usopp received medical treatment from Chopper, Luffy decided to get a new ship based on the shipwrights’ remarks about Merry’s fate. When Usopp woke up, Luffy told him this and Usopp angrily disagreed.
They started a quarrel as to whether they would leave the ship or not. A few harsh words were exchanged, and Usopp then went outside saying he quit being a Straw Hat Pirate. He then challenged Luffy to a duel, and the winner would claim the ship. Later, Zoro was seen fighting with Sanji over who was responsible for the situation. Robin had disappeared while in the city, and they were also wondering where she had gone.
After the duel, the victorious Luffy was still torn up regarding the conflict. Zoro told him that as a captain, he must never hesitate or else the crew could not rely on him. He then stated that they could never come back to the Going Merry again. When the crew later rented a hotel room, he just sat on the rooftop. The Straw Hats then became suspects to the attempted murder of Iceburg after a sudden attempt on his life was made.
When Zoro saw Luffy, Chopper, and Nami, they planned to enter the Galley-La building in order to talk to Iceburg. As Luffy disappeared, they were spotted by the Galley-La guards and started running. When Zoro became annoyed of the carpenters, he decided to use the back of his swords to defeat them. As they entered the building, they saw Luffy with Paulie there and discovered the true identities of Blueno, Kalifa, Kaku, and Lucci as agents of CP9. They saw Robin with them too.
Zoro attacked Kaku saying that he was not a true shipwright, but Kaku replied that he did his job correctly when examining the Going Merry. Afterwards, Zoro was quickly sent flying by Lucci in his Human-Beast Form and ended up landing into the chimney of another building. Zoro remained stuck there for a while, neither able to move nor reach his swords. He was later helped by Chopper, who had been looking frantically for him and Luffy due to the Aqua Laguna about to strike. Chopper gave Zoro Kitetsu and he destroyed the chimney.
When he was finally freed, the two ran as quickly as possible to get away from the tidal wave. Zoro and Chopper, along with Nami and Luffy, were helped by Paulie and narrowly escaped drowning. Having heard the truth behind Robin’s strange behavior, they planned to sail into the storm to pursue the sea train and save her. Paulie disagreed with their plan and was willing to fight them and stop them. Kokoro then informed them she’d show them another sea train and introduced the Rocketman.
Seeing how determined Luffy was to save Robin, Kokoro and Iceburg lent the Straw Hat crew the use of Rocketman. The Franky Family showed up, pleading with Luffy to let them join them because they would do anything for their leader, who had also been captured along with Robin. The Rocketman finally made it out to sea. As the train connected with the tracks, Luffy had to rescue Chimney before she was thrown off by the wind. With Luffy and Chimney safe in the train, Paulie told his fellow carpenters who the real culprits were.
The Straw Hats, Franky Family, and Galley-La Company formed an alliance against CP9. When a large tidal wave loomed ahead of Rocketman, Luffy and Zoro performed Gomu Gomu no Sanbyaku Pound Cannon and blasted a hole through the wall of the wave, opening up a channel for them to pass through. They miraculously passed through unscathed and the passengers rejoiced. In the Rocketman, Luffy, Zoro, Nami, and Chopper got an outfit change. Nami showed off the weapon Usopp upgraded for her while he was still with them.
Those on the Rocketman then encountered the discarded cars that Sanji had managed to detach from the train ahead, and Zoro sliced them so they could pass. Zoro then clashed with “Ship Cutter” T Bone, who was running on the tracks to catch up to the train ahead. The fight was short and Zoro joined the crew again in the Rocketman, victorious. Yokozuna the frog then jumped onto the front of the train, knocking them from the rails. After Kokoro had a word with him, he joined the group. Luffy and the others finally caught up to Sanji and Sogeking on another set of detached cars as they approached Enies Lobby. Paulie sat down with the group and talked about their plan of entry. Luffy did not bother to follow the plan, and launched himself beyond the gates before the train stopped.
Enies Lobby Arc
As the Straw Hats arrived at the Enies Lobby together with the Franky Family and Galley-La, they planned their move going inside, but unfortunately, Luffy jumped the gun and headed inside on his own. They waited several minutes to open the first gate of Enies Lobby. Zoro had been commanded by Kokoro to slice the fence open, but he commanded Yokozuna to push the fence back instead. Using it as a ramp, the train flew into Enies Lobby. Together, they landed on Oimo’s back and started entering the island to their main goal: saving Robin.
As they were waiting for the bridge to be activated, they all lined up at the roof, convincing Robin to accept their request of saving her. When they confirmed that the bridge would not be activated anymore, Kokoro volunteered herself to help them, using the Rocketman. The Rocketman, using the half activated bridge as a ramp and while everyone was being held by Luffy, jumped across to the Tower of Justice. When they landed on the Tower of Justice, Fukurou showed up and declared that a key was needed to uncuff Robin. They decided to fight individually and started to search an agent.
Zoro faced Kaku, who he had already fought at Galley-La. Zoro commented that he had become stronger since then, and in an intense battle, used a new skill to defeat Kaku to finally get his key, which was number 5. After that, he and Sanji carried the injured Sogeking in the tunnel and almost drowned. Luckily, they were saved by Kokoro, who is revealed to be a mermaid. While awaiting the end of Luffy’s fight with Rob Lucci, Zoro and the rest of the crew engaged in battle with numerous Marines, sent there as a result of the Buster Call inadvertently triggered by Spandam. Zoro came across a Marine known as Shuu, who used his Devil Fruit ability, causing his Yubashiri to rust. Their escape ship exploded, leaving them seemingly stranded until they heard the voice of Merry telling them to jump into sea. He complied, and with the rest of his crew, jumped on to the Going Merry. They then evaded the Marine battleships and managed to sail away from the destroyed Enies Lobby. With the Going Merry, everyone managed to escape Enies Lobby safely. After escaping, Iceburg arrived with the Galley-La Company just in time to pick up the Straw Hat Pirates as the Merry suddenly broke apart. Luffy then gave the Going Merry a Viking funeral by burning it as the crew said their goodbyes.
Postenies Lobby Arc
Two days later, back in Water 7, he was seen staring at the broken hilt of his sword wondering what he should do. Finally, he was then seen rushing to meet the others to warn them of the Marines’ arrival. However, as usual, Zoro ended up getting lost on the way there. When he arrived, he was attacked by Chief Petty Officer Helmeppo with dual kukri knives, but Zoro quickly defeated the young man. Zoro was then updated about the Marines being led by Luffy’s grandfather Monkey D.
Garp and reunited with Koby. He was seen trying to buy a sword but had no money and was thrown out. Later on, Zoro’s new bounty was revealed; the bounty was set at 120,000,000. When Luffy was about to invite Usopp back into the crew after hearing he wanted to rejoin, Zoro took a stand on letting Usopp back in, stating that Usopp should not be allowed back into the crew if he returned still full of pride. His reasoning being that Luffy as captain must stand firm as it was Usopp that left them and lost the duel with Luffy over the fate of the Going Merry. He was later seen when he and Sanji informed the rest of the crew that Garp’s battleship was near the island. The Straw Hats then boarded their new ship, the Thousand Sunny, and began sailing away from Water 7. After Usopp apologized for his stubbornness, he was happily accepted back into the crew with Zoro seen smiling at Usopp’s return.
Thriller Bark Saga
Thriller Bark Arc
After sailing for some time on the Thousand Sunny, Zoro and the rest of the crew came across a mysterious barrel floating on the ocean. Upon opening it, a flash shot up from it. After braving a storm that mysteriously came afterwards thanks to Nami and Franky, Zoro and the rest of the crew found themselves in the presence of a ghost ship. This ship apparently belonged to a skeleton named Brook who, by chance, initially accepted Luffy’s offer to join the crew. This apparent new addition to the crew made Zoro scold Nami and Sanji for not keeping Luffy from inviting the skeleton.
Zoro then joined for dinner as the skeleton explained his past to the others. Just as Brook was about to perform before Zoro and the rest of the crew, a ghost appeared and some clanking sounds were heard. These sounds were caused by the closing of the gates of Thriller Bark. These events prompted Brook to head to the island before Zoro and the rest of the Straw Hats’ eyes. After witnessing Franky’s present to the Straw Hats that the cyborg decided to show them, Zoro and the rest of the Straw Hats decided to look for Nami, Usopp, and Chopper, who had not returned.
However, before Zoro and the rest could go to the island, they were stopped by an invisible thing. The thing stole one of Zoro’s swords and tried to stab Luffy with it. Luckily, Franky kicked it away before it found its mark. The thing left Zoro and the rest baffled. After the Thousand Sunny was caught in what was apparently an oversized spider web, Zoro and the rest disembarked onto the island.
There, they met the Cerberus, which did not intimidate Zoro. After Luffy tamed the beast, Zoro and the rest met two more of the island’s creatures. Luffy caught the talking tree while Franky caught the unicorn. Zoro and Sanji then stopped Luffy before he could ask the talking tree to join the group. Zoro and the rest then came across some ghosts who affected some of them with their strange abilities.
Zoro, seeing his companions in such a pitiful state, merely shook the whole matter off only to be affected by one of the ghosts himself. After Zoro and the rest who were also affected by the ghosts recovered, they pressed forward. Zoro and the rest later met with some zombies and defeated them with 600,000,000 Belly Jackpot. The group then met with an old man who looked like a zombie. The old man asked them to defeat Gecko Moria who had stolen his shadow.
While in Hogback’s mansion, Zoro disappeared not long after Sanji did. He was later found asleep on the Thousand Sunny with Sanji and Luffy and was woken up by Usopp. After purifying some zombies, Zoro, Franky, and Sanji were about to cross a bridge leading to Hogback’s laboratory when Oars smashed it. With the construction of a new bridge done by Franky, Sanji departed to save Nami. Later on, Zoro and Franky found the defeated Brook and saved him at the last moment from Ryuma.
Seeing the samurai’s sword, Zoro claimed he intended to fight and take it. After a short but intense battle, he defeated the legendary samurai and gained the sword Shusui from an ashamed Ryuma. When Moria gained control of Oars, he ordered him to rampage through Thriller Bark and defeat the Straw Hats. Zoro, wanting to fight him, only cut off his left tusk before being defeated by Oars’ attack. Later on, he and the other Straw Hats regained consciousness and started a series of combo attacks against Oars.
Using a Hyakuhachi Pound Ho at Oars, Zoro noted how his Shusui was heavy and he was still not adept at using it. After Moria manipulated Oars’ body to allow it to stretch, the Straw Hats were taken down one by one. Before Zoro was taken down, Chopper formulated a theory that his right arm was his weak point. As his final movement, Zoro tried to damage the arm, but failed since zombies do not feel pain, and was taken out. After being carried away from the fight between Nightmare Luffy and Oars by the Thriller Bark Victim’s Association, he regained consciousness and helped Luffy use Gomu Gomu no Gigant Bazooka to shatter Oars’ spine.
As Moria used Shadow’s Asgard, he stood by watching the fight between Moria and Luffy and was almost burned away by the sun until, with the defeat of Moria, his shadow was finally returned. After launching an attack on the Thriller Bark Victim’s Association, Bartholomew Kuma targeted Zoro. Zoro tried to fight Kuma, but Kuma just pushed his attacks away with his Nikyu Nikyu no Mi, leaving Zoro at a disadvantage. Kuma then came with an ultimatum: give up Luffy and the rest will be allowed to survive. Zoro, the crew, and the Thriller Bark Victim’s Association, all in one voice, refused and so Kuma calmly detonated the island with an Ursus Shock, knocking out everybody.
However, when Kuma was about to take Luffy, Zoro rose again as one of the only people not knocked unconscious and even launches a successful Shishi Sonson attack on Kuma, revealing that he is a cyborg. Kuma then stated that he is a cyborg but not like “Cyborg” Franky and furthermore explained that he was an incomplete human weapon created by the World Government and Dr. Vegapunk, called a Pacifista. Zoro then proceeded to ask for his head to be taken in exchange for Luffy’s. Kuma agreed, but at that point, Sanji woke up and wanted to give his head instead.
Zoro calmly hit one of his wounds just above his right hip and knocked Sanji out. Kuma then proceeded to use his powers and drew out all of Luffy’s pain and fatigue. Luffy had so much pain and fatigue that it formed a gigantic paw of energy bigger than Kuma himself. Kuma gave Zoro a small sample of it and Zoro could barely tolerate the pain. Kuma then stated that if Zoro were to take in Luffy’s injuries, he would definitely die.
Zoro then asked to choose a location. Zoro then took the paw of pain and went to a nearby forest. He took a few breaths before he placed his hands inside of the giant paw. When the Straw Hat crew awakened along with the Rolling Pirates, Sanji went out to look for Zoro and found him in the forest still conscious, surrounded by blood as well as being covered from head to toe in blood. When Sanji asked what happened to him, Zoro replied that nothing happened at all in a trembling voice. Afterwards, all of the Straw Hats tended to Zoro’s injuries. He was seen sleeping in the Thriller Bark Mansion with wounds Chopper said were life threatening, while his crew (minus Chopper, who was taking care of him and Nami, who was watching over him) celebrated their victory. Two days later, Zoro was awake and went to the grave that Franky built for Brook to honor the Rumbar Pirates and asked for Brook’s permission to lay his Yubashiri to rest near the grave. He later joked that Brook had bad luck since this crew is varied, to which Brook joked back with him. Once he and the rest of the crew finally left Thriller Bark, they held a toast to Brook, the newest Straw Hat.
Summit War Saga
Sabaody Archipelago Arc
As the Straw Hats continued their journey, Zoro became embroiled in the battles against the Flying Fish Riders to protect a former enemy, Hatchan, against the slave trader Duval. Assisting Hatchan in his escape, he came to an understanding with the fish-man while defeating those in their way. After the incident, the Straw Hats arrived at the Sabaody Archipelago, where Zoro decided to go off on his own, presumably to get some liquor, as he was later seen chugging on a bottle of one. Though he claimed he knew where the Sunny was docked, a misread sign made the swordsman run off into the unknown, getting himself lost again. Eventually, he entered an area where a World Noble was messing around with his slaves and the local population.
Although other Super Rookies were watching, Zoro unknowingly insulted the noble, who fired his pistol. Zoro dodged the shot and was about to retaliate, but Jewelry Bonney knocked him to the ground and forced him to play along to prevent an incident that would bring a Marine admiral to the island. After the noble left and a brief argument with Bonney, Zoro proceeded to carry a civilian who was injured earlier by the noble to the nearest hospital, ignoring Bonney’s protests. He later jumped onto Luffy’s flying fish (after being told by the latter to do so) in an attempt to find his way back to the ship, but was crashed into the Human Auctioning House along with them. After Hatchan was shot, Zoro witnessed Luffy punching Saint Charlos in the face, the same noble he himself almost attacked.
Zoro remarked that Luffy should had given him the chance to slice the noble himself. He also witnessed the mechanic they were looking for, Silvers Rayleigh, who used an ability known as “Haki” to knock out the World Nobles’ guards as well as Saint Shalria. Zoro assisted Luffy and battled his way out of the massive horde of Marines, before escaping along with Rayleigh with the help of Duval’s Rosy Life Riders. They returned to Shakky’s Rip-off Bar to rest. There, Rayleigh revealed that he was Gold Roger’s first mate, and revealed the truth about how and what led to Roger’s execution.
After explaining the story of Roger, Rayleigh mentioned Shanks and Buggy as former members of Roger’s crew. The mention of Buggy mildly irritated Zoro. Rayleigh congratulated the Straw Hats on making it through the first half of the Grand Line, but told them that he was going to need three days to coat the Thousand Sunny. Due to the arrival of an Admiral, he would move the ship to avoid getting noticed. He gave the Straw Hats pieces of a Vivre Card to meet up once he was done.
Because of the Admiral threat, Zoro mentioned they too should split up to avoid getting caught and meet up at Rayleigh’s location. As they said their farewells to Shakuyaku, Camie, Pappag, and Hatchan, the Straw Hats departed but were later confronted by what appeared to be the Warlord Bartholomew Kuma. As he attacked, the Straw Hats fought back. Zoro noted that there was something different about him. The Straw Hats continued to fight “Kuma” and Luffy, Sanji, and Zoro finally delivered a successful counter-attack in the form of the Santoryu Gomu Gomu no Diable Mouton Jet Roppyaku Pound Cannon combo, knocking “Kuma” back.
Zoro deduced that it may not be the real Kuma as he had not reflected their attacks or teleported with his Nikyu Nikyu no Mi abilities. Zoro suddenly collapsed from the phantom pain he experienced before when he had all of Luffy’s pain and fatigue transferred to him, but managed to get up and hit Kuma with Ashura: Makyusen which badly damaged the clone, before Luffy finished it off. As the Straw Hats rested to catch their breath, they contemplated on how powerful their opponent was and how he came so early, as they planned to hide for the next three days and were worried as to how they were going to deal with more opponents like that. Just then, a broadaxe-wielding warrior named Sentomaru appeared with yet another Pacifista and ordered it to capture the Straw Hats. As the Straw Hats separated to avoid capture, Zoro, Brook, and Usopp were suddenly confronted by Kizaru, one of the three Admirals, and he proceeded to attack Zoro with a blast from his kick.
With Usopp and Brook unable to do anything to Kizaru due to the power of the Pika Pika no Mi, the Admiral attempted to finish Zoro off, but his kick was deflected by Silvers Rayleigh, who intervened to save Zoro. Usopp and Brook again tried to escape with Zoro, but as PX-1 started chasing after them, Zoro told them to put him down so they could get away. Usopp refused, saying Zoro was more useless in his current condition. Even with Sanji’s help, they were all beaten down by the Pacifista. Before they could get up to run again, the real Bartholomew Kuma showed up and ordered the Pacifista to stop. Zoro instantly recognized him as the real one and they briefly talked. Kuma asked Zoro about where he would like to go, while removing his glove. He then swiftly touched Zoro with his hand, making him vanish.
Straw Hat Separation Adventure Kuraigana Island
Zoro landed in the ruins of Shikkearu Kingdom on Kuraigana Island in the Grand Line, the same island Perona was sent to. He woke up having been bandaged ridiculously by Perona. He asked for his swords, but Perona refused to give him his weapons back. Eventually, Perona returned Zoro’s swords to him. Zoro was walking through the ruins of the island as Perona floated overhead, and he encountered an unknown swordsman.
Postwar Arc
The swordsman turned out to be a feral baboon known as a humandrill, whose tribe has learned to wield weapons from watching soldiers in a great war fought seven years earlier. The island also turned out to be the home of Mihawk, who upon returning to the castle informed Zoro of the events at Marineford. Mihawk then gave him a small boat to leave the island, though it was unfortunately destroyed by the humandrills. A while later, Mihawk went to the ruins to watch Zoro’s battle with the humandrills. Mihawk commented on how Zoro was still far away from reaching the sea even though Zoro had been away from the castle for a long time.
Mihawk added that the boat was useless in its current state, but Zoro stated that he would use a part of the boat to help him swim to his destination. Mihawk explained to Zoro about the vicious, imitative nature of these humandrills and remarked that they would be difficult but good opponents for Zoro. He then offered Zoro a night at the castle, but Zoro refused, saying he needed to get to the ocean. Zoro was then shown lying on his back making Perona hold a newspaper up for him to read. He explained that Luffy praying at Marineford and ringing the Ox Bell was out of character and guessed that Rayleigh was behind it.
He asked her to hold still, maintaining that there was some kind of message hidden in the newspaper. Zoro was next shown prostrating before Mihawk, requesting that he trained from the Warlord. Mihawk initially dismissed this request, thinking that Zoro was unable to defeat the humandrills and escape the island. He chided Zoro and expressed regret for “over-estimating” the swordsman. When Zoro explained that he had defeated the humandrills and required training from Mihawk to defeat him, the Warlord reconsidered while laughing at the absurdity of the request. Mihawk agreed to Zoro’s request and ordered Perona to patch up Zoro so that the training could begin. The reason for Zoro’s request was then revealed in Luffy’s hidden message. Zoro described this message to Perona, having translated it from the tattoo visible on Luffy’s arm. The message ordered all members of the Straw Hat crew to regroup at Sabaody Archipelago in two years rather than the three days as initially planned. Zoro decided he would use the extra time to train under the world’s greatest swordsman and become much stronger. The story continues two years later.
Roronoa Zoro › History › During And After The Timeskip
Introduction
During The Timeskip
During his training, Zoro also learned from Mihawk how to imbue his swords with Armament Haki. To Zoro’s chagrin, Mihawk forbade him from having any alcohol until he had mastered doing so.
Fishman Island Saga
Return To Sabaody Arc
After two years of training, Zoro (with Perona’s help) returned to Sabaody Archipelago. Shakuyaku told him that he was the first to return. He went to a fisherman, saying that he was bored and wanted to fish, and accidentally went on a coated pirate ship instead of the fisherman’s boat (despite the major difference such as the fisherman’s boat being a dingy and the pirates being a galleon). Later he fell asleep, and the fisherman was unable to wake him up as the coated ship submerged. He was found by Sanji when the ship resurfaced with him sitting on one of the broken masts after he cut the whole ship in half with his blade (similar to Mihawk) upon waking up.
Zoro then tells the unfortunate pirates to blame fate for him being on their ship. He then casually states that he had boarded the wrong ship. Zoro then…
Read More about Roronoa Zoro › History › During And After The Timeskip
Zoro then tells the unfortunate pirates to blame fate for him being on their ship. He then casually states that he had boarded the wrong ship. Zoro then gets reacquainted with Sanji. Zoro says that he wants to go to the beach and go fishing. Sanji angrily states that it would be a pain for the crew to search for him if he ends up getting lost and forces him to return to the Thousand Sunny.
Zoro then ranks Sanji by the order in which he arrived (#7), much to Sanji’s frustration. The two then start their usual bickering with Zoro threatening to cut Sanji in half. After getting a call by Franky, Sanji informs Zoro of the Straw Hats’ meeting place, which is in Grove 42. They also hear a commotion coming from a nearby grove. When they go see what it is, they find Luffy there along with the Marines, the Pacifistas, and the crew of the Fake Straw Hat Crew.
After quickly defeating a Pacifista, and briefly arguing about whose blow actually finished it off, Zoro and Sanji then get reacquainted with Luffy as Zoro ranks Luffy the ninth. Luffy, Zoro, and Sanji then make their way back to the ship. On the way, they come across Rayleigh. When Luffy tells Rayleigh that he is going to become the pirate king, Zoro just smiles along with Sanji. As Luffy, Zoro, and Sanji head back to the Thousand Sunny, they find Marines blocking their path. Perona aids them by fending off the Marines with her Negative Hollow. When Zoro asks Perona why she is still there, Perona gets angry at him, scolding him for talking that way to someone who was nice enough to bring him to Sabaody. Zoro, Luffy and Sanji then return to the ship with the aid of Chopper and a giant bird. With the Marines held back by their new allies, the crew submerges on their coated ship and heads for Fish-Man Island.
Fishman Island Arc
Undersea Voyage
As the crew marveled at the surrounding ocean, Zoro simply stated that he had already seen it when he had boarded a coated pirate ship by mistake. Sanji then scolded Zoro for ruining the moment. Zoro then prepared to catch a fish using his sword, but was stopped by Usopp and Chopper. When Luffy again attempted to catch some fish, Zoro proposed that they have a competition, only to be beaten down by his crew again. The crew then started listening to Franky’s story about Kuma, while they are the bentos Luffy had brought.
Zoro started to wonder what Kuma’s real intentions were as he still had his doubts. With their sea cow, the Caribou Pirates soon caught up with the Straw Hats and prepare for battle, and Caribou jumped onto the Thousand Sunny. Before his crew could follow, his sea cow, Momoo, fled in fear after seeing Nami, Sanji, and Luffy, leaving Caribou behind. Zoro then questioned Caribou if he was the captain of that crew, and Caribou frantically pleaded with them, claiming that he was an unfortunate victim and not a pirate. With that settled, the Straw Hats then sailed through the underwater currents.
When they reached the Downward Plume, they encountered a Kraken. When Zoro witnessed the Kraken destroying Caribou’s ship, he commented that Caribou’s crew looked like jellyfish, much to Caribou’s dismay. Zoro, Luffy, and Sanji then equiped themselves with Flutter Kick Coatings and fought the Kraken out in the sea. During the battle, Zoro cut one of the Kraken’s tentacles, much to Luffy’s disapproval. Luffy, Zoro, and Sanji soon defeated the Kraken, but because they were not wearing life-lines, they were separated from the ship as it went down the Downward Plume.
Luffy successfully tamed the Kraken and named him Surume. Unfortunately, Luffy’s and Sanji’s coatings had popped, so Zoro had to share his own with them. After some searching, Luffy, Zoro, and Sanji eventually found the Thousand Sunny and the rest of the Straw Hats just in time for Surume to save them from Wadatsumi. After reuniting with the ship, Zoro was then startled when the undersea volcano started to erupt. Surume quickly carried the ship away from the eruption and jumped down a trench. The Straw Hats were in danger because of the blast from the volcano, rocks were falling down on them. Zoro wanted to leave the ship and the bubble in order to cut them, but Robin stops him with her power and warns him about the water pressure. The Straw Hats are able to escape thanks to Surume and Usopp’s Pop Greens, with Zoro seen smiling at Usopp’s progress in strength. After going down through the trench, the crew sees Fish-Man Island. They soon encounter a gang of sea monsters led by Hammond, who gives the Straw Hats two options: join the New Fish-Man Pirates or die. The Straw Hats prepare to run using Coup de Burst as Luffy gives Hammond a rejection.
Trouble In The Underwater Paradise
Hammond does not take kindly to Luffy’s rejection and prepares to attack the Thousand Sunny. Franky activates Coup de Burst and the ship flies through the bubble surrounding Fish-Man Island. The ship then falls into a current and the crew gets separated. Sometime later, Zoro was found by King Neptune and brought to the Ryugu Palace and began drinking even after King Neptune suggested waiting for the rest of his crew to get there. After receiving word of the mysterious disappearance of some mermaids from the Mermaid Cove and of Madam Shyarly’s ominous prediction, the palace guards and personnel took action against the Straw Hats.
They locked up Zoro and attempt to capture Usopp, Nami, and Brook (who were invited to the palace earlier) who easily defeated most of the guards. Zoro then frees himself from his cell and reaches the palace hall just in time to intercept an attack by King Neptune. After subduing and tying up the king, the ministers, and the rest of the royal guards, the crew mates have an argument with Zoro, scolded him for overdoing things, but he insists that they had to fight in order to defend themselves. Zoro then tells everyone that they need to leave Fish-Man Island. The three princes of the Neptune Family return to the palace only to find it under the control of the Straw Hats.
Since the princes are unable to enter, Fukaboshi speaks with Zoro through Den Den Mushi. Zoro demands that in exchange for the freedom of the palace, the Straw Hats would be able to leave Fish-Man Island peacefully. Fukaboshi agrees with Zoro’s terms and tells him Jinbe’s message. After hearing noises coming from Shirahoshi’s room, Neptune begs Zoro and the other Straw Hats to check up on the princess to ensure her safety. When Zoro asks why they should take orders from hostages, Neptune angrily responds by saying if Shirahoshi is harmed while he is incapacitated, he will chase the crew to the ends of the ocean.
Brook instantly dashes off to her location while carrying the Minister of the Right. When they return, the minister informs Neptune of Shirahoshi’s disappearance and Brook yells that pirates (pawns of Hody Jones) are invading the palace. Usopp panics asking what to do. Zoro gives a simple answer, “cut them”. Zoro proceeds to defeat the human pirates.
The Minister of the Left states that Zoro was enjoying it much to Zoro’s annoyance. However, one of the unconscious pirate’s arm was laying on top of the Connection Corridor switch, pushing it down and opening the corridor that leads to the palace. Zoro, Usopp, Nami, and Brook then encounter the New Fish-Man Pirates and Vander Decken IX. Once Decken learns that Shirahoshi is no longer in the palace, he quickly goes after her, leaving Jones to take care of things in the palace. Jones then crushes a palace wall, flooding the palace in the process.
Jones launches Yabusame, injuring King Neptune and some of his soldiers. Zoro launches Yakkodori at the fish-man. Jones blocks the attack by using one of his own comrades as a shield. Nami goes off to an unknown location, Usopp and Brook untie the guards, and Zoro cuts Neptune’s chains. Zoro regrettably states that the negotiation with the kingdom is void since they are unable to keep the hostages unharmed.
Before the room is completely submerged, Zoro tells Neptune to take his crew mates to safety. When completely underwater, Zoro prepares to face off against Hody Jones. Even though Zoro is at a disadvantage being underwater and without a Flutter Kick Coating, the swordsman manages to deal a striking blow to Hody Jones. While Jones is knocked out, Zoro quickly surfaces and breathes for air. He then grabs onto Neptune as he prepares to make an escape route.
Neptune launches Ultramarine and clears a path that allows the ministers and the Ryugu Palace guards to escape. However, Neptune’s back gave in, putting him, Zoro, Usopp, and Brook in a dangerous situation. Neptune’s whale, Hoe, arrives to save them, but before they can leave the palace, Jones, energized by Energy Steroids, stops Neptune with one hand. Zoro, Usopp, Brook, and Neptune are then captured by the New Fish-Man Pirates. They then lock up Zoro, Usopp, and Brook in a cage in a room with rising water, and plan to drown them after executing Neptune. Brook then shows a new ability in which he can leave his body in spirit form. Zoro instructs Brook to tell Pappag to bring him his sword so they can escape. They eventually do escape and appear in the Gyoncorde Plaza with the rest of the crew, preparing to fight against the New Fish-Man Pirates.
Battle For Fishman Island
Zoro along with Sanji were getting ready to face off against the enemy. However, Luffy used his Supreme King Haki and took down half of them. Zoro was quite impressed, and he commented that if the captain could not do that much, they would have to search for another one. As the battle with the New Fish-Man Pirates initiate, Zoro defeats the Iron Shell Squad with Kokujo: O Tatsumaki. Later, Dosun tries to attack Luffy as he approaches Hody.
Zoro intercepts Dosun and knocks him down. Later, when Hyouzou goes on a rampage and tries to attack Robin, Zoro intercepts the octopus merman before he reaches her. Zoro comments that Hyouzou will be a good warm-up for the New World. Regardless of Hyouzou’s strength, Zoro manages to cut his swords. Zoro then comments that Hyouzou’s power is not even enough to kill his boredom. Despite being disarmed, a still-drunken Hyouzou merely smiled and complained. Later, Zoro seemingly lowers his guard and insults his opponent by calling him a frog. An angered Hyouzou then draws new swords, coats them with poison, and attempts a sneak attack. Zoro effortlessly cuts him down and comments that he’s just a frog from the bottom of a well. After all the officers of the New Fish-Man Pirates have been defeated, the Straw Hats look up into the sky as Luffy tries to destroy Noah. When the Sea Kings appear and stop Noah from falling, saving the ship and the island at the same time, everyone on Fish-Man Island celebrates.
The After Battle Celebration And Departure
After the battle he is seen with the rest of the crew and their friends by Thousand Sunny, commenting on Chopper’s inability to move. He then watches as Chopper performs a blood transfusion between Luffy and Jinbe. Afterward, while floating in the air on the ship, Zoro is appalled at himself for fighting in public the way he did, saying heroes have to share their drinks, and he wants to keep it all for himself. He then goes with the rest of his friends to Ryugu Palace for the celebratory banquet, where he yells at the guards not to call them heroes. He is then seen happily accepting a drink from a mermaid server and later laughing with Franky and Hatchan.
Zoro is later seen sleeping next to Nami, Usopp, and Sanji, who drank, ate, and lusted too much, respectively. Luffy wakes him up by asking if he sensed some kind of animal in the palace. The three of them then confront Caribou and Zoro watches with Sanji as Luffy sends him packing. When the Minister of the Right notices that one of the prison towers was cut in half, he suspects Caribou was the culprit, but Pappag tries to tell him it was Zoro. Zoro tells Pappag to let him blame it on the thief.
He and Luffy then make the connection that Caribou was also the one who stole the palace’s treasure and are surprised when Nami gets mad at them for sending him flying. She then sends Luffy, Zoro, and Sanji to look for him. They found Caribou, who was knocked out already. The three then collect the treasure and make their way back to the palace. Luffy asks Zoro which direction to go.
Zoro points to one direction and Sanji immediately suggests they go the other way to which Zoro takes offense. They soon arrive at the Candy Factory and meet Big Mom’s messengers: Pekoms and Baron Tamago. Zoro questions the Emperor’s manhood and Tamago points out that Big Mom is not a “man”. Zoro is seen smiling when Luffy answers the Den Den Mushi from Charlotte Linlin. He is present when Luffy declares war on her.
After returning to the palace and informing the crew about the situation with Big Mom, Nami beats Luffy, Zoro, and Sanji for giving the treasure to the Emperor. Afterwards, Zoro and the crew say their farewells to the citizens of Fish-Man Island and set sail to the New World. Note:The following takes place during the Punk Hazard Arc and not before. While heading to the New World, the crew decides to catch some sea fishes to eat. Zoro stated that they should have a party to celebrate entering the New World. Later, Zoro uses Sanbyakurokuju Pound Ho to kill the giant sea monster. As the crew gets caught in the White Strom, a gam of Island Whales (all of which look like Laboon) stop them from getting lost. After Brook plays Binks’ Sake, the whales bring the ship up to the surface of the New World and Zoro comments that it looks like entrance to Hell.
Dressrosa Saga
Punk Hazard Arc
Arriving At Punk Hazard
Soon after entering the New World, the crew spots an island surrounded by a sea of flames. The Straw Hats then receive a distress call from someone who seems to be in trouble and mentions a samurai attacking and killing them, before the broadcast cuts out. Zoro asks Brook about the samurai, who answers that samurai are the swordsmen of Wano Country, who have a closed-door policy to outsiders and are not affiliated with the World Government. Later, the crew draw straws on who to be the landing party. Zoro, Usopp, and Robin all draw the red straws and then accompany Luffy to Punk Hazard.
Nami makes a safe road over the sea of flames for them out of clouds, as Zoro and the rest snack on the bentos Sanji made them. Acting on a threat from an earlier argument, Sanji had slipped razors & poison into his meal but Zoro merely crunched away, as they had no effect on him. Zoro bugs Usopp about returning to his cowardly ways and not eating, himself unaffected by the danger present. As they set foot on land, they come to an iron gate walled up. Zoro slashes the gate down, letting them open.
As they explore the island, they are affected by the heat as Zoro and the others strip down from the heat of the flames. They come to a city, finding it blazing-hot with most of the buildings melted. Looking at the structures, Robin deduces the buildings to be a former government base. As they begin to explore, they stumble upon a massive skull bigger than a giant’s that had perished during this catastrophe. Feeling a presence nearby, they are surprised to encounter a dragon, a monster that Zoro had previously believed to be a myth.
The group engages the dragon in battle. Eventually, with a combined effort from Usopp and Luffy, Zoro manages to cleave off the dragon’s head. The group then discovers a pair of talking dismembered legs stuck to the dragon’s head, which take off in pursuit of a Warlord. After the group cuts up and eats the dragon meat and takes the rest with them, they continue their expedition. As Luffy plays with the legs, pretending to be a centaur, Zoro draws the group’s attention to a remarkable sight: a lake separating the HOT half of the island from a COOL half.
Usopp then sights a humanoid figure with wings. Luffy’s group then receives a call from Brook, who informs them that the Sunny has been taken to the COOL side of the island and that the other Straw Hats went missing. After Luffy and Robin defeat two centaurs, the group then decide to go to the COOL side of the island. To cross the lake, Usopp forms a boat from Pop Greens. While the group rides on the boat, the centaur that Luffy had just fought jumps after them and informs his boss that the pirates are heading his way.
The four Straw Hats then see a group of centaurs waiting for them on the other side. The boss spots Zoro and thinks that he was the samurai who attacked their comrades. The centaurs then fire their bazookas at the water around the boat, capsizing it and leaving Usopp and Zoro to hold up Luffy and Robin. Zoro moves to attack the centaurs, but is instead dragged underwater by sharks. The centaurs prepare to attack the Straw Hats again, but they are stopped by Brook, giving Luffy, Zoro, Robin, and Usopp enough time to escape the lake.
After emerging from the freezing water, they plan on stealing coats from the centaurs. After defeating them and stealing their coats, the group uses Brownbeard as transportation to Vegapunk’s former research institute. They soon arrive at the scene where Law and Smoker just fought. After Luffy talks to Law, the group quickly gets away from the Marines and meets up with Sanji, Nami, Chopper, Franky, and some of the children that were held prisoner in the research institute. They then take shelter in the back side of the institute. The Straw Hats then tie up Brownbeard and bring each other up to speed on the current situation. After interrogating Brownbeard, they learn about a man known as Caesar Clown. Kin’emon later leaves the group to find his torso and Sanji (in Nami’s body) and Brook volunteer to go search for him while having perverted thoughts. Nami makes Zoro go with them to ensure that they will not do anything indecent.
A Weapon Of Mass Destruction
Zoro’s group later sees the Yeti Cool Brothers’ massive footprints and decides to follow them. When they reach the edge of a cliff, they encounter the yetis. The brothers fire KYP bullets at the group, knocking them out and sending them falling off the cliff towards an icicle trap. Fortunately, Zoro destroys the trap before falling unconscious. After Sanji kicked Zoro and Brook to wake them up, they then walked and stumbled on a frozen Kin’emon by accident.
After learning that Kin’emon’s torso has fallen into the lake, they go to the lake to retrieve it. They then run into Brownbeards’ men, but the centaurs choose to run instead of fighting. When they are close to the lake, Zoro then noticed a mountain he did not remember from the previous time he was there. Zoro, Sanji, and Brook then stare at the slime and comment that it is doing something mysterious. As Smiley continued to shoot itself over the lake, Brook tells the group that he once read a book about the slime, and that it melts away women’s clothes.
Zoro notices that the fish are surfacing on the lake, realizing that they have been poisoned by the slime’s toxins. As Sanji jumps into the lake to find Kin’emon’s torso, Zoro and Brook try to fend off the Smilies close to their position. Zoro watches as Brook tries to attack the slimes which releases poisonous gas with each hit. Zoro tells Brook that cutting is no use and should eat it instead. Once Sanji resurfaces, he yells at Zoro and Brook for not doing something about the slime, to which he simply states that attacking it did not work out.
Zoro then watches as Kin’emon uses his Foxfire Style to cut the slimes as well as the fire caused by the subsequent explosion. Impressed by Kin’emon’s performance, he then claims that the samurai’s swordsmanship had sparked his interest. Zoro is later seen fleeing from Smiley along with Sanji, Brook and Kin’emon. He then watches with the others as the slime begins to change its shape. Resuming its attack again, Zoro and the others begin to run again, deciding to head for the research institute to find Momonosuke.
As they run from Smiley, they come across the giant piece of candy left by Caesar for Smiley, and a small dragon made by Vegapunk. They then see a screen appear with Caesar on it but choose to continue running. After witnessing Smiley exploding, Zoro, Sanji, Kin’emon, and Brook run quickly away from the poisonous cloud. They see the small dragon flying away from the poison cloud, and Zoro proposes the idea for them to get on its back and fly away. Struggling to catch up to it, Sanji is able to rush ahead after being motivated by his perversion.
He then catches the dragon, allowing the group to finally ride it. Eventually meeting up with Nami, Usopp, and Brownbeard, the two groups turn their attention to Caesar’s lab where Zoro and Kin’emon are able to cut down the iron shutter, allowing them to enter. As a result of cutting the iron shutter, the poisonous gas is then able to flow in. The G-5 Marines are able to plug the hole with boards and they blame Zoro and Kin’emon for putting everyone in danger. They prepare to arrest the Straw Hats and Brownbeard and Zoro is getting ready for a fight.
Law interrupts them and then tells everyone present about a way off the island but will have two hours to escape. The groups then split into three teams with Zoro going with Kin’emon, Nami, Usopp, and Sanji while the G-5 Marines goes with Tashigi. Usopp tells Zoro of Luffy’s earlier defeat at the hands of Caesar. Zoro then mentions about how his group were beaten by the Yeti Cool Brothers and comments on how they cannot let their guards down anymore. While Luffy goes after Caesar, Zoro yells at him, telling him not to be careless and reminds him that they are in the New World.
When the G-5 Marines attempt to capture the Straw Hats, they are repelled by Zoro, Kin’emon, and Brook’s three-way attack. Tashigi stops them from fighting any further and allows the Straw Hats to continue on their way. One of Caesar’s henchmen fires a cannon at the wall of Building A, allowing the gas to enter. As the gate exiting Building A is closing, Zoro and the others then make a dash for it. They manage to escape to the passageway to Building B before the gate seals completely.
Brownbeard, Kin’emon, and Zoro’s group go on ahead through Building B, leaving Tashigi and the Marines to mourn the ones who did not make it. After attacking Tashigi’s group, the small dragon goes after the group riding on Brownbeard. Zoro, lying on Brownbeard’s back, appears unfazed by the fire the dragon is breathing, and merely comments that it is more dangerous than the large dragon due to its agility. After the dragon’s defeat, the group then find Chopper (in Monster Point) trying to prevent the children from getting their candy. Regardless of his efforts, the children beat him down and run pass him when the Rumble Ball wears off.
Zoro, Nami, Kin’emon, Robin, Usopp, and Brook quickly come to Chopper’s aid and run after the children to the Biscuits Room. Once they reach there, they encounter Monet. Zoro asks who it is, and Usopp says that it is the bird woman he had seen before. As Monet stabs Robin from behind, Zoro shouts her name out and interferes from Monet attacking further stating she is a Logia user and that he will fight her and tells Robin to handle the rest of the kids as he clashes with Monet. Monet tries to attack Nami, Robin, and Chopper when they attempt to go after the children, but Zoro quickly blocks her.
Nami retaliates with a Heat Egg, damaging Monet. She then dives into the snow and stops Nami, Robin, and Chopper from leaving by creating a wall to block their path. After Robin shatters Monet, Zoro slices down the barrier, allowing Chopper, Nami, and Robin to escape the room and go after the berserk children. Monet and Zoro then continue their duel, and Monet comments that oddly enough, Zoro is not on the offensive at all and wonders whether she could defeat Zoro. Sanji, Tashigi, and the G-5 Marines later arrive at the Biscuits Room.
Zoro and Sanji then comically yell at each other, despite the serious situation. Tashigi then decides to stay with Zoro and fight against Monet while Sanji and the Marines go find the children. Tashigi and Zoro begin to argue over Zoro’s dismissive treatment of Monet and his apparent reluctance to cut her, with Tashigi believing this to be another example of Zoro’s sexism. Zoro gets mad at Tashigi and then he decides to sit out and let Tashigi handle Monet. After a while, Tashigi starts to lose against Monet.
After Monet bites Tashigi in the shoulder, Zoro steps in and cuts Monet on the cheek with Armament Haki. While Monet is shocked, Zoro shows how serious he is and slices her in half with Daishinkan. However, since he did not imbue Haki into his attack, Monet survives. Monet becomes filled with terror knowing that Zoro could have killed her if he chose to. Upon pulling herself together, she tries to attack Zoro in the back only to be struck down by Tashigi.
Shortly afterwards, Tashigi berates Zoro for not dealing the finishing blow to Monet when he had the chance, and then she once again gets irritated with him when he tells her that he would have cut Monet if Tashigi did not. After Zoro congratulates her and lets her have the credit, Tashigi gets angry and asks why he talks to her as though he is above her. Zoro simply responds by saying that she is indeed below him, much to her annoyance. After the battle, Tashigi and Zoro try to get away from the deadly gas. Zoro carries Tashigi over his back while she asks him to put her down as soon as they reach her subordinates. While being carried, she notices his rare sword Shusui, and get excited about it. Zoro tells her to stay still and quiet. Zoro gets together with the rest of the Straw Hats, the G-5 Marines, the kidnapped children, Law, Momonosuke, Brownbeard, and Kin’emon who has been petrified by the deadly gas. As Zoro tries to help Brook solve Kin’emon’s predicament, the group enters a rail cart in an attempt to escape the island. While riding through the escape passage, Zoro defends the cart by slicing the falling rubble. Once they made it outside, they find Franky in his General Franky and two of Doflamingo’s subordinates, Buffalo and Baby 5.
Aftermath
After the defeat of Buffalo and Baby 5 and the capture of Caesar Clown, Zoro has a feast with everyone else. Later, while Tashigi and her men are taking the children away from Punk Hazard, the Straw Hats leave with Law, Kin’emon, and Momonosuke. While sailing to their next destination, Dressrosa, Luffy tells everyone that he and Law formed an alliance to defeat one of the Four Emperors. Zoro seems eager for the challenge. With everyone gathered around, Law explains to the crew about Doflamingo’s connection to the underworld and the plan to decimate Kaidou’s forces. Later that evening, Kin’emon notices that Zoro is holding Ryuma’s sword and demands a duel with him, accusing him of defiling the grave of Wano’s hero. Zoro denies doing such thing as he fends off Kin’emon’s attack. Kin’emon eventually ceases his attack when he learns that his son is bathing together with Robin. On the next morning, everyone reads the news about Doflamingo’s resignation from the Seven Warlords. They see that the newspaper also explains about Luffy and Law’s alliance as well as the alliance between Kid, Hawkins, and Apoo.
Dressrosa Arc
The Next Objective
After Law contacted Doflamingo to inform him that they will bring Caesar to Green Bit, Zoro had a meal with the rest of the crew while Kin’emon and Momonosuke told them the story about how they were shipwrecked and drifted to Dressrosa, how Momonosuke was separated from his father, and how Kanjuro was captured. The Thousand Sunny later approached Dressrosa. After arriving at Dressrosa, the group split up into teams. Zoro went along with the team to destroy the SMILE Factory and save Kanjuro. The team saw everything Dressrosa is famous for and stop by at a restaurant to get something to eat after putting on disguises.
At the restaurant, they found some thugs taking advantage of a blind man while taking away his money in a roulette. After Luffy called the thugs’ bluff, they then witnessed the blind man used some gravity-like ability on the thugs. After the man left without saying who he was, a commotion started with various people having their possessions mysteriously stolen. A bystander claimed that it was the work of fairies. Zoro got instantly worked up when he noticed that Shusui was missing.
Zoro managed to spot the thief holding his sword and immediately gave chase alongside Sanji and Kin’emon. Kin’emon declared that when they capture the thief, he will duel Zoro for the sword. Zoro eventually lost sight of the thief. When Sanji was distracted by a woman named Violet, Zoro ran off, leaving Sanji behind. Zoro later caught up with the thief and retrieved his sword.
Right after that, Zoro saw the thief, a dwarf named Wicca. Zoro then grabbed her as she berated herself for getting caught. Since she sprained her leg, she begged Zoro to take her to the flower field so she can report to her commander. She informed Zoro that the Donquixote Family was on their way to attack the Thousand Sunny. Zoro was about to rush to the shore, but Wicca urged him to carry her to the flower fields first.
As she guided him, she berated Zoro for his terrible sense of direction. Zoro and Wicca later arrived at the Riku Royal Army Headquarters hidden beneath the flower field where Franky and the Thunder Soldier are also present. While Wicca tried to remind Zoro about the Thousand Sunny, he watched Luffy competing in a tournament at the Corrida Colosseum via a video broadcast and was grumpy that he did not get to participate along with Luffy. After learning that Usopp and Robin also have an encounter with the dwarves, Zoro suddenly remembered that he needed to get back to the Thousand Sunny. Zoro was then seen running back to the Sunny with Wicca beside him.
On the way, Wicca told him about Giolla as well as Doflamingo’s three strongest subordinates. They then ran into Sanji and Kin’emon. After learning that Nami’s group back at the Thousand Sunny was in trouble, Sanji went to save them. Zoro and Kin’emon stayed behind at the Corrida Colosseum, wondering how to get in. Bartolomeo then spoke to them and offered to help them find Luffy while asking for Zoro’s autograph. With Bartolomeo’s guidance, Luffy came to them. Zoro stated his frustration of not being invited to compete in the colosseum. He then informed Luffy that the colosseum was surrounded by Marines, who quickly dismissed the fact despite Kin’emon’s shock. They then engage in a conference call with Sanji and Franky’s group. After everyone is brought up to speed and learned the true situation on Dressrosa, they gained Luffy’s approval to join the revolution. Zoro, Kin’emon, and Luffy then witness the dramatic conclusion of a battle between Doflamingo and Law which raged across Dressrosa and stopped right outside the colosseum. They are shocked to see Doflamingo standing above his opponent and then shoot Law three times at close range.
The Decisive Conflict Against The Donquixote Family
Zoro and Kin’emon then rushed Doflamingo to save Law. Zoro was intercepted by Issho, the blind gambler they had helped earlier. As Kin’emon informed everyone of what was happening, Issho used his ability to push Zoro underground, but the swordsman was able to propel himself and send a flying slash towards the Admiral, which he repelled commenting on it being merciless. After Kin’emon was kicked away by Doflamingo, the samurai informed everyone that the blind gambler is actually a Marine Admiral. Both Doflamingo and Issho float above their opponents using their abilities, taking Law with them and head towards the palace.
After the Marines started pursuing Zoro and Kin’emon, Zoro told Luffy to find the exit. They then heard that the Sunny was under attack by the Big Mom Pirates, who are after Caesar Clown. While Sanji’s group continued on to Zou and Franky’s group was left in charge of destroying the SMILE Factory, Luffy decided to go to the palace with Zoro and Kin’emon to rescue Law and fight Doflamingo. After Luffy finally escaped the colosseum, the trio wore disguises to elude the Marines, provided by Kin’emon’s ability. Zoro was annoyed that Luffy had been crying nonstop.
Luffy then revealed to Zoro and Kin’emon that someone dear to him is still alive. Zoro, Luffy, and Kin’emon later arrived at the lift that leads to the royal palace alongside the dwarf, Wicca. There, they encountered Viola, who offered to guide them to the palace. After getting acquainted with her and learning about her ties with the Riku Family, Zoro’s group was then led to a secret passage. Once inside the passage, Zoro suggested that they use a basket used for lifting supplies and that Luffy should climb up carrying a rock and hang from the chain to act as a counterweight for the basket to move up.
He and Kin’emon then sit in the basket before Luffy reached the top. They were later seen at the palace rampart tower. Viola was about to sneak them in, but Luffy went ahead and smashed his way through the gate. Having alerted the guards, they decided to charge in. Once Zoro, Luffy, and Viola reached the Rampart Tower B-1, they were intercepted by Pica. After Viola explained about Pica’s Devil Fruit power, Pica attempted to crush Zoro’s group with the palace walls. Luffy and Viola went ahead while Zoro stayed to battle Pica. While fighting the executive officer, Zoro wondered how he should attack him. During the time the toys transformed back into their original forms, Pica left the battle and Zoro wondered where he went. He later went outside of the outer wall tower and noticed the commotion happening in the country and continued wondering where Pica was.
The Birdcage
After Doflamingo trapped Dressrosa in his Torikago and Pica relocated the royal palace to the top of the Flower Hill, Doflamingo forced everyone into a survival game and put a price on the heads of a certain group of people. Zoro was included in Doflamingo’s hit list, with his two stars giving him a 200 million bounty. Zoro reunited with Luffy’s group and contacted Robin through Den Den Mushi. After Luffy declared that he will defeat Doflamingo and end his game, he grabbed Zoro and Law and pursued Doflamingo. Luffy jumped down from the King’s Plateau and they landed in the middle of a crowd of enemies.
After a brief scuffle with Senor Pink, Machvise, and Dellinger, the Dressrosa citizens started attacking Zoro and his group. Issho soon arrived to confront them as well. While Zoro clashed swords with Issho again, Pica joined the fray while appearing as a massive stone giant. When Luffy made Pica angry by laughing at his high-pitch voice, the elite officer threw a colossal punch. Luffy and Zoro ran from it, with Zoro chastising Luffy for laughing at his voice, but simultaneously failing to suppress his own laughter, much to Law’s annoyance.
The impact of the punch sends Luffy, Zoro, and Law flying to the square in front of the colosseum. They are soon joined by those who also wished to fight Doflamingo: Cavendish, the Chinjao Family, Hajrudin, Elizabello II, Dagama, Abdullah, Jeet, Orlumbus, Ideo, Suleiman, and Blue Gilly. Zoro commented that Luffy made strange friends and also commented on their big ego when each of them said that they will defeat Doflamingo themselves. After Ucy joined the group, Zoro and his allies then marched towards the royal palace and began to fight against Pica. When Pica attacked, Chinjao and Elizabello II shattered his stone arm, enabling Zoro and his allies to move forward.
Pica prepared to attack with his other arm and Zoro informed Chinjao and Elizabello II that attacking Pica’s stone body is useless. Pica attacked with his other arm, causing Luffy’s allies to fall back. As this happened Zoro, Luffy, Law, Abdullah, Jeet, and Ucy managed to jump on his arm and started climbing on it. Pica soon noticed them after regenerating his shattered arm, he prepared to attack Luffy again. Luffy then responded by shattering Pica’s stone head with Gomu Gomu no Grizzly Magnum.
After Luffy shattered Pica’s stone head, Zoro discovered Pica’s real body, which appeared in front of the group. Pica took out his sword and tried to attack Ucy carrying Luffy’s group but Luffy carried the bull and evaded the sword. Pica tried to strike again, but Zoro intercepted him and initiated another battle with the executive. As the battle went on, Zoro was able to fight Pica without much difficulty. Zoro and Pica later noticed Robin, Rebecca, and Bartolomeo approaching from the sky with the assistance of Yellow Great Rhinoceros Beetles.
Pica prepared to attack the trio with the stone statue, but Zoro used Senhachiju Pound Ho to strike him, halting Pica’s attack and injuring him in the process. Zoro then explained to Pica that he is the man who will become the greatest swordsman in the world. Enraged that Zoro’s interference allowed Rebecca’s group to pass him, Pica charged at Zoro again, declaring that he would not be allowed to leave alive. Pica eventually sent Zoro crashing into the second level of the New King’s Plateau though Zoro did not sustain any serious injuries. Some of Doflamingo’s grunts were about to attack Zoro, but Orlumbus arrived and repelled them.
After thanking Orlumbus, Zoro ran through the second level and was quickly confronted by Pica again. The swordsman then angered Pica by making fun of his laugh. Machvise then noticed Zoro and prepared to crush him with Hakai no Senton Vise. Before Machvise landed, Hajrudin delivered Gungnir to the officer and send him flying to the ceiling of the Torikago. When the giant collapsed from his injuries, Zoro promised him that the Torikago would be gone by the time he woke up.
Elizabello II later offered some assistance. Zoro appreciated the offer but told him to save his King Punch for later. Zoro then witnessed Lao G’s defeat and took note of Sai’s destructive power. After Pica went to Flower Hill to speak to Kyros and Rebecca following Diamante’s defeat, he returned to the second level to fight Zoro and attack the wounded. Zoro reminded him that he was his opponent and while fighting with him, Pica asked who it was standing on the Old King’s Plateau.
Zoro told him it was the rightful king of Dressrosa, enraging Pica. Pica inhabited the statue and made his way towards the Old King’s Plateau. Zoro quickly went over the options he had to stop Pica and eventually made the decision to leap into the sky and cut him in half. Zoro prevented Elizabello from using his King Punch just yet and asked him to wait for two minutes while he dealt with Pica. Running up to Orlumbus, Zoro had him use his Teitoku Killer Bowling to propel him toward Pica, who was preparing to crush Riku Doldo III.
Imbuing his swords with Armament Haki and preparing Santoryu Ogi: Ichidai Sanzen Daisen Sekai, Zoro proclaimed that there was nothing in this world that he could not cut before bifurcating Pica’s stone form with Ichidai Sanzen Daisen Sekai. He proceeded to cut the top half of the stone in half to determine where Pica was, only for Pica to emerge on his own and armor his entire body with Armament Haki before claiming that Zoro has not won just because he has destroyed the stone body. However, Zoro notes that the end result of this battle depends on whose Haki is stronger before cutting down Pica in midair with Ichidai Sanzen Daisen Sekai. After Elizabello used his King Punch to blast away the rest of Pica’s stone body, Zoro noted that he was just in time. Hanging on to a wall, Zoro examined his sword for any nicks and was satisfied to find no marks on his sword.
He was then pulled up by Usopp, at which point the latter and Kin’emon praised him for his display of strength. Zoro told them to save their praise for when the Torikago was taken down, as it was proof that Doflamingo still had not been defeated. As Doldo, Tank, and the citizens were leaving the Old King’s Plateau, Zoro heard about Law’s defeat from Viola. Zoro then watched nervously as Torikago started to shrink. As he left the Old King’s Plateau, Zoro informed Kin’emon and Kanjuro about his intention to stop Torikago.
While running past Franky, Zoro informed him of his plan to buy time. Once he and the samurais reached Torikago, Zoro hardened his swords with Haki and attempted to push Torikago back despite the samurais’ objection. Zoro then angrily asked them to help him instead of doing nothing. Zoro continued pushing back Torikago with his swords as many others joined in. Once Gatz announced Luffy’s promise to defeat Doflamingo with one punch continued pressing, Zoro hoped that Luffy could fulfill his promise, knowing that they could not keep Torikago back forever. When Luffy regained his strength after being worn out for ten minutes, Zoro smiled. Once Luffy finally defeated Doflamingo, Zoro and the samurais witnessed the collapse of Torikago. Zoro continued smiling as everyone on Dressrosa celebrated Doflamingo’s downfall.
After Doflamingos Defeat
Zoro and his group were later seen resting and recovering in Kyros’ old house. Zoro then listened to Sabo’s story. Before Sabo departed, he gave Zoro a vivre card for Luffy. Three days after Doflamingo’s defeat, Zoro and the other Straw Hats continued with their recovery. They were eating a meal as they heard the rumor about Rebecca’s father.
Bartolomeo then entered the house and informed them that the Marines were mobilized to pursue the Straw Hats. He also explained that there is an escape route planned for them. When the Marines were about to storm Kyros’ house, Zoro and the others fled. Zoro’s group then went to the eastern port. While waiting for Luffy, they saw Issho approaching.
When Issho prepared to strike all of Luffy’s allies with all the rubble from Dressrosa, they quickly fled to the escape ship. At that moment, Luffy arrived and attacked Issho. As Zoro watched the battle between Luffy and Issho, Zoro wondered why Luffy was announcing each of his attacks. After Luffy was blown away and caught by Hajrudin, Zoro prepared to fight the admiral, but Bartolomeo stopped him, saying that it was not the right time or place. The Straw Hats and their allies quickly fled across a bridge leading to a gigantic ship in the distance.
Issho prepared to drop the rubble on them but was obstructed by the Dressrosa citizens who were pretending to chase after the pirates. The Straw Hats and their allies eventually reached Orlumbus’ flagship, the Yonta Maria. After boarding the ship, the following pledged their allegiance to the Straw Hats: Cavendish of the Beautiful Pirates (including Suleiman), Bartolomeo of the Barto Club, Sai of the Happo Navy, Ideo of the XXX Gym Martial Arts Alliance (including Blue Gilly, Abdullah, and Jeet), Leo of the Tontatta Tribe, Hajrudin of the New Giant Warrior Pirates, and Orlumbus of the Yonta Maria Grand Fleet. When Luffy was asked to drink a sake cup to complete the agreement for an alliance, Luffy declined, much to the others’ shock. While Luffy was explaining that they can do whatever they want, Zoro drank from Luffy’s cup. Thanks to him, Luffy found his cup empty when Sai, Bartolomeo, Leo, Cavendish, Ideo, Orlumbus, and Hajrudin sat down and drank their sake cups. Once the Straw Hat Grand Fleet was formed, they held a feast to celebrate their victory over Doflamingo. After the feast, each of the leading allies received Luffy’s vivre card and parted ways. Bartolomeo then brought the Straw Hats, the samurais, and Law to his ship, the Going Luffy-senpai. After Zoro noticed the Straw Hats’ increase in bounty from a newspaper, Bartolomeo proudly showed Luffy’s group their new wanted posters. Upon seeing his, Zoro gleefully asked if there was any alcohol around so that he could celebrate.
Whole Cake Island Saga
Zou Arc
Encounter With The Mink Tribe
During a hailstorm, Zoro was shocked to learn that the Barto Club does not have a navigator, lack experience in sailing, and they usually called a granny who gives them useless advice. Therefore, Zoro, the other Straw Hats, the samurais, and Law needed to protect the ship. After one week of traversing through the dangers of the New World, the ship finally arrived at Zou. After finding the Thousand Sunny, the Barto Club bid Luffy’s group farewell. Proceeding to search for Sanji’s group, they climbed the giant elephant’s left hind leg with a dragon that Kanjuro conjured.
After the samurais explained that they were also searching for their ninja comrade, Raizo, the group saw something dropping towards them. The thing that was falling towards them happened to be a monkey. The monkey hit Kin’emon and Kanjuro, causing them to fall off the dragon. Despite being separated from the group, the samurais assured the Straw Hats that they were alright and will catch up to them eventually. The rest of the group considered turning back for them, but after they saw the dragon struggling to climb, they decided to continue towards the top.
Once they reached the top, the dragon turned back into a drawing while Zoro and Law remained unconcerned about it. They later entered a village and Luffy ran ahead of the group. While exploring the village, they saw signs of a recent attack. Zoro was then attacked by a rabbit mink named Carrot and they clashed until a dog mink, Wanda, appeared and stopped her. Right after Wanda interrupted the fight, Zoro wondered what kind of weapon Carrot uses.
Wanda and Carrot proceeded to leave in a hurry to deal with an intruder at Whale Forest. Before leaving, Wanda explained to Zoro’s group about where to find a “corpse” of their comrade. Zoro and the others thought that Wanda was saying the other Straw Hat members died, but they did not believe that to be true and they continued exploring the island. As they explored the Mink Tribe’s civilization, they found more signs of a recent battle. During their exploration at Kurau City, the group experienced an eruption rain and they fled to higher ground.
Once the rain passed, they surmised that it is a daily occurrence based on how the city is built. Right after Usopp spotted Luffy with Carrot and Wanda, Law teleported the group close to their location. Wanda then led them into Rightflank Fortress, where they reunited with Nami and Chopper. While having a feast with the Mink Tribe, Zoro was annoyed with how the minks wanted to play with him. The group was then reunited with Brook, who explained that Momonosuke was safe but refused to leave his room.
He also warned the group not to mention samurai or the Wano Country. Before he could explain the reason, he was interrupted by canine minks. Nami then asked them what to do about Sanji. Since Sanji left a letter, Zoro and Luffy were not too worried, much to Nami’s chagrin. Zoro then listened to Nami and Chopper’s story about how they escaped the Big Mom Pirates before listening to Wanda’s story about how Nami’s group saved the Mink Tribe.
After hearing that Duke Inuarashi awakened from his coma and wanted to meet Zou’s benefactors, Zoro and his group went to meet him. On the way, Wanda began to explain to them about Jack’s attack on Zou in more detail. During her explanation, Wanda revealed that Jack was searching for a Wano ninja known as Raizo. After Wanda finished with her recollection, Brook explained to his crew the reason why they should not mention samurai or the Wano Country. They then arrived at the duke’s home where they were introduced to Shishilian, who expressed his gratitude to the crew.
After entering the duke’s home, they heard about a weapon Jack used against the Mink Tribe. After Wanda recalled the devastation caused by Jack and the Mink Tribe’s salvation, the Straw Hats decided to visit Nekomamushi and the Guardians. They then traveled to Whale Forest with Wanda and Carrot. After hearing about the circumstances concerning Sanji’s departure from Zou, Zoro appeared indifferent about it, much to Chopper’s annoyance. Zoro then reminded his crew that as much as destroying the SAD factory on Punk Hazard angered Doflamingo, destroying the SMILE Factory at Dressrosa angered Kaidou.
He went on explaining that Kaidou was also targeting the samurai for some unknown reason, and they should be expecting a confrontation with the Beasts Pirates sometime in the future. Zoro and Nami then argued about whether or not Sanji was at fault for leaving. After Luffy decided to find Sanji, they arrived at the Whale Forest. Zoro listened in on the conversation between Luffy and Pekoms as Pekoms explained in detail about Sanji’s predicament. Luffy then ran out to look for Chopper and found Zoro sitting on a bench. Luffy assumed that Zoro was also worried about Sanji, much to his annoyance. Nekomamushi arrived and greeted Luffy and Zoro. Zoro, his crew (except Franky, Robin, and Brook), and the Heart Pirates then partied with Nekomamushi and his subjects.
Revelations And A New Alliance
On the next morning, Zoro and his group heard a bell ringing and realized that Kin’emon and Kanjuro had arrived. They quickly rushed to find them, fearing what would happen if the Mink Tribe meets the samurais. The Straw Hats managed to intercept Kin’emon, Kanjuro, and Momonosuke just as they arrived at Kurau City and tried desperately to keep them hidden. However, as Nekomamushi and Inuarashi were fighting, Kin’emon and Kanjuro revealed themselves. Contrary to what the Straw Hats expected, the Mink Tribe welcomed the samurai and revealed that Raizo is safe.
The Straw Hats were stunned to learn that the minks knew about Raizo all along and went to great lengths to keep him hidden despite the abuse they suffered. The Straw Hats were further shocked when they learned that Momonosuke was not Kin’emon’s son, but rather was the heir to the daimyo of Kuri. However, Zoro and Usopp became enraged when Momonosuke hugged Nami, and she was fine with it due to deducing that his father was wealthy. Inuarashi and Nekomamushi then led the Straw Hats, Law, and the samurai to Raizo’s location, a secret cave inside the whale-shaped tree. When Robin deciphered the red poneglyph hidden inside the Whale Tree, Inuarashi then explained to the Straw Hats about the four Road Poneglyphs and they listened in anticipation as he revealed how they can lead to Laugh Tale and Nekomamushi revealed that Kaidou and Big Mom each possessed a Road Poneglyph.
The Straw Hats were surprised when Nekomamushi revealed that Momonosuke’s ancestors created the poneglyphs. However, the samurais explained that Momonosuke never inherited the knowledge of the poneglyphs due to the execution of Oden at the hands of Kaidou and the shogun of Wano. When Zoro asked why Oden was executed, Kin’emon revealed that Oden was part of Roger’s crew and had been on Laugh Tale with him as well as the Beasts Pirates’ objective in obtaining the secret that Oden knew. Zoro then realized the reason why Doflamingo and Kaidou were after the samurais. However, they explained that Oden never revealed the secret of the world to them before he died.
He then watched Luffy formed an alliance with the samurais and the Mink Tribe in order to defeat Kaidou and the shogun of Wano. Right after they left the secret room, Zoro and the others learned that Inuarashi and Nekomamuhi traveled with Oden and had been on the ships of both Whitebeard and Roger. The alliance decided to split up to accomplish different tasks and meet up again at Wano. However, before they could start their operation, they felt Zou shaking and heard Zunesha crying. As everything shook around them, they witnessed Luffy and Momonosuke’s ability to hear Zunesha’s voice. They then heard from Momonosuke that Jack returned to Zou and started attacking Zunesha. On Momonosuke’s command, Zunesha sank Jack’s fleet with one blow. With the threat of Jack ended, everyone became calm again. While the Ninja-Pirate-Mink-Samurai Alliance prepared to get on with their missions, Zoro decided to accompany Kin’emon’s team. As the Sanji Retrieval Team departed from Zou, everyone, except for the Straw Hat members left behind, were shocked when Luffy jumped off Zunesha with his party.
Wano Country Saga
Wano Country Arc
Zorojuro The Ronin
Upon arriving at Wano, Kin’emon instructed the Straw Hats and Heart Pirates to blend in with the populace as they readied their plot to recruit allies for the raid on Onigashima on the day of the Fire Festival. Zoro adopted the alias “Zorojuro” and wandered the streets of the Flower Capital as a ronin. However, he was then arrested under the accusation of committing murders on the streets at night. He was brought before the magistrate Toyama Tsujigiro, who sentenced him to death by seppuku and confiscated Shusui. However, Zoro then noted the smell of blood on Tsujigiro and realized he was the murderer.
Zoro then unleashed a flying slash that cut down Tsujigiro, as well as sliced through much of the structure he stood on. Now a wanted man, Zoro escaped from the Flower Capital and lived as a vagabond, eating the animals that roamed the vast wastelands. One day, he encountered a platoon of Beasts Pirates chasing a villager named Tsurujo, and took down the pirates. A nearby Luffy then called out to Zoro, and the two crewmates reunited. However, their reunion was quickly interrupted by the arrival of another Beasts Pirates platoon led by Basil Hawkins.
The two groups began fighting and Zoro slashed at Hawkins, but the damage was transferred to one of the Super Rookie’s subordinates due to his Devil Fruit power. Luffy and Zoro were then pulled away by the komainu Komachiyo in order to get treatment for Luffy’s sick companion Tama. Hawkins covered himself in straw and fired large nails, some of which struck Zoro and injured him; however, Zoro kept him at bay with a sword slash. Tsurujo then introduced herself to Luffy and Zoro, and said they could go to her house where she would brew a treatment for Tama. The group went to Okobore Town, where a woman named O-Kiku bandaged Zoro’s wounds.
A sumo wrestler named Urashima was courting Kiku, but ran off after encountering Zoro. After treating Tama, Tsurujo told Zoro and Luffy about the destruction inflicted on Wano by Kurozumi Orochi’s shogunate. Zoro then intercepted an arrow fired by the Beasts Pirates Gifter Batman at Tsurujo, and as he was fending off more arrows, Tama was then kidnapped by the Gifter Gazelleman. Kiku immediately took a sword and mounted Komachiyo to pursue them, and Luffy pulled himself and Zoro up on the animal as well. As they got moving, Kiku revealed that she was a samurai.
The trio rode Komachiyo to Bakura Town, a place populated with pirates and government officials. They came to a sumo ring where Urashima was competing, and Kiku hid behind Zoro. However, Urashima’s subordinates were able to get to her and carry her off, though Kiku responded by cutting off Urashima’s topknot. Luffy entered the ring and defeated Urashima, and some Beasts Pirates then arrived to confront the trio. As Zoro, Luffy, and Kiku fended them off, the Shinuchi Holed’em then arrived with Tama as his hostage. Luffy proceeded to knock out Holed’em and rescue Tama, while Zoro seized a cart full of fresh food and had Komachiyo pull it out of the town. They were joined by Law, who berated Zoro for getting into trouble once again. They successfully made it back to Okobore Town with Tama and the food in tow, and the impoverished citizens were delighted to be able to consume fresh food and water.
Meeting Tonoyasu And Hiyori
Law told Zoro and Luffy to go with him to the ruins of Oden Castle on a nearby mountain, and they were joined by Kiku. However, as they rode Komachiyo up the mountain, Zoro inexplicably got lost and ended up wandering to a wharf, where he took a ride on a boat. While sailing, he received a newspaper with the news that Luffy had been beaten by Kaidou, which caused him to recoil in shock. Zoro ate a lot of sushi and wasabi on his ride, but a man named Tonoyasu paid for it. The two of them then went to an inn, where Zoro won a considerable amount of gambling matches and beat up yakuza thugs who tried to stop him.
This caused Tonoyasu to tag along with Zoro for protection, and the two of them walked through Kibi together. Yasu took Zoro to his homeland of Ebisu Town by the Flower Capital, where the residents all smiled and laughed constantly. The next day, Shusui was stolen by a man named Gyukimaru, and Zoro chased him all the way to Ringo. They dueled on Oihagi Bridge after Gyukimaru had already returned Shusui to Ryuma’s grave, with the bandit not believing that Zoro had obtained the legendary sword rightfully. However, the duel was interrupted when a young woman and Toko came rushing in while pursued by the assassin Kamazo.
The woman begged Zoro to help her, and Zoro agreed on the condition of receiving food and alcohol in return. Zoro and Kamazo then engaged in a fierce duel, but Gyukimaru would occasionally jab at Zoro with his naginata while the swordsman was distracted, forcing him to make even more effort to dodge. Eventually, an attack from Gyukimaru distracted Zoro enough to allow Kamazo to impale the side of his chest with a scythe. However, Zoro was then able to rip out the scythe and put it in his mouth in place of Shusui, and he performed Rengoku Oni Giri which cut down Kamazo. He then collapsed and fell unconscious from his bleeding.
Zoro woke up in a house in the Northern Cemetery and found the woman had tended to his wounds. She gave him the food and alcohol that he requested and revealed her relationship to Momonosuke as his sister Hiyori. Zoro then fell asleep, and was woken up the next morning by the arrival of Brook; to his shock, Hiyori had been laying on his chest. Brook revealed that Tonoyasu was going to be executed in the Flower Capital shortly, and Toko, revealing that Yasu was her father, ran off to find him. Zoro, Brook, and Hiyori chased after her, but they arrived at the city right as Tonoyasu, who was actually the former daimyo Shimotsuki Yasuie, was shot to death by Orochi and his forces.
Zoro was appalled upon seeing Toko and the Ebisu Town citizens laugh in response to Yasuie’s death, but Hiyori then revealed to him that they had no choice as Orochi put defective SMILEs in their food supply that forced them to smile and laugh all the time. Orochi then attempted to shoot Toko as she stood over her father’s body, and both Zoro and Sanji moved to save her. Enraged at the shogun, Zoro launched Nanahyakuniju Pound Ho toward him, but this attack was countered by the samurai Kyoshiro. The two of them dueled as Kyoshiro prevented Zoro from going after Orochi, allowing the shogun to escape. Hiyori then came under attack by the Orochi Oniwabanshu ninja Fujin and Raijin, and Zoro went and cut down Raijin as he took Hiyori to safety.
Zoro and Hiyori escaped to the Enma Shrine outside the capital, and Zoro was forced to cut down many Oniwabanshu members pursuing them. After taking care of their threat, he decided to go to Ryuma’s grave and get Shusui back, expressing his desire to avenge Yasu. Zoro and Hiyori returned to Oihagi Bridge the next day, and Zoro overwhelmed Gyukimaru in their rematch. However, their duel was interrupted by the Kouzuki Family retainer Kawamatsu, who reunited with Hiyori. A group of Beasts Pirates then arrived to attack Gyukimaru, but Zoro and Kawamatsu proceeded to quickly take them out.
Gyukimaru then ran off, and Zoro pursued him. Zoro chased Gyukimaru to an abandoned village, where the bandit opened up a secret entrance before disappearing. Zoro, Kawamatsu, and Hiyori discovered a room filled with weapons, which Kawamatsu and Gyukimaru (who was actually a shapeshifting komagitsune named Onimaru) had stockpiled many years back in preparation for the impending battle. Hiyori then requested that Zoro leave Shusui in the possession of Wano. Zoro initially objected, but she offered to give him Enma, a Meito of the same quality that once belonged to her father, as a replacement. Zoro agreed to this in exchange for being allowed to visit Ryuma’s grave, and two days later he went back to Kuri with Kawamatsu to meet with the alliance and discuss the strategy for their invasion, with Hiyori remaining in Ringo until the war ended. Tenguyama Hitetsu presented Enma to Zoro, and as Zoro took the blade, a considerable amount of Armament Haki was drawn out from his arm. However, Zoro managed to take control over Enma and regulate the amount of Haki it drew before it could sap him of all his strength. He then tried to cut a tree with the blade, but to his shock accidentally unleashed a cut powerful enough to slice off the entire cliff face. For the next five days, Zoro trained with Enma to improve his control over the Meito.
Raid On Onigashima
On the day of the Fire Festival, Zoro and the Straw Hats sailed out from Kuri on the Thousand Sunny and went to the alliance’s promised meeting place of Tokage Port. They arrived there at the same time as the Heart Pirates and Kid Pirates, and the three crews came just in time to stop a Beasts Pirates fleet from attacking Kin’emon’s group. The rest of the samurai in the alliance arrived soon afterwards, and the battle against the Beasts Pirates fleet concluded when Jinbe suddenly arrived to take out their last ship. The Straw Hats had a happy reunion with Jinbe, who officially became part of their crew. The alliance fleet drew close to Onigashima, and the Straw Hats proceeded to disembark and take out the Torii Guards at the island’s entrance.
The rest of the alliance then disembarked, and although the plan was for them to sneak around to the back entrance of Kaidou’s castle, the Kid Pirates had already entered it through the front. Luffy decided to go after them and stop them, and Zoro went in afterwards to stop Luffy in turn. After hearing chaos erupt, Zoro cut a tower on the Live Floor to see what was going on and found Luffy. With their identities now exposed, the two pirates were forced to battle the massive hordes of Beasts Pirates in the castle, and the Super Rookie and Beasts Pirates informant Scratchmen Apoo joined in their assault by using music-based attacks which dealt significant injuries to both pirates. Realizing they were in danger of taking excessive damage before even meeting Kaidou, Zoro grabbed Luffy and tried moving to a safer area.
They ran into Kid and Killer in the process, and the latter told them to cover their ears to gain immunity to Apoo’s attacks. Zoro became split up from the others as they advanced further into the castle, and stayed busy fending off hordes of Gifters; however, he was eventually joined by the alliance forces as they commenced their all-out assault. Zoro ended up on the Live Stage right as Luffy was about to pull himself up to the roof where Kaidou was through a hole in the Skull Dome’s ceiling, and he grabbed onto Luffy to go with him. However, the two of them were stopped in midair by the Beasts Pirates All-Star Queen, who transformed into a brachiosaurus and caught them in his mouth; to make matters more difficult, an aerial platoon led by the All-Star King flew in to further cut off air passage. Queen spat Zoro and Luffy down to the Live Floor far below, where they regrouped with the rest of their crew and geared up for another push to get Luffy and Zoro up to the roof.
The Straw Hats and other alliance forces charged into battle against the Beasts Pirates, and Zoro bisected the metal club of Goki of the Numbers before the immensely large fighter could attack a horde of samurai. As the battle raged on, X Drake, who had been one of the Beasts Pirates’ Tobiroppo, very suddenly attacked Juki and asked the Straw Hats to let him fight on their side. Zoro was immediately suspicious of Drake and the two clashed, with Drake assuring he was now an enemy to the Beasts Pirates but not divulging his true allegiance. However, when Apoo returned to the battlefield, the two of them decided to form a temporary truce to take him down. Queen then shot at the fighters on the Live Floor with Excite Bullets carrying a virus he had created called Ice Oni, which turned those infected mindlessly violent before killing them within an hour.
To make things into a game, he gave Apoo the antibodies for it, and Zoro immediately began chasing Apoo to seize them. Drake joined him again in assaulting Apoo; however, as the chase persisted, Zoro saw Big Mom heading up toward the Dome roof while more and more of the alliance’s forces falling victim to the Ice Oni. Tired of Queen’s game, Zoro proceeded to charge toward Apoo and cut him down in the blink of an eye. He seized the antibodies vial and immediately gave it to Chopper, and when Queen tried to shoot him, Zoro bisected his gatling gun with a long-range flying slash. Zoro then turned his attention back to getting up to the roof, and Marco of the Whitebeard Pirates arrived to help.
When Marco used his flames on Chopper to halt the spread of the Ice Oni virus, Brook and Zoro misunderstood Marco’s intention and attacked him. After spreading the flames to the other infected, Marco offered to fly Zoro to the roof, so Zoro put his trust in Drake who offered to help protect Chopper. Marco turned into his Beast Form and carried Zoro toward the hole in the roof. After grabbing hold of King and Queen, Marco threw Zoro up through the hole, and Zoro landed on the roof to confront Kaidou and Big Mom at the exact same time that Luffy, Law, Kid, and Killer arrived. After Luffy punched Kaidou to the ground and hurt him with advanced Armament Haki, Big Mom tried attacking the Super Rookies with her sun homie Prometheus.
However, Zoro was able to bisect Prometheus using Foxfire Style, which he had successfully learned from observing Kin’emon. Zoro and Killer then charged at Kaidou and struck him, but Zoro was unable to utilize enough power out of Enma to truly damage the Emperor. Kaidou then transformed into his Beast Form, and Zoro had Law teleport him into the air so he could bisect the Emperor’s fire breath and prevent it from striking Luffy. Zoro then unleashed Hiryu: Kaen from Enma toward Kaidou, but the strike missed and he proceeded to be struck by Tenman Daijizai Tenjin from Big Mom and her thundercloud homie Zeus. Luffy’s Gear 4 then expired after he used it to pummel Kaidou, forcing Zoro to carry him out of danger from Big Mom’s Haha no Hi.
Kaidou generated Tatsumaki that blew Luffy away from Zoro, and the Emperor trapped Luffy inside his mouth; however, Zoro then unleashed Kokujo: O Tatsumaki that successfully cut through Kaidou’s scales and forced him to release Luffy. Kaidou then transformed into his Human-Beast Form, and the Super Rookies formed a strategy to split up the two Emperors after failing to gain any sort of advantage. Kaidou and Big Mom proceeded to unleash a combined attack called Hakai that inflicted a devastating explosion-like force over a wide area; however, Zoro was able to resist the attack with all his might for just long enough to allow the Super Rookies to escape its impact. Despite taking considerable damage, Zoro then proceeded to go after Prometheus and cut it into pieces while Law and Kid successfully trapped Zeus, which allowed the latter two to then send Big Mom flying off Onigashima without either of her homies to save her from falling into the ocean. However, Kaidou moved to attack Zoro after knocking Luffy unconscious, and Law was forced to teleport the swordsman away to save his life even though this allowed Prometheus to go and save Big Mom.
As Kid and Killer went after Big Mom, Zoro decided to put his remaining strength into a last-ditch attack against Kaidou. Activating Kiki Kyutoryu: Ashura for the first time in ages, Zoro unleashed Ashura Bakkei: Moja no Tawamure on Kaidou that successfully inflicted a large cut on the Emperor’s chest. Kaidou noted in shock that Zoro had used Supreme King Haki in the attack as well, which confused Zoro as he was unaware, he possessed it. Zoro was disappointed that he had not knocked down the Emperor, but Kaidou still commended him, saying the cut would leave a scar. Kaidou then defeated Zoro and Law with Raimei Hakke, but as they collapsed to the ground, Luffy got back up and began equally clashing with Kaidou with his Haki; he told Law and Zoro that they could retreat and leave Kaidou to him.
Law teleported himself and Zoro inside the castle, and the duo ended up in midair, but were fortunately caught by Sanji. With Zoro having sustained numerous broken bones, Law told Sanji to put him in a splint, and Sanji reluctantly did so before carrying a bandaged Zoro with him back out onto the battlefield. Zoro fell asleep, but when Sanji ran into Kawamatsu and Izou, he briefly woke and told the trio to go to the Live Floor. There, Sanji unceremoniously threw him to Chopper, to have the swordsman attended to. As the battle continued, he learned the Minks possessed an instant recovery medicine, which possessed powerful side effects after it wore off.
Initially he was adamant to take it in order to rejoin the battle, but became worried due to how Miyagi was treating him. Sanji found Chopper with Zoro and told him to flee with him if the medicine is not working, but Chopper responded that Zoro had already been administered it, and that it was just taking longer due to his condition. Sanji then resumed fighting Queen as King ordered the Beasts Pirates to find Zoro and stop him from recovering. Zoro is eventually found by the remaining loyal members of the Beasts Pirates and the samurai attempt to keep him safe, but they are stopped by King. As King attempted to attack Zoro, his punch was blocked by Marco.
Queen then met up with King, and when the pair begin to attack Marco, Marco does nothing to stop them. He instead says that from this point on, the stars will be taking the stage. Just as he says this, Zoro, who has recovered, strikes King with Rengoku Oni Giri while Sanji strikes Queen with Diable Mouton Shot. Both Zoro and Sanji then say that when they conquer this battle it will give them a glimpse of Luffy as the Pirate King. King and Queen quickly recovered from the attack, and Queen began to attack Zoro and Sanji with beams in retaliation, which they both dodged.
Zoro questioned why Sanji was acting strangely, and Sanji uncomfortably pointed out that his body has felt off since he first used his Raid Suit. Zoro warned Sanji not to hold him back, causing the two to start bickering. The pair then blocked an attack from both King and Queen for each other, although with great resentment, and split up to face the All-Stars one-on-one, with Zoro preparing to fight King. As he was attacking King, Zoro was stunned when King’s sword was able to catch and pull away his own swords, sending them flying while King attempted to punch Zoro with his gloves which had spikes. However, Zoro was still able to stop King’s punch with his third sword in his mouth.
He quickly regained his swords back and then commented on their different view of combat, stating that King is no traditional swordsman and after King replied that one ought not limit to a single way of fighting, Zoro assured him that he will win this battle, even if it requires him to bite King’s throat out. Both then resumed their fight. Later, Zoro was caught off-guard when a dragon crashed into the Live Floor, with Luffy attached to its horns, and was later surprised alongside Sanji to hear that this dragon was actually Momonosuke, although altered. He would later be sent out of the Live Floor by King, and was caught by Franky, who happened to be nearby. He then advised Franky to leave King to him and head to the Live Floor and then prepared for King’s next strike, blocking King’s Tankyudon with Ul-Tora Gari.
While Zoro was able to effectively block the strike, he was not able to block the impact, being sent flying entirely out of the castle. King even attempted to send Zoro off of the island after pushing him out of the castle, but Zoro prevented his move by using Clear Lance to push himself back onto the island. Zoro then berated King for fighting dishonorably by not attempting to kill Zoro with a blade, and King returned the sentiment due to Zoro having damaged his mask during their fight. They then resumed to cross blades with each other. Deep in the middle of his fight with King, Zoro was contacted by Sanji with a Den Den Mushi and was wondering how ended up with one.
After Sanji explained he snuck it into his clothes should he get lost, he agreed on Sanji being confident in their win. He was then tasked with killing Sanji should he lose his humanity. Although confused about this request, Zoro nonetheless agreed to these terms, adding he was looking forward to it and told Sanji to not die until then before resuming his fight with King. However, Zoro was soon struggling against King’s Devil Fruit powers, narrowly blocking King’s Tempuraudon and retaliating at him with Sanbyakurokuju Pound Ho, although without any result. As Zoro was then trying to figure out a way to defeat King, wondering if the flames on King’s back were natural, he launched Kokujo: O Tatsumaki.
This attack again had no effect on King, who blocked the attack with his wings, leaving Zoro remarking on the toughness of Ancient Zoan users, before they both continued clashing with their swords once more, with Zoro wondering if King’s strength lies in his body’s uniqueness or if it might be his origin. After Zoro was send into a wall by King and still looking for a way to defeat him, he heard a shamisen playing, which then led to Enma painfully draining Haki from Zoro. As Zoro demands Enma to stop, King moves in and stops in front of Zoro, confusing Zoro as to what King is trying to do. Zoro decides to stab King in the chest with his sword, only for King to not only be unharmed, but to explode seconds later. Zoro manages to survive using Busoshouku Haki, but is in disbelief as to how and why King is unscathed after an attack like that.
He attacks King again with Ittoryu Iai: Shi Shishi Sonson, but once again King is unscathed. As Zoro prepares to block another of King’s attacks with his swords, Enma once again starts draining Haki from Zoro, causing Zoro to get grazed by King’s attack, and for a chunk of the area to be destroyed with both of them falling. While falling, Zoro drops Sandai Kitetsu, but quickly goes to reclaim it, while thinking back to all his moments with the sword. King then kicks him back towards the island afterwards, expressing how crazy he thought he was for risking his life for a sword.As his battle with King raged on Zoro had a difficult time dealing with the All-Star and the renowned immense toughness and vitality of his species is known for, while the Straw Hat became grievously wounded and exhausted. Zoro then gets up to see that Wado Ichimonji didn’t fall and was safe, gratefully thinking back to when he first got that sword, and began to look back at everything he learned in Wano and his childhood in Shimotsuki Village, immediately realizing all the connections and realizing that Enma was testing him the whole time.
After realizing this, several Beast Pirates arrive and try to interfere with his and King’s fight, only for them to all pass out after Zoro decides to let Enma take all the Haki it wants. Realizing that Zoro has Supreme King Haki, King asks if he had “kingly ambitions” as well, to which Zoro answers yes to, saying that he must since he promised his captain and best friend. Zoro figured out that when King puts out the flames on the back of his head to increase his speed his defenses get weaker so waited for the right moment and serially wounded King. When King’s face was exposed the Beasts Pirates who were watching their fight commentated that the World Government was offering 100,000,000 to anyone who had information on lunarians which caused King to scorch them with his flame attacks. Zoro was appalled that his opponent would attack his comrades like that but was interested in King’s species, but the All-Star refused to answer and attacked him again.
Zoro now dealing serious damage to King declared that the Beast Pirates had reigned long enough and ignored King’s claim that Kaidou would be the next Pirate King. After Zoro correctly assumed that King was afraid of his attacks now, King tried finishing him off with Omori Karyudon, but Zoro was unfazed by this and used En-Ō Santōryū: Ippyakusanjo Hiryu Jigoku and landed a destructive onslaught onto King defeating him while simultaneously slicing off half of the lunarian’s right wing. Still being mid-air, Zoro remembered the promise he made Luffy when he was defeated by Mihawk to never lose again. Remembering this, he declared that he shall become “King of Hell” if this is what it takes to keep him from losing. He then used his swords to push himself back onto Onigashima. After reaching the top Zoro finally succumbed to his fatigue and injuries from all the intense battling and passed out. As Zoro awakened sometime after the fight, he was confronted by a hooded, Grim Reaper-like figure, who was about to strike at him with a scythe. As a result of this encounter, Zoro was rendered unconscious, laying on his stomach while bleeding profusely. When Big Mom caused one of the bombs in the armory to detonate, large sections of Onigashima crumbled, including the ground beneath Zoro. As Zoro began to fall off the island, Franky appeared and grabbed him with his extendible arm, and later carried Zoro to Chopper for treatment, He and Luffy later laid unconscious outside the crash site of Onigashima with the others, as the broadcast of the alliance’ victory is announced, as well as the announcement of Kouzuki Momonosuke officially becoming the Shogun of Wano.
A New Dawn In Wano Country
A week later, both Luffy and Zoro woke up and immediately demanded meat and booze respectively. As the crew celebrated their recovery, Zoro and Luffy both were shocked to see Momonosuke in his adult form for the first time, after initially not recognizing him.When Hiyori revealed that she had personally bathed Zoro while he was asleep Sanji grew angry.The outburst reminded Zoro of the promise he had made Sanji, and the two began fighting, with Sanji insisting that the issue had been resolved already. After the crew learned that there was going to be a massive festival to celebrate Wano’s liberation, Zoro decided to go to the baths first with his friends before partying. Zoro later enjoys the festival with the others and the rest of the Ninja-Pirate-Mink-Samurai Alliance, along with Law and Kid’s crews as well. A couple days later, Zoro, along with Luffy, Sanji, and Jinbe, secretly watched Momonosuke, his retainers, and Yamato work to prevent Admiral Ryokugyu from entering the Flower Capital and reaching the Straw Hats.
After Shanks made Admiral Ryokugyu retreat from Wano, Zoro acknowledged Momonosuke’s growth, and Luffy pointed out that the Haki was familiar to him. Afterwards, Yamato talked with Luffy and the others about staying in Wano instead of joining the crew. Zoro advised Yamato to be cautious of Momonosuke’s pride. Marco then flew over their heads and told them that he was leaving with Shanks’ ship. The next day, the Straw Hats met to discuss Pluton. Days later, they went to Tokage Port in preparation to depart from the country. As thanks for helping Luffy, the crew agreed to take Caribou with them and drop him off at the first island but forced him to travel in a barrel. Momonosuke, Yamato, and Kin’emon caught up to the crew before they could leave. Zoro was amused by Momonosuke’s emotional breakdown over the crew’s departure. After Luffy gave Momonosuke a flag with the crew’s jolly roger, they set sail and bid farewell to Momonosuke and Yamato. Kid then goaded Luffy and Law into taking their ships over the Climbing-Koi Waterfall.
Final Saga
Egghead Arc
Zoro was asleep on the deck until Robin announced that the newspaper had arrived with their new bounties. Zoro teased Sanji who was upset at having a bounty below Zoro and Jinbe, which led to a fight between Zoro and Sanji. After reading that Sabo had assassinated Cobra and that Vivi had disappeared, Luffy demanded that they go immediately to Arabasta, but Zoro pointed out that Vivi had disappeared from Mary Geoise, which led to them bickering about whether or not they should go there. Zoro then reminded Luffy of how he had left Ace to do his own thing until his life had been in clear danger, and suggested that they do the same for Vivi, which drew ire from Luffy, Nami, Chopper, and Sanji. As Zoro and Sanji restarted their fight, Robin read aloud the other events reported in the newspaper.
Luffy then told his crew about his oath to Sabo and Ace, as well as about his dream for once he becomes the Pirate King, which surprised Zoro. Days later, the Thousand Sunny entered a turbulent and cold region of the sea and came across a giant warm eddy. Zoro cut it open when they spotted and heard Bonney trapped inside it. After the wind carried Chopper and Luffy off the ship, the Mecha-Shark attacked the ship and ended up capsizing it. While Jinbe swam off to save Luffy, Chopper, and Bonney, the ship and rest of the crew were saved by Lilith and Vegaforce-01.
As the robot lifted them out of the water, Lilith explained the shark’s purpose and malfunction and introduced herself. Lilith then demanded the pirates’ valuables as the other Sea Beast Weapons surfaced. Zoro watched quietly and prepared to attack them, but Shaka called Lilith and warned her about the danger that Zoro and the crew posed. Zoro had questions for Vegapunk, so Shaka ordered Lilith to bring the ship to Egghead. Once they reached the island’s Labophase, Zoro and Brook remained behind to guard the ship, while the others followed Lilith into the lab.
Zoro and Brook released Caribou and then sat down for tea. Caribou protested at being dropped off at a government island, but Zoro insisted that Caribou get off the ship. Zoro was napping when CP0 infiltrated the island and gained access to the Labophase. Upon seeing the Thousand Sunny docked in the Labophase, Kaku attacked the ship, but Zoro grumpily awoke, blocked the Rankyaku, and engaged in battle with Kaku. Zoro had Brook protect their ship while he fought Kaku in his awakened giraffe form.
After Kaku was distracted by the Seraphim’s display, fellow CP0 agent Stussy bit Kaku, putting him to sleep. After she similarly subdued Lucci, Zoro was puzzled by the agents fighting each other. Stussy then contacted Shaka, revealing herself to have been Vegapunk’s secret ally. Zoro and Brook rushed off to stop the Seraphim, who were still attacking the lab where the rest of their crew was. Zoro clashed with S-Hawk until Edison ordered the Seraphim to stop attacking.
After receiving new clothes, Zoro, Brook, and Stussy joined the rest of the crew and the Satellites in the control room. After Shaka reported that the main Vegapunk body had gone missing and that they had lost control of the security system, everybody decided to split and search for Stella. Zoro suggested he should join them, but Sanji and Chopper shut his idea down, replying he would only get lost if he went searching, so Zoro stayed behind with Luffy to watch over the captive Lucci and Kaku. When Luffy went to check with Shaka, S-Bear and S-Hawk arrived and attacked Lucci and Kaku, but Zoro held them off and called for Luffy. After the Seraphim failed to respond to Shaka’s orders, Lucci and Kaku suggested that they all team up to take out the Seraphim, the idea of which disgusted Zoro and Luffy.
Zoro doubted that they would let themselves be cuffed up again once they were freed. However, Luffy had already been convinced to set them free though Zoro told him Kaku was lying to them. Their dispute was then interrupted by S-Hawk, who used a powerful flying slash attack against them, making Zoro realize that S-Hawk is using an artificial version of the Supa Supa no Mi, which is the Devil Fruit used by Daz Bonez. When Zoro heard Nami screaming, he realized that all the Seraphim were let loose on everybody inside the Laboratory and was extremely surprised when Lucci fell for an obvious taunt by Luffy. After evading an Ursus Shock, both Luffy and Lucci attack S-Bear with Gomu Gomu no Kong Gun and Rokushiki Ogi: Rokuogan” while Zoro teamed up with Kaku, both attacking S-Hawk with Rengoku Oni Giri and Rankyaku: “Hakurai”.
However, all their best attacks were not very effective against the Seraphim, and they struggled to do any lasting damage against the Seraphim. It then, out of the sudden, occured to Zoro that the Seraphim highly resembled King the Conflagration from the Beasts Pirates. To Shaka’s surprise over Kaidou having a Lunarian in his crew, Zoro only replied he did not know what King really was. When Shaka told everybody King’s background and that the Seraphim were created using King’s Lineage Factor, Zoro told Luffy, Lucci, and Kaku to keep a close eye on the flames on the back of the Seraphim, because as soon as they would go out, they would get faster but also lose their defense. Zoro then apologized to everyone for not realizing that the similarities between King and the Seraphim, namely dark skin, black wings, white hair and fire, were so obvious only to receive their annoyance over him realizing that important connection so late.
While they continued to fight, Shaka went on to find Vegapunk, realizing that he might possibly knew where he was. Zoro then realized that S-Bear and S-Hawk’s flames were not going out, but Luffy noticed that S-Hawk had left the room. Lucci said that S-Hawk was choosing to prioritize killing the weaker members of the crew and save the more troublesome members for later, thinking they would be too rattled to fight effectively. Zoro then immediately ran after S-Hawk, prompting Luffy to tell Kaku to go with him to make sure he did not get lost. The following day, York was found to be the culprit and was outmatched by the reunited Straw Hat Pirates and their allies, who subdued and chained her to the ground.
Zoro held his sword to her neck and listened in as she was forced to contact the Five Elders for help. Just after Kizaru arrived in the Labophase, Rob Lucci went on the offensive, aiming to kill Vegapunk in the midst of the confusion. Stussy managed to block his attempt, and Zoro promptly attacked Lucci, calling him spineless for his tactics. The two then engaged in a fight, with both breaking out of the lab, with Zoro refusing to have additional help from Luffy in his fight against Lucci, telling him to focus on Kizaru alone. He then proceeded to mock Lucci for not being strong enough to face Luffy with his skills, to which Lucci menacingly replied, though it could be true, it would be enough to kill Zoro instead.
During his fight with Lucci the two, along with Luffy and Kizaru, suddenly felt the presence of Jaygarcia Saturn, who then ordered the pacifistas to stop. As Zoro continued fighting Lucci telling the agent he was in a hurry, Lucci mocked him by pointing out how their fight was holding up Zoro’s crewmates. He continued to say they were fools for not cutting loose a member to save the rest of them and that as long as they kept fighting they would all be be trapped here, Zoro retorted that he controlled how long the fight lasts and not Lucci. As the fight continued on, all five of the Five Elder’s touched down on Egghead. Lucci knocked away one of Zoro’s swords, before questioning him about the strong Haki popping up all over the island.
As Zoro agreed with the strangeness of it, he suddenly overheard a communication from Sanji (through Jinbe’s contact) about him apparently being a burden to the crew for taking his time with fighting Lucci. Zoro was silently enraged by the notion, and caught his sword again as Lucci prepared an attack. Before Lucci could land his attack, Zoro slashed him using Kokoba Madara Gari, leading to the Zoan user becoming gravely wounded. When Jinbe arrived at the scene, Zoro noted Lucci was still standing but the fight came to an end when Jinbe grabbed Zoro to escape off the island, Jinbe then used Gosenmaigawara Shuto to distract Lucci with a dust cloud. While Zoro and Jinbei escaped he spotted a Itsumade.
Jinbe continued to carry Zoro as they made their way back to the Thousand Sunny. On the way, the two were passed by Ethanbaron V. Nusjuro, who shared in the objective of reaching the Sunny, albeit to stop it from escaping Egghead. As Nusjuro prepared to attack the Sunny, Jinbe threw Zoro toward him, with Zoro using Two-Sword Style: Gokuraku Anyo Rashomon, resulting in the two clashing with their blades instead. During the clash, both were shocked to see that the other used a Kitetsu, before blasting each other back.
Zoro then ordered the crew to take off while he and Jinbe held back Nusjuro, with a plan of jumping down to the ship after it was secured. As the two made it onto the Sunny, Zoro once again told everyone to take off, but Lilith said they couldn’t with Nusjuro still on their tail, as a single interference from him could prevent their escape. Before she could continue, Atlas arrived and punched Lilith unconscious into the ground, then snapped a switch behind her head. Atlas told the Straw Hats to take care of Lilith and go, as she sacrificed herself to ensure their escape. As the Sunny finally landed safely in the sea, the crew sailed away from Egghead alongside the Giant Warrior Pirates, setting course for Elbaf. Not long after, the giants attempted a celebration , but decided to cancel it so that Luffy could recover and mourn the apparent loss of Vegapunk. During the downtime, Zoro conversed with Jinbe and Franky over the miracle that was their escape from Egghead. Zoro expressed his disgust at Luffy’s concern for Vegapunk, stating his belief that one of the Four Emperors should not care so much about the death of an elderly man. Later, Zoro joined in on the actual party, happily celebrating amongst his friends.
Elbaph Arc
About two days after the party, Zoro, Luffy, Sanji, Usopp, Nami, and the Thousand Sunny went missing, to everyone’s horror. The reason for their disappearance was due to Muginn plucking them from the ocean and bringing them to his master, Road, a member of the New Giant Warrior Pirates. Road was outraged to see the Straw Hats, due to his captain proclaiming to now be loyal to Luffy. As a result, Road kept the Straw Hats asleep and placed them into the Land of Gods as a test. Zoro would eventually wake up and locate Luffy and Sanji.
The trio killed and ate an Ear God during this time, and later on made their way to Bigstein Castle. At the same time as their arrival, Usopp and Nami were being attacked by a massive cat that had somehow transformed into a lion, forcing the three to intervene to save their crewmates. After easily defeating the cat, the three decided their next course of action would be to locate their remaining crew and the Sunny. Eventually, the Straw Hats made their way down from Bigstein Castle to the lower part of the Land of Gods. They encountered a normal-sized man who informed them that the Sun God(a false identity taken by Road) ruled over their current location, and that they could pick up “fodder” rations in town.
Upon finding out that the Sun God’s “temple” was off limits, Luffy burst off to find it, with his crewmates begrudgingly following behind, while Zoro was excited. Luffy eventually ran straight into a large one-way mirror, revealing that the Land of Gods was in fact a diorama, and completely artificial. After rescuing Chopper, the crew got into a short conflict with the “guardians” of the “temple”. The Straw Hats easily dispatched the large animals, with Zoro defeating Muginn. Eventually, the Sun God made their appearance, outraged that the Straw Hats were damaging their work and harming their “guardians”.
A chase followed, with the Straw Hats hitching a ride on the cat they had beaten earlier while the Sun God proclaimed they wouldn’t escape. The Straw Hats continued to make their way through the Land of Gods atop Iscat while the Sun God attempted to capture them using a large net. Zoro and Sanji easily broke out of the net, while Usopp attempted to shoot through the wall on the opposite side of the diorama. Due to the wall’s thickness, he was unable to break it, prompting Luffy to try his hand at it. While Nami knocked out the Sun God using Zeus, Luffy used Gear 4 to shatter the wall, allowing the Straw Hats to make their getaway.
While heading outside, Zoro and his crewmates barely managed to avoid an encounter with Goldberg, Gerd, and her pet, Piper. After the giants passed by, the Straw Hats proceeded down a massive bridge that connected Road’s castle to the upper levels of Elbaph, but stopped when Luffy sensed a strange presence. Deciding that the presence was more important than their current task, Luffy leaped off the bridge down into the wilderness of Elbaph below. Zoro attempted to head down with him, but was held back by Sanji. Moments later, the bridge began to shake.
Usopp used a pair of binoculars to spot Road running down the bridge, attempting to get away from Goldberg and Gerd as they carried the Sunny. As the Straw Hats realized that Road was really the “Sun God” who had kidnapped them, Zoro suggested cutting all of the giants down. Usopp instantly refused his suggestion on the grounds that they could be allies. Sanji took the lead, remarking that they were almost to a village, and running was their best bet. The Straw Hats eventually arrived in the Sun World, where they continued to evade Road.
They eventually set a trap, which resulted in Road being dealt a blow to the head by Sanji and Zoro. Moments later, Gerd and Goldberg made their arrival, and promptly knocked Road completely unconscious. After introductions were made, Luffy, Usopp, and Chopper ran ahead to the village, while Sanji, Zoro, and Nami, were given a ride by Gerd. Alongside most of his crew, Zoro was shocked by the sight of the village. At the same time, the rest of the Straw Hats, Giant Warrior Pirates, and remaining New Giant Warrior Pirates arrived as well, prompting a short reunion.
Although a feast was declared by Hajrudin, the Straw Hats decided that a reunion between Robin and Jaguar D. Saul was the priority for the moment, and took off in a Svarr piloted by Gerd. Upon arrival at the Warrior’s Spring, Zoro remained silent as the rest of his crew panicked over Saul collapsing to the ground. However, the apparent injury was simply a way of greeting Robin after so long, and after the two embraced, Zoro remained stoic as most of his crewmates burst into tears from the sight. Following their introductions to Saul and his assistant, Ange, Zoro, Luffy, and Usopp ran off into the Walrus School, and began to play with the giants attending said school.
While being chased, Zoro suggested cutting them down, leading to Usopp berating him over the fact that they were children. A moment later, the children who were chasing them were easily stopped by classmates, to Zoro’s disgust, as he assumed they would be warriors in training. After meeting with the teacher Ripley and getting an explanation on how the modern generation on Elbaph was much more peaceful than their predecessors, the Straw Hats returned to the banquet in the Western Village. While there, Zoro kept to himself and drank while his crewmates partied with the giants. Sometime later, Zoro and Nami were confronted by the recently-freed Road, who offered his apologies for his previous actions.
Zoro accepted, but reminded Road of the fact that he would have killed him if not for Usopp’s intervention, scaring the giant. Road went on to explain that he had simply been trying to mimic the “Sun God”, leading to an argument amongst the giants about who Nika really was. During the argument, Loki was brought up, and Luffy voiced his belief that Loki was not in fact evil, leading to the giants vehemently correcting him. Moments later, Zoro interrogated Luffy about his belief, and quickly deduced that his captain had been fooled by Loki, due to his desire to see Shanks’ once again. Zoro eventually decided to allow Luffy to carry out his plan to get the keys for Loki’s restraints, but made it clear that he would keep them until they could figure out Loki’s true intentions.
The pair were joined by Nami and Road, who took the three Straw Hats up to Aurust Castle, in order to retrieve the keys. As the group arrived at the castle, they found the large doors to the structure broken down, with Zoro commenting that it had happened from the inside, for whatever reason. While Luffy ran ahead to search for the key, Zoro and Nami were content with being carried by Road. As they proceeded further inside, they discovered the entire castle to be in very poor condition. Road gave a rundown on a previous fight that had taken place between Loki and his father, Harald, who was backed up by 100 soldiers, including Jarul.
Road eventually showed off a portrait of Harald himself, pointing to the fact that the king had torn off his own horns to show he desired peace, leading to Zoro commenting on the gutsy nature of the action. Road went on to further explain that Hajrudin was also Harald’s son, but not a prince; his mother was a giant from a foreign kingdom, which removed him from the line of succession. Zoro originally believed it to be absurd, but Road reminded him of the fact that humans had the same sorts of discrimination, leading to him withdrawing his comments. Zoro was still confused as to Road’s purpose in joining Hajrudin, and was understanding when he mentioned wanting to help his captain complete his dream. A moment later, Luffy suddenly appeared, yelling about finding the missing guards to the castle.
Luffy and the guards got into a short argument over who attacked them. The guards believed it to have been Shanks, while Luffy considered the idea of it to be absurd. They eventually came to the agreement that Shanks may have had a brother, and the Straw Hat group proceeded further into the castle. While continuing on, Zoro began to grow tired of the fruitless search, and took a moment to remind Luffy that they hadn’t yet decided on whether or not to free Loki. Eventually, the group discovered a Magic Circle marked into the floor of the room.
Nami mentioned such symbols being used to summon demons, causing Road to be unnerved at the prospect. Before they could discuss further, a strange voice echoed through the room, causing Road to lose his composure and attempt to flee in fear, while Luffy attempted to get him to calm down. Before he could flee, a massive axe struck the door, blocking their escape. In the process, Road dropped Nami, forcing Zoro to catch her. The group turned to see “Ya-san”, whom Road instantly recognized.
Ya-san(in actuality, Scopper Gaban), introduced himself and revealed that he was Ripley’s lover, and Colon’s father. In the ensuing conversation, Luffy accidentally revealed their plans to free Loki, causing Gaban to laugh at the absurdity of it. Luffy and Zoro were at first willing to listen to Gaban’s various warnings about Loki, but both eventually grew bored of them, and attempted to leave. Gaban scrambled to stop them, and in an attempt to keep them attentive, showed them the location of the key, in a hidden room behind the throne. However, before they could grab it, Gaban took it for himself and challenged the group to a fight for it.
While Luffy fell for Gaban’s taunts and rushed in to fight the former member of the Pirate King’s crew, Zoro stayed back and recalled Colon’s mention about his father being able to stand on even ground with Elbaph’s warriors. During the ensuing fight, Luffy tried various times to simply take the key from Gaban, but none of them were enough, and he end up getting toyed with. Gaban eventually decided on upping the ante a bit, and equipped a pair of axes, forcing Zoro to intervene. As Gaban unleashed a massive attack toward his captain, Zoro jumped in and intercepted it, causing said attack to be redirected into one of the castle’s towers, causing it to collapse and fall. Deciding that they had no choice in a potentially lethal situation, Luffy and Zoro stood together against Gaban with their attacks readied.
However, before they could actually use them, Gaban simply surrendered, leading to the pair becoming outraged at the fact that they had just been fooled into a fight that wasn’t going to happen. While Gaban took his leave, he asked the Straw Hats to find him before they left Elbaph, and should they survive freeing Loki. Zoro and Luffy were both still angry, and told him that they never wanted to see him again, although they did thank him for the key. Following their acquiring of the key, Luffy and Zoro set out back down to the Underworld of Elbaph, where they found a severely wounded Loki(from his attempted and failed recruitment by the God’s Knights). Zoro watched as his captain tried and failed to release Loki, and came to the conclusion that the shackles were made of Seastone.
While Luffy brazenly tried to release Loki on his own, Zoro was more cautious about the situation, and quickly moved to throttle his captain and prevent him from making a rash decision. In order to test if Loki’s wounds were legitimate or not, Zoro kicked the giant, causing him to yell out in pain, and for Luffy to believe that he had died, but Zoro quickly corrected him. Due to Loki’s severely wounded status not being an act, Zoro agreed to release 3 of the 4 shackles on his body, leaving a single one on in case he tried anything, and ordered Luffy to locate a doctor nearby so that Loki’s wounds could be tended to. Luffy suggested also collecting food, but was outraged when Zoro mentioned simply eating the giant beasts that Luffy had tamed earlier, as they were already close to death. Before Luffy could set out to find a doctor, the New Giant Warrior Pirates and other members of his crew suddenly dropped out of the sky in a Svarr, forcing Luffy to intervene to save their lives.
While they attempted to warn Luffy about Loki’s deceitful nature, Zoro had already released most of the shackles, and quipped that they were simply too late as Loki rose to his feet. Loki equipped himself with his hammer as he informed those in front of him that one seastone shackle was apparently not enough to contain his great strength. To everyone’s shock, Loki proceeded to make his point clear, and used his hammer to strike Elbaph’s Adam Tree. A bolt of lighting struck the tree, causing a large fire to begin. As the fires burned the tree, Loki goaded the group into trying to take him down, with the threat of violence toward the Sun World’s residents should they decline freeing him.
While Hajrudin attempted to accept the deal, Zoro quickly warned him not to fall for it, as Luffy prepared to fulfill his promise to put Loki down, since he had shown himself to be a threat. Zoro promptly issued another warning to his captain about Loki’s wounds being too grievous, and not to go all out. Sure enough, Zoro’s prediction proved correct, as Loki collapsed a very short time after being hit by a fairly weak attack by Luffy. While Loki laid close to death, Zoro informed Luffy that it was up to him to decide his fate, to which Luffy made a request to Hajrudin about saving Loki’s life. Hajrudin complied, and had Gerd treat the wounded former prince.
After a few moments of Loki’s treatment, Hajrudin lost his composure, and attempted to attack his half brother for the sake of their father, which Loki had killed. However, all were shocked when Loki implied that he had not killed Harald in cold blood, as the official story had gone. Sometime later, after deciding that provisions were necessary for Loki’s recovery, Zoro set out with Sanji and Goldberg to hunt down one of Elbaph’s First World beasts for food. The trio encountered a groggysaurus, prompting a short fight. While the beast was distracted attacking Goldberg’s shield, Zoro worked with Sanji for a combo attack, allowing him to decapitate the groggysaurus without issue.
Zoro was satisfied with their work, although he found himself wondering as to why Goldberg’s shield seemed to be alive. While the trio carried the body of the groggysaurus back to their camp, Goldberg explained that his shield, Nash, was a homie created by Big Mom long ago, surprising Zoro. Following their arrival back, Zoro and Sanji got into a spat over who actually killed the groggysaurus. After a series of events that ended with Loki being accidentally burned by Luffy, with Gerd’s approval, Sanji wondered aloud what Loki could have done to earn such disdain from the giants. Zoro commented that Loki had likely lied to Luffy about meeting with Shanks, however Loki revealed that he had in fact been telling the truth.
During the ensuing feast, the conversation shifted back to Loki’s revelation about the truth of what happened to he and Hajrudin’s father, Harald. Their argument was cut short by the sound of Chopper and Gaban falling from the Sun World. Figuring the two were likely in danger, the Straw Hats quickly set out to retrieve the pair, and returned moments later. Zoro was surprised to learn of Gaban’s deep connection to the Roger Pirates, but now understood why Gaban was such a powerful opponent. Following Gaban regaining consciousness, Chopper revealed that the situation above was grim, with a burst of Haki from Imu appearing to give credence to said fact, shocking everyone present.
With little time to spare, the New Giant Warrior Pirates prepped a nearby lift in order for a quick ascension to the Sun World. Before they could leave, Gaban held them up to inform them of a couple of important facts. For one, the God’s Knights were not in fact immortal, and could be defeated using Conqueror’s Haki. For two, Zoro was a user of Conqueror’s Haki. Zoro was dumbfounded upon learning of his power, and apologized for not realizing it earlier. At the same time, Loki demanded to be released, citing that his power and knowledge of the God’s Knights would be vital in the upcoming battle. Hajrudin vehemently denied the very idea, however, Luffy was not so opposed. In a moment that shocked all of those present, Luffy offered Loki the chance to join his crew. Both Zoro and Sanji agreed on it being a horrible idea, however Luffy was undeterred. Hajrudin tried to reason that Loki was a criminal, and therefore couldn’t be released, however Gaban chimed in, ordering him to release the former Prince. While Luffy and Hajrudin remained behind to hear Loki’s story, Zoro and Sanji ran off ahead with the other giants.
Roronoa Zoro › History › Non-Canon
Introduction
Past
Zoro and Saga were trainees together at the same dojo when they were children and became friends even as they became young men, with the two making a promise with one another; with one aspiring to become the world’s best swordsman and the other wanting to join the Marines and become the master of the sword of justice respectively. Years later, during Zoro’s time as a bounty hunter, he was fighting with a group of pirates, Zoro was cornered by a pirate wielding two pistols. The pirate, however, was quickly dispatched by Saga, who appeared much to the pirate hunter’s surprise. He pulled a small knife out from his waistband, telling Zoro that it represented their promise and reminding him of their childhood together. The two began fighting together for a time, and when they came across another pirate crew at sea that was burning down, Saga ended up trapped on the burning boat by an iron chain, forcing Zoro to leave him as he could not cut steel at that time. Zoro believed that Saga died that day, but Saga had managed to survive with his right arm paralyzed, and made had it…
Read More about Roronoa Zoro › History › Non-Canon
Zoro and Saga were trainees together at the same dojo when they were children and became friends even as they became young men, with the two making a promise with one another; with one aspiring to become the world’s best swordsman and the other wanting to join the Marines and become the master of the sword of justice respectively. Years later, during Zoro’s time as a bounty hunter, he was fighting with a group of pirates, Zoro was cornered by a pirate wielding two pistols. The pirate, however, was quickly dispatched by Saga, who appeared much to the pirate hunter’s surprise. He pulled a small knife out from his waistband, telling Zoro that it represented their promise and reminding him of their childhood together. The two began fighting together for a time, and when they came across another pirate crew at sea that was burning down, Saga ended up trapped on the burning boat by an iron chain, forcing Zoro to leave him as he could not cut steel at that time. Zoro believed that Saga died that day, but Saga had managed to survive with his right arm paralyzed, and made had it to a nearby island.
East Blue Saga
One Piece Defeat Him The Pirate Ganzack
Adrift in a small dinghy on a sunny, windless day, Luffy, Nami, and Zoro sit paralyzed with hunger. As Nami berates the two men for squandering the month’s provisions, a Plesiosaur suddenly attacks, snapping their dinghy in half. Overjoyed at this new source of meat, Luffy and Zoro prepare to counterattack, but are quickly overpowered and swept away in the tide; while a panicking Luffy drags Zoro deeper and deeper down, the monster carries Nami off. Some time later, a half-drowned Luffy washes up on an island. Here two pirates, Alto and Chico, prepare to loot his body, only to be challenged by Medaka, a small, heavily armored girl who demands they return her father.
Though unimpressed, the pirates are annoyed enough to give chase, and inadvertently trample Luffy enough times to force all the water from his lungs. Awakening in a rage, Luffy beats up the two pirates senseless, and promptly collapses from hunger. An awed Medaka brings Luffy and a hastily found Zoro into the local village, where an elder named Skid offers them food. While Luffy and Zoro eat (and speculate on Nami’s fate), Skid warns them of Ganzack, a vicious pirate whose crew has enslaved the whole island. While the women, children, and elders have been left in the village as hostages, all the able-bodied men – including Medaka’s father Herring – have been put to work in the Devil’s Tower, a massive structure on the far side of the island.
When the tower starts shaking, it spills Luffy’s meal. When he asks for more, Medaka sadly explains that the village has given the last of its food to Luffy and Zoro; only the tower, she adds, might contain more. On hearing this, Luffy immediately rushes off to the tower with Medaka, an exasperated Zoro following in their wake. As they reach the tower, the three of them discover that the Ganzack Pirates are forcing the villagers to make weapons, and that the shaking was coming from artillery fire. As Medaka cries out to her father as soon as she finds him, alerting dozens of hostile pirates, and unfazed Luffy and Zoro eagerly meet the challenge, until a masked figure suddenly swoops in and kidnaps Medaka.
As the two prepare two give chase, Ganzack’s men begin to attack, leaving Zoro to fend them all off while Luffy gets Medaka back. Luffy chases Medaka’s kidnapper out of the tower and down to the shore, only for the kidnapper to reveal herself as Nami. At first puzzled, Luffy is shocked when the Plesiosaur reemerges with none other than Ganzack himself riding it. Upset about everything that is happening, Luffy attacks the pair and proves an even match for both Ganzack and the Plesiosaur, but eventually falls when Ganzack’s armor sprays a powerful foam that binds his entire body. Shortly after, Ganzack’s men force Zoro’s surrender by threatening to fire on the slaves; as Zoro is taken away in chains, Herring quietly reassures his fellow slaves, and shows that he has smuggled some dynamite out of the pirates’ munitions.
Soon, Luffy, Zoro, and Medaka find themselves shackled to a wall, forced to watch the Ganzack Pirates – and a disinterested Nami – feast and party. When Luffy continues to defy him, an annoyed Ganzack seizes Luffy’s hat and stomps on it. Enraged, Luffy shouts that the hat is a treasure entrusted to him by Shanks, and – to Medaka’s shock – proudly proclaims himself a pirate. Moments later, an explosion rocks the tower, as Herring leads the other villagers out in open rebellion. While the Ganzack Pirates rush outside to quell the villagers, Nami cheerfully approaches the shackled trio, returns Luffy’s hat, and flashes the keys to their shackles; all along, she had meant to double-cross Ganzack.
As soon as Medaka is freed, however, she runs off by herself, now considering Luffy and his friends no better than the Ganzack Pirates. Despite this, however, when Ganzack unsheathes the bladed pincers on his armor and gets ready to kill both Medaka and Herring; Luffy, Zoro, and Nami join the fray. Their arrival inspires the villagers to challenge the Ganzack Pirates anew, spurring Ganzack to reveal his ultimate weapon, which turns out to be the Devil’s Tower itself. At his signal, the Plesiosaur tows the tower, along with him and his crew apart from the rest of the island, revealing it to be the main cannon on a massive warship. To the villagers’ horror, a single shot from this cannon sinks a good part of the island – and Ganzack means to keep shooting until he sinks it all.
As Luffy and Zoro prepare to engage, Herring desperately tries to hold Medaka back; though touched by her father’s concern, Medaka refuses to stay behind, and grabs on as Luffy rockets himself and Zoro onto the ship. Onboard, Zoro engages Ganzack’s men, while Luffy confronts Ganzck himself atop the mainmast. Now prepared for the projectiles in Ganzack’s armor, Luffy presses his advantage, until Ganzack binds him in a long, powerful chain. Gloating, Ganzack swings his pincers in for a killing blow, only for Medaka to once again block him – and fall, her armor unable to withstand the razor-sharp blades. Shocked by her sacrifice, an enraged Luffy shatters his chains and forces Ganzack into melee, quickly overpowering him and his armor with a Gomu Gomu no Tsuchi.
Moments later, Luffy finds himself being applauded by Medaka, who cheerfully reveals that Ganzack had only sliced off the top half of her helmet. As Zoro, Nami, Herring and the villagers deal with the rest of Ganzack’s crew and the Plesiosaur, Luffy prepares to escape with Medaka and the others as they send off a boat filled with dynamite to finish the Plesiosaur and sink the Warship for good. Refusing to admit defeat, Ganzack clambers to his cannon and fires one last shot at the island, all the while proclaiming himself to be the future Pirate King. In response, Luffy scornfully punches him into the sky, on a collision course with his own shell. As Ganzack is swallowed by a huge explosion, Medaka helps Luffy off the sinking warship, and back to the island. Sometime later, the crew prepare to depart, the grateful villagers having supplied them a new boat and plenty of food. To Luffy’s surprise, Medaka runs up with a gift of her own: a life preserver. As she gently teases Luffy about his inability to swim, Nami and Zoro quietly smile at the “thank you” scrawled on the gift’s underside. With Medaka’s encouragement, the crew sail off into the sunset, with their hopes aimed high as they head for the Grand Line.
One Piece The Movie
On the Going Merry, Zoro finds himself starving alongside Nami, Luffy, and Usopp, specifically because Luffy ate all of their food and provisions. As they’re starving, a group of thieves come to steal their treasure and supplies. Luffy stops them and wrecks their getaway boat, which had a kid on it as a hostage. Suddenly, a large pirate ship led by a man named Eldoraggo, appeared. Since the thieves worked for his pirate crew, an angry Eldoraggo, using his Devil Fruit ability, while aiming at Luffy, destroyed what was left of the getaway boat.
Luffy and the kid both fell in the sea, and Zoro jumped in to save them. As a result, Luffy and Zoro were separated from Nami and Usopp. After reaching a floating Oden stand owned by his grandfather, Ganzo, the kid; whose name is Tobio, told Luffy and Zoro about Woonan, the Great Gold Pirate, who, according to the legend, obtained almost one-third of the world’s gold and disappeared with it to a remote island. As Luffy and Zoro hastily eat while listening, they learned from Tobio that Eldoraggo was determined to find Woonan’s loot, too, and that he had the treasure map, which had the coordinates of the location of Woonan’s treasure in possession. After hearing this, Luffy wanted to meet Woonan and find his treasure too, but he and Zoro were both stopped by Ganzo, who told to pay for the food they just ate.
When he heard that they had no money at all, Ganzo tied them both up in chains. After arguing with his grandfather about Woonan and the gold, Tobio and the others see Eldroraggo using his devil fruit in the distance, and Tobio decides to go for the treasure. As they reach the island, and Tobio runs off alone to the forest, a concerned Luffy, still chained to Zoro goes off after him, forcing Zoro to go along with him as result. After the three run into Eldoraggo, the pirate easily wards off Tobio, while Luffy and Zoro have better luck despite being chained together, with Zoro stuck with only his mouth to use one of his swords. As Luffy continues to try to fight back, he makes a mistake that leads to him, Zoro, and Tobio being launched into a distant hill, with Nami and Usopp carefully escaping Eldoraggo to follow them.
After Nami and Usopp reach the hill, Nami undoes the chains binding Luffy and Zoro, and she reveals that took the map from Eldoraggo. After both destroying and deciphering the map, the group meet up with Ganzo, who reveals that he knew Woonan and tells them how Woonan became a pirate and how he became an Oden shop owner. After hearing the story, the Straw Hats take Tobio and Ganzo to the plateau where the treasure is located, unfortunately Eldroraggo and his crew figured out the location as well. As the Straw Hats begin their counterattack, Zoro is pitted against the mercenary hired by Eldroraggo, Golass. As the two duel, Zoro notices Golass’ strength as a swordsman, but is disappointed by his apparent greed. As the duel continues, Golass seems to have the upper hand, till Zoro shows him that he is stronger, and then soundly defeats him. Although Golass lost, Zoro allowed him to live, as he realized that Golass never wanted to fight for money, and that during their duel, he wasn’t. Zoro then leaves him there, and tells him to come back to challenge him if he ever regained his pride as a swordsman. After Luffy manages to defeat Eldroraggo, the Straw hats, along with Tobio and Ganzo go inside the house, hoping to find Woonan and the treasure in a hidden chamber. It turns out it was the resting place of Woonan himself and that he returned all the gold he stole to its rightful owners. As the Straw hats try to settle the earlier payment for the food, Ganzo refuses and states that they don’t have to pay anymore, stating that they can pay it back after they reach their dreams, which Zoro and the others happily agree to. The Straw Hats then bid farewell to Tobio and Ganzo and sail away to their next adventure.
Luffy Falls Adventure In The Uncharted Oceans Navel
It’s a random day aboard the Going Merry, and Luffy is being yelled at by Nami for urinating in the ocean. While on fishing duty, Luffy catches something big and tries to reel it in, only for it to drag the ship backwards instead of forward. As the ship crashes, the fishing line, as well as the ship ends up caught at a rocky crater with a chest chained to it. While Luffy is disappointed that he catch anything to eat, the others are more interested in the chest, namely Nami. She opens the chest, only to find a skull inside.
Usopp picks up the skull and reads the back of it, and finds an engraving about a treasure that can make anyone’s dream come true. It also says that it can be located at a place called the Ocean’s Navel. While the others explore the Ocean’s Navel, the Going Merry begins to fall down into the crater, causing Luffy to almost drown, and for Zoro to have to save him. As they are doing this, they meet the one who sent the message in the bottle, Hamu as well as his guardian, Meroie. After being welcomed to their hidden village, they are immediately attacked by a monster, but Zoro manages to stop them with a polearm.
Hamu and Meroie give them food, and asked them why the two of them are there, and Luffy explains they fell looking for treasure and that they are pirates. After hearing this, Hamu gets upset and leaves, when Luffy and Zoro ask what was wrong, Meroie explains the village’s past and how it was destroyed by the pirate captain Joke. She asks them if, even though they are pirates, they will help Hamu avenge his mother and protect his village. They reply that they will and decide to go to the mountain. As soon as they reach the end of the village, the monster they encountered before attacks them again. Zoro immediately starts fighting the monster and tells Luffy to go find Nami and Usopp. Meroie stays with Zoro while Hamu runs towards Luffy. Zoro keeps fighting the monsters with rusty swords that were provided by Meroie until Sanji shows up and delivers the finishing blow. Zoro is glad that Sanji is there, but then gets immediately annoyed at Sanji’s behavior towards Meroie. After Joke is defeated, the monsters and treasure disappear, and Zoro, Sanji, and Meroie reunite with the others. When the Straw Hats leave the island, Hamu tells Meroie that he hadn’t asked their names, but she states that it doesn’t matter since they are just a bunch of pirates, to which Hamu agrees. He looks at the Straw Hats’ ship sail away and smiles.
Clockwork Island Adventure
Having found a sunny, peaceful island in the midst of their voyage, the Straw Hat Pirates disembark and relax on the beach together. Their relaxing day is ruined when Luffy not only go on about a toy windmill that he finds on the beach, but later when Luffy sees The Going Merry sailing away, as the ship has been stolen to everyone’s shock. With no possessions and forced to rent a small paddleboat and clothes from a nearby wedding shop, the crew chases their ship, only to run into a boy floating in the water. After stopping to help, they are caught in a net, realizing that the boy, Akisu lured them into a trap alongside his brother, another thief named Borodo. After seeing that they had nothing to steal, the pair let the straw hats go and introduced themselves.
Then they explained that they were planning to steal the legendary Diamond Clock, which is located on Clockwork Island, which is where the Going Merry is currently headed. When asked why, the brothers explained that the Island was taken over by the Trump Pirates which is led by a pirate named Bear King, and that they are the ones who took their ship. As they began explaining who the Trump Pirates were and how big of fleet they had, the group soon became surrounded by a part of the fleet. The fleet was commanded by two members of the Trump Pirates, Boo Jack and Honey Queen, who soon corners the brothers’ boat. Despite Luffy, Zoro, and Sanji happily fighting back, Usopp frantically rows the boat away when the pirates almost capsize them all, accidentally causing Akisu to drop a music box in the sea, and causing Akisu to force Usopp to stop so Borodo can retrieve it.
Borodo manages to get the box, but the Trump Pirates catch up as a result, destroying the boat, and even kidnapping Nami to be their captain’s new bride. After salvaging enough of the boat to make a raft, the remaining Straw Hats, along with Akizu and Borodo, make their way to Clockwork Island, and listen to Akisu’s past. As they arrive, they see a small, barren rock in the sea, which Borodo explains is the entrance to the Island. Atop this rock stands a huge spiral staircase, stretching far beyond the clouds. This staircase leads to the “true” Clockwork Island, a hill town full of scientists and engineers.
The hill is topped by a great castle, which houses the delicate engine keeping the island stable; for seven years, Bear King has commandeered it as his base, Trump Castle, using the people of the island to build a weapon powerful enough to help him become the king of the pirates, the King Cannon. As they go up the staircase, they storm through trap after trap, with Zoro stopping one trap by uprooting a part of the floor with his bare hands. Eventually, they reach the top of the staircase, though extremely exhausted and begin to head to Trump Castle. As Borodo spots both the Diamond Clock and the Going Merry at the top of the castle, the group decides to go into town first for food and clothes. After finding both, they soon meet the town’s chief engineers, who explain the town’s current situation and tells the group to leave while they still can.
Despite them telling the group to leave, they head straight to the castle by parasail, but are attacked by the Trump Pirates again, this time being separated from Sanji, who falls into a hill filled with landmines and is quickly captured after. Borodo brings the parasail to a crash landing at the gates of Trump Castle, where everyone continues inside through the gates. As the group is met with hundred’s of the Trump Pirates’ foot-soldiers, Luffy and Zoro quickly make short work of them. When the group is attacked by another member of the Trump Pirates, Skunk One, Usopp decides to hurl himself towards him so the others can continue moving forward inside the castle, being captured in the process. As they make their way through the upper floor of the castle, Akisu is stopped by a foot-soldier and is knocked out.
Seconds later, the floor springs a pressure-trap that threatens to crush them against the ceiling. Luffy and Zoro desperately try to hold the trap back, only for Borodo to slip away, taking himself and Akisu to safety. As the Straw Hats look on in shock, Borodo coldly deems them unfit to fight the Trump Pirates and reveals he had stolen their ship and planned to sail it to Clockwork Island so they would fight the Trump Pirates and hopefully save Akisu’s hometown, but now he has decided to defeat them on his own, leaving Zoro and Luffy stuck on the floor. As Borodo moves on, the trapped Luffy and Zoro are accosted by the last Trump member, the vengeful Pin Joker. As Pin Joker recalls his past with Zoro and the scar he received from him, Zoro dismisses him entirely, claiming not to even remember ever fighting him in the past.
Enraged, Pin Joker began unleashing a flurry of feather darts with poison gas held within at them. However, to Luffy’s horror, Zoro throws himself into these darts head-on, shielding Luffy’s body at the cost of his own, and is then stabbed by Pin Joker and taken to the Bear King, where he is crucified along with the other captured Straw Hats. While Borodo and later Akisu is being beaten by Bear King for their actions, the toy windmill from before fails down to the floor Luffy is on and breaks in front of his feet. Reminded of the Thief Brothers’ integrity, Luffy finds the resolve to shove straight through the ceiling and every floor above, and after reaching the top, he randomly grabs a stick of dynamite and “plays” with it, causing everyone to freak out and make Luffy toss it away, causing an explosion, which accidentally frees the rest of the Straw Hats. After being freed, the Straw Hats, despite being upset by Luffy’s antics, rally for another fight with the Trump Pirates, with Zoro quickly confronting Pin Joker.
After Usopp manages to retrieve Zoro’s swords and the other’s stuff, The Straw Hats were finally ready for a proper fight. With his swords returned to him, Zoro begins a fight with Pin Joker, who tries to sneak attack Nami, only for Zoro to block his attempt. The two continued fighting until they reached the edge of the balcony. An angry Pin Joker then launched another wave of poison darts at Zoro for correcting his speech, but Zoro managed to not only block the attack, but send them right back at Pin Joker. Zoro then tells Pin Joker that he won’t be defeated by him and finishes him off with an Onigiri attack.
As the Straw Hats defeat the members of the Trump Pirates, Luffy gets into an intense fight with the Bear King, who ends up using the King Cannon on Luffy. This backfired as Luffy caught the bullet and shot it back at the Bear King, sending him crashing into the King Cannon and through the floors of the castle. As the Bear King was defeated and the impact from Luffy’s attack using the King Cannon’s bullet caused the island to collapse, the townspeople watched as the castle and hill collapsed. Zoro and the others got onboard the Going Merry and made a dangerous escape attempt using a large piece of canvas as an emergency parachute, which did lead to them landing back into the water safely. With the island destroyed, the islanders pledge to seize the future that the Thief Brothers and the Straw Hats staked their lives for, and build a new homeland elsewhere on the sea. Hearing this, and the crew sees an alive Akisu, who is quickly reunited with his mother, who was one of the chief engineers, after seeing this, Borodo decides to leave Akisu with his real family. As they leave the ruins of Clockwork Island, the Straw Hats and Borodo quietly sail their separate ways. Despite the Straw Hats’ questions, Borodo tearfully insists that he and Akisu can’t stay together anymore now that he’s found his real family. Despite this, Akisu boards Borodo’s boat and shocks everyone by stating that not even his blood family can erase what he truly is: a man of the sea, and Borodo’s brother. As the two tearfully reunite, the Straw Hats happily sail away, ready for their next adventure.
Loguetown Arc
Warship Island Arc
Back on the Going Merry, Luffy asks Nami if they reached the Grand Line yet, and she tells him no. Usopp then spots a flock of birds off their starboard side and Luffy sees something in the water and stretches his hand out to grab what he thinks will be a fish. The crew are all surprised when he pulls in a girl instead and accidentally knocks Zoro off the edge of the boat. The girl is unconscious but wakes up when she smells Sanji’s cooking. After learning that she is on a pirate ship, she freaks out and refuses to eat any food given to her.
Later in the night, Zoro and the rest of the crew are awoken to both Luffy and the girl in the kitchen, after being reassured that they were not evil and would let her take what she wants to eat, the girl introduced herself as Apis the next morning after making everyone breakfast. She tells them that she is from Warship Island, but refuses to tell them why she is being chased by the Marines. After a Marine ship begins attacking the Going Merry, the crew manage to avoid and escape the Marines, but only to end up stranded in the Calm Belt. The Merry ends up atop the head of a Sea King as the crew are surrounded entirely by them. After Apis manages to pull out the Sea King’s nostril hair, it sneezes, causing the Going Merry to be blown back out of the calm belt into the regular seas.
After this, the group start sailing to Warship Island to take Apis home. As they reach the port, Apis had to persuade the locals not to attack the Straw Hats, telling them that they were the ones who rescued her. After doing so, Apis’ grandfather, Bokuden shows up, and tells Apis to come home, and invites the Straw Hats for dinner. While waiting, the group asks Bokuden why the Marines are after Apis, to which he asks Apis the same question, only for her to refuse to answer. Bokuden then tells them about the island’s old legend about the Lost Island, the millennial dragons, a substance called Dragonite, and the Elixir of Immortality.
A day later, Luffy and Nami come back with Apis and tells the others the truth about why the Marines are after her, and they tell them about her pendant and about the millennial dragon Ryu. With Luffy wanting to help Apis and Ryu, the crew prepare to get the two of them off the island before the Marines show up. Unfortunately, the Marines of the 8th Branch, led by Nelson Royal already have the island surrounded, and they even have a mercenary by the name of Eric hunting the two. Everyone splits into groups, Usopp and Zoro move the ship into position, Nami and Apis get Ryu onto a cart, and Luffy and Sanji fight off the Marines. Despite all this, the group still have trouble shaking off Eric, as he hunts them with his Kama Kama no Mi, but manage to lose him in a mirage.
After going into the mirage, the crew spot an island hidden in the mirage and go towards it. After reaching the island, Ryu is still unsure if the island they are on is the Lost Island, so they go to the top of the mountain to find the Dragon’s nest. Instead, they find a building with a dragon emblem. While trying to find the entrance, they end up falling down into an underground temple. After examining the temple ceiling and its paintings, Nami comes to the conclusion that the Lost Island is actually hidden beneath Warship Island, and a sleeping Ryu wakes up and confirms her theory.
As Eric shows up, the others flee with Apis and Ryu, while Zoro holds him off. After battling Zoro for a while, Eric flees the building to chase Ryu, Zoro chases after Eric, stopping him by throwing a stick at his legs. Despite Eric finally agreeing to fight Zoro for real, the others had finished getting Ryu’s cart back to the Merry, and Luffy stretches his arm and pulls Zoro back onto the ship, much to his frustration. The crew then escape Eric and sail out of the mirage. Even after the crew escape and make it to the Lost Islands’ coordinates, Nelson’s fleet manage to blockade them, with Eric and lieutenant Hardy’s ship closing in.
As the ship becomes blockaded with giant chains, the crew starts to board the Marines ships to kick the Marines out. As Eric comes and takes Ryu and Apis, an angry Ryu knocks Eric into the water after knocking Apis back. As Ryu starts to finally fly, Nelson has his ship fire several cannonballs at Ryu, to everyone horror. As Ryu falls to the water, he asks Luffy to keep Apis safe. As this happens, Ryu lets out one final roar, leading to the Lost Island rising from the ocean, and multiple dragons flying from it.
After this happens, the straw hats begin their counterattack once again, with Luffy and Sanji fighting off the Marines and Zoro cutting the chains connecting their ship to the Marines. While Luffy decides to finish off the Marines, the other reach the Lost Island with Apis, upon doing so they learn that the so-called substance called dragonite meant for creating the Elixir of Immortality was in fact the fossils of ancient sennenryus. After Luffy destroys Nelson’s Ship, he gets on land and makes it to the others, after which he tells Apis Ryu’s final message to her; that when the dragons die, they are reborn in the nest. Seconds later, a baby dragon hatches from an egg, with the baby supposedly being a reborn Ryu. The baby screeches at Apis, and she cries happily agreeing with what it’s telling her.
Unfortunately, both Nelson and Eric show up, however an angry Eric slashes Nelson and proposes a deal with the straw hats. He states that he wants to split the dragonite and the immortality with them, but a critical Nami points out that the fossilized sennenryus that make up the dragonite couldn’t possibly be used to make the Elixir. That’s when Eric states that the alive sennenryus could, which upsets Apis, who runs towards him out of anger. As Eric tries to attack her, Usopp and Zoro protect her, and Luffy tells them all to stop, and that he’ll be the one to beat him, because he promised Ryu he would. Eventually Luffy does succeed in taking Eric down. As the Straw Hats get ready to leave Warship Island again, they are met by Apis and Bokuden. Luffy asks Apis if she wants to come with them, to which she replies that she would like to but she will stay in the village to protect the Dragon’s Nest. The Straw Hats set sail and say goodbye. Then Usopp asks the rest of the crew if Apis will be fine and Sanji, Luffy and Zoro all say that she will be okay. As the Straw Hats finally reach the entrance to the Grand Line, they have a rough time going through Reverse Mountain, which is made even worse by Eric showing back up and telling them that if any of them move and he will tear the ship apart. Nami warns him that there is Dragonite besides him, and he falls for it and she kicks his leg, throwing him to the current. With Eric officially gone, the crew celebrate as they enter the Grand Line.
Arabasta Saga
Choppers Kingdom On The Island Of Strange Animals
Following a lead from an old treasure map, the Straw Hats set sail for O-Kan Island, with everyone ready for a new adventure; except Chopper, who worries over every possible danger. While the others tease Chopper, the Going Merry suddenly begins shaking. Rushing above-deck, the Straw Hats find the sea erupting with dozens of massive geysers, one of which directly strikes the Merry and launches it high into the air. In midair, the crew can see the entirety of the island, and the crown-like ring of steam its surrounding geysers produce, but then the ship starts to fall and crash land on the island, accidentally Knocking Chopper off the ship in the process. As Chopper vanishes in the forest, the others land in the far-off shore, with several bizarre animals surrounding them, including a Bald Parrot.
The crew was taken aback when the Parrot started speaking english, but then listened as he explained that he was the elder of the island, and the island was filled with animals as intelligent as him. He then explains that for years, the creatures of the island lived peacefully under the rule of the Kirin Lion, but their ruler passed away and now the kingdom needs a new ruler, one that falls in line of an ancient prophecy. After listening to the story, the crew hears a celebration happening in the mountains, and they go to investigate, with Usopp giving everyone animal themed disguises to blend in. On the way though, the celebrating is cut short by the arrival of the islands natural predators, the Horn Eaters, a herd of armored beasts. As everyone runs away, Luffy gets targeted by the beasts due to his costume having fake horns.
Panicked, Luffy snaps them off, but throws them straight ahead, leading the Horn-Eaters to trample him anyways, with the others watching annoyed. Later, the Straw Hats stumble across a cliff-side camp where the Horn-Eaters have been trapping and trampling scores of horned animals. They soon come to learn that the beasts are being controlled by a man named Battler, who’s collecting horns in an attempt to find a treasure on the island said to have power that could shake worlds. Realizing that he told the Straw Hats too much, he controls the Horn Eaters with a special hypnotic violin and orders them to attack, unfortunately Luffy was also effected by the hypnotic music and goes on a rampage knocking himself and the crew over a cliff and into a crocodile filled river. Once Luffy is out of range, he grabs everyone and breaks their fall with his rubber body.
The straw hats then see dozens of dehorned animals along the riverbanks. Realizing how much damage Battler has already done, the crew start to worry more about Chopper, while doing that they notice the Bald Parrot from earlier flying above. They ask for his help, and he agrees to take them to the mountain to meet the new king of the beasts, unaware that they are being followed by Battler and his men, Heaby and Hotdog. Once they reach the top of the mountain, however, they are surprised to learn that the new king is Chopper, and while Chopper is happy to see them, Mobanby; the only human resident of the island, and a talking bird named Karasuke, who thinks they are invaders, and asks Chopper to fight them. Chopper tells the animals that the Straw Hats are safe, and so he leads the Straw Hats over to a great feast so they can eat together.
Mobanby demands what’s so great about the Straw Hats, and when the animals hear that they are pirates and when Luffy asked for meat, the animals flee in terror thinking Luffy is going to eat them. Nami asks Karasuke about the treasure of O-Kan Island, but Usopp says that they should just grab Chopper and leave. Then, a large blast is heard from the distance so the straw hats and the animals go to see what is going on. They see Battler and his men down below, and he states that the power he is looking for is in the horns of the King of the Beasts. Battler demands that they tell him where the king is and starts playing his violin, so the Horn Eaters start charging.
An angry Chopper leaps down and lands in front of Battler declaring himself as the King. Battler stops playing the violin, unconvinced by Chopper’s words. Chopper tells him to stop attacking the animals and to call off the Horn Eaters, but Battler says he will only if Chopper beats him. Luffy tries to help, butt is unable to leave the entrance, due to eating to much and becoming fat, which ended up blocking Zoro and Sanji as well. As Chopper and the others try to divert the Horn Eaters away, Sanji, Zoro, and Luffy arrive, and Zoro and Sanji run off to go help Chopper.
Luffy says that Mobanby should go help too, but Mobanby says that he is not strong enough, remembering that he was helpless when his father was killed by pirates. As the others console Mobanby, Zoro begins fighting off one of Battler’s henchmen, Hotdog. As the fight went on Zoro became restrained with a metal ball and chain, and began taking an onslaught of powerful kicks from Hotdog. This goes on for awhile, until Hotdog becomes overconfident and ends up kicking the chains holding Zoro loose, till Zoro eventually breaks free from them. As Hotdog brags about having the world’s strongest kicks, Zoro simply notes how careless the man is, before finishing him off with his Tatsu Maki Technique, finally defeating him. After this, Zoro openly states that Sanji’s kicks are more powerful, then goes off to find the others. As Luffy finally defeats Battler once and for all, a day later as Mobanby and Chopper say their tearful goodbyes, the Straw Hats talk about the great party they had after the defeat of Battler. As they head toward their next adventure, Usopp jokes with Chopper about possibly seeing some monsters next, and Luffy happily yells that they will just keep moving, full steam ahead.
Arabasta Arc
Postarabasta Arc
Episode Of Arabasta The Desert Princess And The Pirates
The majority of the events of Whisky Peak Arc plays out the same, but Zoro’s fight with the bounty hunters of Baroque Works has changed. In this version, when the bounty hunters try to shoot Zoro, he cuts them, instead of dodging their attack to make them shoot each other. When Zoro runs up a ladder, an unknown man shoots him, and when fighting against the Officer Agents, another unknown man throws a barrel at Zoro, instead of Miss Monday. His fight with Miss Monday remain the same, but his fight with Mr. 9 happens while Zoro is on the roof, also Zoro doesn’t fight against Igaram or Vivi and defeats all bounty hunters that are left with Tatsu Maki.
Just like in the original version, Vivi ends up traveling with the Straw Hats all the way to the Arabasta Kingdom. A sleeping Vivi wakes up on the Going Merry to find Luffy and Usopp fishing with Karoo as bait, and she punishes them by bashing their heads together. They pull up a mysterious okama, who appears extremely grateful to be saved by pirates he does not know. The man reveals that he cannot swim because he ate the Mane Mane no Mi, which allows him to change himself into anyone he has touched the face of. He adds that he can also remember these faces, which allows him to take on the faces of those he touched before, showing several faces to the crew, one of which is Vivi’s father Cobra, the king of Arabasta.
The man then leaves as his crew arrives to pick him up, declaring the Straw Hats his friends despite not knowing them for long. As he leaves, he is called Mr. 2 Bon Kurei by his crew. When Vivi realizes that the man was a member of Baroque Works and that he could turn into her father, she reveals that Arabasta is in a drought, and her father, King Nefertari Cobra had been framed for using Dance Powder, which forces rain onto the region it is used on at the expense of places downwind, for the capital. She states that the leader of Baroque Works is Crocodile, one of the Seven Warlords of the Sea, who is considered a hero in Arabasta for protecting the nation from pirates.
In order to prove their identity should Mr. 2 transform into any of them, the crew each draw an X on their wrists and covers it with a bandage, which they will take off to prove their identity. The crew reach Yuba, a ghost town that had once been a prosperous oasis before sandstorms ravaged it, causing many of the people to join the rebellion. They encounter an old man named Toto, who is the father of the rebellion’s leader, Koza, a childhood friend of Vivi’s. As the sun rises, Toto gives Luffy some of the water he dug up.
During their travel, Luffy declares that he quits, saying that even if the rebels stop, the threat will continue as long as Crocodile is alive. He adds that Vivi is naïve to think that they can prevent everyone from dying in the battle, and he urges her to, rather than risk only her life, let them help her, which she agrees to. After this, the crew befriend a camel named Matsuge, and they begin to ride his Crab friend, Hasami. Vivi then thanks Luffy for helping her see the truth, and promises him a feast after they save the kingdom. Crocodile then ambushes them almost immediately, using his devil fruit abilities to reach and capture Vivi.
Pell shows up and attacks Crocodile and while he fails to injure him, manages to make him let go of Vivi. Crocodile’s assistant, Miss All-Sunday uses her powers to ground Pell, then uses Clutch to severely wound him. Luffy intervenes, stretching out and throwing Vivi atop Hasami, staying behind to fight Crocodile. As the rest of the crew go on to Alubarna without Luffy, Baroque Works’ Officer Agents lie in wait, but the crew splits up as decoys for Vivi, allowing her to escape and try to stop the rebellion. Zoro ends up fighting Mr.
1. The majority of his fight with Mr. 1 remains the same but is a lot shorter, as Zoro is initially unable to hurt Mr. 1, but suddenly realizes how to cut through steel, and defeats him. After Luffy and Pell save Vivi, Zoro reunites up with the rest of the crew, and they attempt to retrace Crocodile’s steps to find a bomb he placed in the city that will take everyone out, while Pell searches from the air.
They discover its location in the clock tower and is guarded by Mr. 7 and Miss Father’s Day, who shoot Pell from the sky. The crew are left with less than one minute, and they work together to launch Vivi into the clock tower, where she easily defeats Mr. 7 and Miss Father’s Day and cuts the fuse, only to discover that it’s a time bomb and cannot be disarmed. Pell, however, shows at the last minute and carries the bomb high above Alubarna, sacrificing himself in the process.
As the crew watch Vivi try to stop the fighting, the then see Crocodile fly through the sky and lands in the main square, defeated, knowing that their captain has won. As the fighting finally stops, Cobra then brings Luffy to his crew, meeting them for the first time. The crew then collapse from their injuries and rest in the palace as Vivi stays up, watching the rain. Three days later, Luffy awakens from his coma, and the crew enjoys a feast for helping save the kingdom. As they eat, Chaka then arrives, informing them that Marine ships have come for the Straw Hats. Nami tells Vivi that she can come with them if she wants, and if she does, she must come to the shore at noon the next day. That night, Vivi wonders if she can truly continue her journey with the Straw Hats. The next day, Vivi, who is supposed to be giving a speech at the palace, instead proceeds to the shore, where the Straw Hats are waiting, initially believe that she would not come. She tells the Straw Hats that she can no longer travel with them, but asks if they will consider her a friend if they meet again. Luffy is about to say yes, but Nami tells him that her being associated with them will make her a criminal, and as they sail away on the Going Merry, the crew says goodbye by showing her the marks on their arms, while Vivi and Karoo does the same, happily saying their goodbyes.
Sky Island Saga
Goat Island Arc
While being chased by the Marines, led by Moore and Minchey, Luffy and his crew get lost in the fog and discover an uncharted island. They find that the island is inhabited only by an old man named Zenny and a multitude of goats. They also find a partially constructed ship on the top of the island. Because of his bad heart, Zenny probably only has three days to live. Hoping to make his last days good ones, the Straw Hat Pirates help him out and they learn about Zenny’s past as a money lender and his dream of becoming a pirate.
But realizing that Zenny has outlived Chopper’s predictions the Straw Hats decide that after helping him finish his pirate ship, they will leave the island. The Straw Hat Pirates help the old man out while hiding from the Marines and working to get his ship into the water. With help from Luffy, Zenny and his goats were able to attack the Marines. The Straw Hat pirates then went forth to help him. They defeated Minchey and tied him up. Luffy, then, threw Minchey back on Captain Moore’s ship, and Captain Moore allowed them to choose their battle location. Zenny decides to follow his dream and become a pirate, despite his age and they part ways, leaving the island and officially forming the Zenny Pirates. Luffy, then, pointed to the Marines a foggy area for battle location, which caused Captain Moore’s ships to land in a shipwreck due to the rocks. With the Marines out of their way, the crew sails off on towards their next adventure.
Ruluka Island Arc
The Straw Hats are being chased by a small fleet of Marine ships led by Major Pasqua and Isoka. The crew barely escape when the Major accidentally sinks one of his own ships. The crew then make their way towards an island named Ruluka. After making landfall, they soon meet Flip, the leader of the Collection Party, a group who collect taxes from the people of Ruluka. He is also the son of the island’s mayor, Wetton, who used to be a pirate, and is currently over taxing the people to build the Rainbow Tower.
Wetton hires a professor named Henzo to build the tower, and to research a phenomenon called the Rainbow Mist. As the straw hats eventually meet Henzo, he explains the Rainbow Mist to them, they then hear two townspeople rushing to the harbor to see a galleon and they rush there as well. Some of the mist begins to arrive as Henzo rushes to the galleon, that he recognizes as the Tarielishin on his small boat. When the mist begins to reach the island, Henzo borrows the Going Merry, with Luffy, Usopp, Robin, and a sleeping Zoro on the ship, into the mist. The inside of the Mist is full of wrecked ships and treasure, and is guarded by a group of kids calling themselves the Pumpkin Pirates.
Henzo explains that the flow of time is different inside the mist, and that those children were once his friends. He tells them that Ruluka was attacked in the past by the Wetton Pirates and that the children stole the pirates ship but were chased by Wetton and his crewmate Ian. As the children fight off Wetton and Ian, Wetton and Henzo fall overboard and the children sail directly into the Rainbow Mist never again returning. Understanding now how the Rainbow Mist kept the children from aging, the crew attempts to find a way out. Finally, Flip communicates with Henzo with a Den Den Mushi and the group realizes they are still connected with the outside world.
Knowing this, they try to reach the end of the mist, alongside the Pumpkin Pirates. As they do that, Sanji, Nami, and Chopper are trying to get to the harbor to find the others, as they are hindered by Lake, Wetton’s grandson. He tells them that the mayor has announced all the shipwrecks there have untouched cargo just laying around with jewels and coins, and that the Rainbow Tower will be used as a bridge between the island and the Shipwrecks in the mist, just as Luffy propels himself and one of the kids outside of the mist. After the Rainbow Tower is connected, Nami manages to get into the mist and reach the Merry. After asking where Luffy was, Zoro and Usopp told her that he was gone, and then continue trying to make it out of the mist, despite Wetton and his invading forces. As Luffy returns, he fight Wetton off, but Wetton manages to escape and blows the Tower away. Despite this, Luffy and the others manage to escape the mist onboard the Going Merry, when the Pumpkin Pirates stay behind and help the Merry escape with an explosive. Outside the collapsing Mist, Wetton finally gets arrested by a group of powerful Marines, who turn out to be the older versions of the kids who stayed behind in the Rainbow Mist. They reveal that after the mist collapsed, they were thrown 50 years into the past and became Marines. They decide to let the Straw Hats leave as a thanks, and the crew departs the island of Ruluka, going onwards to their next adventure.
Dead End Adventure
The Straw Hats are now chased by a Marine ship, commanded by Drake. Due to the stormy weather and Nami’s exceptional navigational skills, the ship sails away unscathed, leaving the Marine pursuant behind. The crew reach a town on Hannabal Island. Inside a pirate filled bar, they find out there is a great but very dangerous opportunity through a mysterious door in the bar. As the crew enters the mysterious door they are surprised to see it is the opening to a large tunnel.
Inside they find themselves in a large cave filled with pirates, who are all there to compete in the Dead End Race, a very dangerous anything goes sailing competition, which the winner can win up to 300,000,000. The crew is introduced to the favorites to win that year, 2 giants, Bobby and Pogo, a Fish-Man and former rival of Arlong, Willy and the favorited to win, Gasparde, a former Marine general who deserted after killing his crew. While Nami registers the crew for the race, Luffy gets involved in a fight against Gasparde’s crew along with an infamous bounty hunter by the name of Shuraiya Bascùd, as well as meets Gasparde himself which of course ends on bad terms. The next morning, The crew set sail along with many other pirate ships for the parade start which involves sailing off a waterfall, fighting off other pirates, and navigating sharp turns. Before even reaching the ocean, several pirate crews are wrecked, luckily the Straw Hats manage to pull through with each challenge.
However while checking the ship, they find a stowaway, a kid by the name of Anaguma whose come to kill them for their bounties, though find that’s impossible after witnessing the crew’s strength and power and thus sails along with them for the race. After a few more encounters one involving the pirate ship of Bigalo the Hangman and sea kings, the Straw Hats arrive at Partia, the supposed finish line of the race. However it turns out to be a Marine stronghold that quickly sinks any incoming pirate ships. Luffy realizes Gasparde rigged the race and the crew manages to escape the stronghold and track down Gasparde’s ship using Chopper’s nose. The Straw Hats manage to get to Gasparde’s ship, the Salamander, just in time to stop Gasparde from killing Shuraiya.
After Luffy knocks out Shuraiya, and starts to fight Gasparde, the rest of the crew board the ship and Anaguma reunites with his grandpa and tries to get him to leave the ship. Instead he sends Anaguma on ahead while he claim he has one last thing to do. As Luffy’s fight continues, When Anaguma realized that his grandpa is still on Gasparde’s ship, he begs the Straw Hats to go back but Zoro knocks him out and reveals that Anaguma is actually a girl, while this is happening, her grandpa causes the boiler to explode and make the ship sink. As Luffy manages to stay on the sinked wreckage and finish his fight with Gasparde right as a cyclone is coming, Luffy manages to defeat Gasparde and send him flying into the cyclone. After this, he is saved by Anaguma’s grandpa along with Shuraiya. As they head for the nearby island, the grandpa reveals that Anaguma was adopted and her real name is Adelle Bascùd, Shuraiya’s little sister whom he thought was dead. Despite the awkward reunion, the two come to accept each other. The Straw Hats close in on the real Partia as the winners of the race but the Marine ships suddenly appear and go after them, forcing them to flee from the island and forfeit their prize money. They let Adelle, Shuraiya, and Grandpa off then wish them good-bye individually before sailing off with the Marines on their tail. Despite not getting the prize money, and Nami strangling Zoro for his wisecrack about her leaving without the money, the Straw Hats continue on for their next big adventure.
The Cursed Holy Sword
When the Straw Hat Pirates dock at Asuka Island, Zoro and Usopp stay behind on the Going Merry to guard it, while the others head into town to restock their supplies. As everyone on the island learns about the legend of the Shichiseiken, Zoro is fast asleep, while Usopp is issuing repairs on the Merry. After Usopp asks a still sleeping Zoro to kick down some wooden boards for repairs, a knife is thrown through the wood, nearly hitting Zoro squarely in the face, if he had not moved his head. However, Zoro is shocked to see his name carved into the knife. As Usopp climbs above deck to get the wood himself, he notices Zoro is suddenly missing.
Zoro is later seen walking through the woods, with the knife thrown earlier in his hand, when he eventually comes across three people: Bismarck, Boo Kong and Toma. The three identify him as Roronoa Zoro, tell him that they’ve been expecting him, and asks him to follow them. As the Straw Hats notice Zoro’s absence and are forced to make an attempt to leave the island without him due to the Marines chasing them, Zoro follows the trio deeper into the jungle, where they reach a Marine dojo. It is revealed that Zoro has been taken by Toma’s group to meet their leader, who turns out to be Saga, his old friend. Zoro hands Saga the knife, who hands it to Toma.
Zoro presumes, since Saga is a Marine and Zoro is a pirate, he wants to fight him, but Saga asks him instead to give up on being a pirate, before collapsing on his knees, clutching his chest in pain. As Zoro asks his friend what’s wrong, Saga simply asks Zoro for a favor; to lend him his strength. Zoro then decides to listen to what he has to say. Later the Straw Hats end up back on the island, due to them barely escaping the Marines chasing them, as well as a Hippo Rhino that fell in love with the Merry. As they go back to looking for Zoro, they end up meeting a woman named Maya and eventually most of the crew follow her back to her village, with Luffy and Usopp getting lost on the way.
Just then, a band of Marine swordsmen assaults the village, led by Bismarck, Boo Kong, and much to the Straw Hats’ surprise, Zoro. Zoro chases after Maya and another villager; Izaya, in an attempt to steal a set of orbs in her possession, while Sanji pursues the rogue swordsman. After Sanji asks Zoro what the hell he thinks he is doing, Zoro simply refuses to answer his questions, and the two engage in combat. As the two are fighting, Sanji leaves himself wide open in the middle of another conversation with Zoro, which lets Zoro cut his arm in the process. After that, as Sanji lies on the ground, Zoro steals the orbs, and leaves with the retreating Marines.
Back at the dojo, Luffy and Usopp managed to get there, and Toma simply tells them that Zoro will be there soon, but are later driven out by Toma and Saga, who start to fight them saying that Zoro will no longer be a part of their crew. Later that night, Zoro brings the orbs Maya was protecting to Saga, who throws them down a well. Despite this, Saga once again collapses, even though it seemed that the orbs were causing him pain, but Saga tells him that he will be alright. In morning, Saga, Zoro, Toma, Bismarck, and Boo Kong are standing in front of many Marine soldiers, all trained under Saga’s tutelage in swordsmanship. Saga promises the Marines an insurmountable power when “the awaited time arrives”.
At that moment, he lifts his sword, which he identifies as the Shichiseiken, and proclaims that with their power, they will cut a path to true justice. Everyone in the vicinity roars in agreement, except for Toma, Saga, and Zoro. Saga then tells Zoro that on the night of the red moon, his dream will be realized, with Zoro simply staring at him, realizing that everyone, including Saga was under the sword’s influence. As they left, Toma expressed interest in sparring with Zoro and informed the pirate of his captain’s defeat by Saga’s sword. Toma asked Zoro to have a proper duel with him before he completely succumbs to the sword’s influence like the others.
Zoro agrees and he and Toma fight, reminding Zoro of his past with Saga, and of the promise they made, that Zoro would become the greatest swordsman of all time, and Saga would join the Marines and master the sword of justice. However, Saga interrupted their duel and took complete control over Toma, crushing his spirit and ordering him to protect one of the towers needed to perform a ritual with the orbs from earlier to seal away the swords’ power. Zoro, angered by this, called out Saga and stated that Toma was stronger through his ability to resist the sword, angering Saga. Despite the disagreement, Saga proclaimed that Zoro would still make his dream come true, prompting Zoro to attack Saga. The two began to fight, with Saga launching flames at his angered friend.
Zoro’s attacks had no effect, and Saga sent a blue, dragon-shaped flame to bite Zoro, picking him up and throwing him into the ground. Struggling on the ground, Zoro tried to reach for Yubashiri, but Saga kicked the sword away before stabbing Zoro in the hand. He stood over Zoro, telling him about how the Shichiseiken gave him the power he lost when his dominant arm was crippled and how he would take over the world with darkness. Zoro stood up, remarking about their past dreams, and charged Saga, who knocked the pirate back and shot him with Youkazan: Dark Fire Slash. This action thrusted Zoro into the outer wall of the dojo, and he fell to the ground injured.
Saga was ready to finish Zoro off when, to his surprise, Maya was able to activate the barrier between their island and the Red Moon and prepare to start the ritual to seal the Shichiseiken. Infuriated by this interruption, Saga ran toward Maya’s location, with an injured Zoro following to the site. As Zoro tries to get to the site, Luffy and Saga fight their second fight. While Luffy had the upper hand for a while, Saga eventually loses full control of himself to the cursed sword, which merges with Saga’s body, making him strong enough to get the upper hand on Luffy. As Luffy is about to challenge Saga again, he is stopped when Zoro arrived to fight Saga himself.
Wanting a proper final duel, Zoro threw Saga a katana. As the two prepared to clash, Maya, praying again, caused the orbs in the towers to glow, activating the ritual. The ritual aggravated the mark on Saga’s chest where the sword merged with him, and the swordsman stabbed the ground in front of him in anger to force Zoro into the air. He lunged at Zoro, but Zoro was able to strike Saga down, defeating the Shichiseiken, and destroying it once and for all. Lying injured on the ground, Saga regained his consciousness and smiled up at his victorious friend before passing out. Zoro himself passes out along with Luffy who passes out from hunger as their friends come for them while Maya holds Saga in her arms. With the ritual complete, the cursed sword destroyed, and everyone under it’s influence freed, and his old friend saved, Zoro apologizes to the crew for his earlier actions, including Sanji, who simply shrugs off his apology and states that after everything that’s happened, he’ll let what he did slide. As the crew happily reunite, Saga wakes up and swears to everyone that he will master the sword of justice for everyone’s sake, as it is the only atonement he can make. Zoro then gives Saga his old knife back, as Saga makes Zoro the same promise, he walks away with his crew ready to leave the island. As the Straw Hat Pirates leave the island, Saga sits on a cliff with Maya, Izaya, Lacos, and Toma to see their departure. As the crew ready themselves for their next adventure, the Going Merry sails out with a Hippo Rhino continuously hitting it in a strange sort of mating ritual, with the crew trying to sail away from the smitten creature.
Open Upon The Great Sea A Fathers Huge Huge Dream
The Straw Hats arrive onto Shellfish Island where they run into a mysterious group of people looking for treasure. The same group is then ambushed by the Bayan Pirates’ second in command, Zap, who captures the oldest child, Amanda, along with a sleepy Luffy, who apparently had sleeping medicine put into his food by Sanji earlier to make him quiet. Straw Hats visit Amanda’s father’s hut to try to find out where the great treasure is. They learn that the treasure island is between Mamanato Island and Samua Island, which is the island that they are on now. They also learn Amanda holds the key to finding the treasure.
After this, the Straw Hats, Maccus, Bonney, and Amanda’s younger siblings follow the Bayan crew to their main ship in order to save Luffy and Amanda. As the Straw Hats arrive to save their captain, Bayan decides to force Luffy to fight his own crew. This tactic was successful until Usopp manages to shoot sleeping pellets into the singers’ mouths, stopping them from singing. As Bonney and Maccus board the ship and fail to defeat Zap, The Straw Hats then board Bayan’s ship, easily defeating Zap and, using a combined attack against Bayan, send him off into the ocean, and rescuing Amanda in the process. The Straw Hats then sail back to the island where the treasure is supposed to be. Afterwards, the island starts to “open” and reveals itself to be a giant clam. Inside is a gigantic pearl, which makes Amanda acknowledge her father’s drive for adventure, as they all realize that the island itself was the treasure that the map leads to. Afterwards Bonney and Maccus offer to adopt the children, as the Straw Hats say farewell to the newly formed family.
Protect The Last Great Performance
One day on a random island, the Straw Hats decide to buy tickets to go see the farewell performance from a long time actor named Randolph. 30 minutes before the play is set to start, 3 actors decide to quit the play, leaving Randolph’s play shorthanded. Nami makes a deal with the manager of the play to participate as the princess for 100,000, and the other Straw Hats decide to help as well. As the first act ended up being disastrous, due to the straw hats’ individual performances, their hectic performances causes a crash on the set and Zoro, thinking that was the cue, turns the stage so that it crashes on all the actors. Randolph, playing a marine officer, however performs a valiant speech which inspires the audience and keeps the show going.
Before Act 2, Randolph finds out Luffy is a pirate and attacks him, due to his own past as a ex marine and the loss of his family to pirates. Knowing that Luffy was a pirate made Randolph angry and he attempted to fight him. Seeing as Act 2 was soon to come, Randolph decided to postpone the fight until after the play. Just as everyone was about to start the 2nd act, a marine commander showed up and arrested Randolph for selling weapons to pirates. This turned out to be a lie however as this marine commander Governor had planted those weapons on Randolph’s ship for revenge, as the commander was a former subordinate of Randolph who once tried to sell weapons to pirates to speed up his own promotion within the marines and to make money, but Randolph caught on and tried to get him kicked out by court martial.
Although he failed to prove his guilt, Governor’s plans to rise the ranks were greatly halted as a result of Randolph’s actions for years, with the commander now back to get his revenge and arrested Randolph. After falling into a cell, Randolph is freed by Luffy who tells him to go back to his ship and finish the act. Randolph refuses to accept help from a pirate but once they are discovered, Luffy grabs Randolph and fights through many marines until he escapes the marine ship and places Randolph back on his own ship and stage. Commander Governor tells the marines to fire and sink both the Going Merry and Randolph’s ship but Luffy stops the cannonballs from reaching Randolph’s ship. Luffy vows to protect Randolph’s performance and yells to Randolph to hurry and finish the act.
While Randolph is performing the act, the marines send two ships around the Going Merry to try and sink Randolph’s ships. Zoro and Sanji head out to stop these ships and defend against cannonballs. Eventually, the marines focus all fire on the Straw Hat Pirates and sink both Zoro’s and Sanji’s rowboats. As the rest of the crew deals with marines, Luffy and Chopper board the main marine ship during the confusion and knock out all of the marines on board. Two other marine ships try to help the main marine flagship but each one is destroyed by Zoro and Sanji respectively.
Commander Governor wonders why the pirates are so strong and finally realizes that they are facing the Straw Hat Pirates. He accuses an underling of making the mistake and threatens him with court martial, but the marine says go ahead and threatens to reveal the truth about Commander Governor. Meanwhile, Randolph is just about to finish his play when he decides to change the last line. Instead of “I will fight until every pirate is dead at my feet”, he tells the audience that the pirates in the play actually disposed of the cruel and greedy princess of the village. He says that he will fight against all who are despicable instead. He will fight against those with rotten souls and that even if your loved ones are slain by these evil people, you must forge ahead and live on. The Straw Hat Pirates defeat all the marines that fight, while some decide to ditch the cowardly Commander Governor. With no men left, Governor states he will not give up and will just lie on his reports to his superiors about what happened. Luffy then drops down into the commanders room however, and punches him through the sky. Randolph’s new speech brings tears and cheers to the audience as his farewell performance comes to an end. As Luffy and the rest leave the island, Luffy yells to Randolph that he will be back to settle things and to not to forget about it and Randolph remarks that Luffy better not forget their postponed fight either as the Straw Hats sail off into the sunset.
G8 Arc
When the Straw Hats drop from the sky after their adventure in Skypiea, they land in the middle of the marine base known as G-8, they are forced to abandon their ship, as many marines immediately spring upon it. Separated, the crewmates are forced to disguise themselves and try to find a way out of the base, which is comprised of a huge mountain surrounded by water, and then a ring of sheer rock cliffs that form a wall of sorts. As the crew separates, Zoro surfaces in the water and dodges an oncoming ship. As Zoro wanders the base with no real destination and without doing anything to hide, Nami notices him and takes his swords and throws them on a bush difficult to reach, just to make him busy and to stop him from getting caught. However, Zoro eventually reaches his swords, but he falls into the sea.
When he comes out, he finds himself surrounded by marines that capture him. As Zoro is taken prisoner, Vice Admiral Jonathan gives Lieutenant Commander Drake a direct order to interrogate Zoro. In the cells, Zoro was about to take a nap when Drake shows up and demands for Zoro’s guards to open the cell. Drake begins asking questions as to how many of the crew there are, how did they infiltrate the stronghold and such. Zoro truthfully replies that they came from heaven via an octopus balloon.
Drake does not believe him and warns him not to underestimate the marines. While imprisoned, Zoro is eventually joined by Usopp who is also captured, Robin is with Vice Admiral learning more about the island. Major Shepherd is captured by the marines and held in the same cell as the Straw Hat Crew, as Robin stole his uniform previously and the Marine mistook him for an intruder. Usopp takes the chance to pretend he is their comrade, assuring the marines won’t let him out, with Zoro knocking Shephard out so he can continue his nap. Meanwhile, Luffy and Sanji attempt to infiltrate the prison, concerned about how deserted the path was.
They race down, despite the obvious trap. Luffy discovers the bars are made out of Seastone, whist Sanji attempts to kick down the bars, also discovering that they are practically unbreakable. However, Sanji takes Usopp’s impact dial, only to find out it’s the voice dial instead. He tries Usopp’s other pocket, only for it to be the flavor dial. The gas sets off an explosion, and the Straw Hat’s escape only to get lost while following Zoro.
Luffy’s group begins running around the base, being chased by Marines. In trying to escape, they end up in what seems like a dead-end at the side of the mountain and meet Jonathan again, who happened to be at the balcony of his office. Luffy tells Jonathan that he has freed his crewmates and declares that they were going to escape the base. This makes Jonathan laugh, asking him if he really thinks he can escape Navarone Island with their treasure, to which Luffy replies that they are pirates and that the Marines can’t catch them. Suddenly a huge cannon fires at Luffy’s group, and they run back inside the base.
Instead of going in pursuit of the Straw Hats, Jonathan decides to set a trap for them in Dock 88, where the Going Merry is moored, as he knows this is where they will surely go. He tasks Lieutenant Commander Drake to set up the ambush in Dock 88 and since it will take Drake some time to arrive at said dock, he orders Unit 55 to slow the Straw Hats down to stall for time. He stations them at the bridge which is the only way to get to the ship. As Luffy’s group arrives at the bridge leading to Dock 88, they see that the bridge is unguarded, they gather that it must be a trap. They decide that they don’t care and go ahead and cross it.
Unit 55 block their path and have them surrounded from all sides. Luffy’s group easily defeats them but, in the process, Luffy destroys the bridge, and they all fall into the bay. Even with the damage caused, Jonathan in pleased with the result since it bought them the time they needed to set up the ambush in Dock 88. Luffy’s group heads to the dock, straight into the trap, seemingly cornered. Luffy is shot with a Seastone net and is incapacitated.
Just then, Nami and Dr. Kobato also arrive pushing a hospital bed, with Chopper hidden in the sheets pretending to be a patient. As Nami’s group arrive in Dock 88 to help, Drake’s men bombard Luffy’s group with gun fire but he easily repels the bullets using his Devil Fruit powers. The Marines resort to using what seem like bazookas seeing that their guns are ineffective. They have fired instead, flash bombs to subdue the pirates which stings their eyes.
Drake then has his Sword Unit attack the Straw Hats as they are still trying to recover from the effects of the flash bomb. The Crew are able to fight off the attacks. Luffy is then shot with a Seastone net and is instantly incapacitated. Drake demands that they surrender and tells them that while their Marine base policy is to take prisoners alive, he will not hesitate to change this policy if he is met with any resistance. With Luffy in a weakened state, Sanji, Zoro and Usopp seem to be unable to resist the overwhelming number of the Marines in the dock and consider surrendering.
Just as the Marines are about to capture them, Nami and Dr. Kobato, with Chopper still hidden under the sheets of the hospital bed, get up, and as the marines notice the doctor, Kobato then pretends to be a hostage and screams in feigned terror. She hints at Nami of her plan and in turn, Nami also pretends to be a nurse held hostage by Chopper, now in his Heavy Point form. Chopper acts like a tough and ruthless pirate and demands that the Marines stand down and let them board their ship. As Drake gives in and orders his men to stand down in return for the release of the hostages, Zoro releases Luffy from the Seastone net but Luffy remains weak.
Drake “accommodates” the Straw Hats and lets them board their ship, but Zoro senses another trap. He silently tells Luffy to sling them to their ship on his signal. A Marine covertly rescues Dr. Kobato and another also tries to rescue Nami, but she punches the Marine. This was their signal to rush towards the ship.
Luffy slings the Crew onto the Merry. Mekao, with the safety of his daughter in mind, aides the pirates in their escape by releasing the Going Merry from the dock into the bay. Thinking that the Straw Hats are holding the “nurse” Nami as hostage, Drake orders them not to shoot at them, but instead to just give them warning shots. As the ship sails away, the Marines scope out the ship and notice Nami giving the crew orders and realize that she is not being held hostage. They realize that she is actually part of the Straw Hats.
As Robin later arrives and rejoins the crew, She gives Nami a map of Navarone Island which she obtained in the library. The Marines start shooting cannons at the Merry and start giving chase using warships. Nami refers to the map and sees the only way out of the base is the Sea Gate, to which they head. She notices that the water is too shallow and that the map doesn’t make sense. They head to the Sea Gate anyway and try to think of a plan to open the gate.
The Marines continue their barrage on the Merry while the Straw Hats don’t have a way to retaliate since the Marines have confiscated all their cannon balls. Luffy devises a plan and catches all the cannon balls shot at them with his Gomu Gomu no Fusen ability and redirects them towards the gate. Just as the gate explodes, Nami realizes that if the Marines took all their cannon balls, they must have also taken the treasure they found on Skypiea. The Straw Hats decide to go back for the gold, as well as Nami’s waver. They hide the Going Merry in an abandoned dock, since there are so many.
Usopp uses the junk in the dock to disguise Merry as a Naval ship, and then splits the crew into two teams: one team to recover the treasure gained at Skypiea, and the other team to retrieve Nami’s Waver. Chopper is left behind to guard the Merry. Jonathan tricks the crew into another ambush, this one in a huge room that is locked from the outside. Drake is once again leading the attack, with countless marines backing him up, and things look bleak until Agent Shepherd foolishly opens the doors and allows Luffy, Robin, Zoro, and Usopp to escape. As Nami’s group retrieves the Waver and return to the ship, she goes looking for Luffy and finds him, only to discover that they still do not have the gold.
Nami suspects that it’s in the Commander’s office, so she and Luffy go alone while everyone else goes back to the boat. Using the Waver, she and Luffy scale the main mountain and break into Jonathan’s office. Marines fill the room but Nami uses her Thunder Tempo attack to electrocute them all. She and Luffy grab the treasure and head back to the boat. However, Jonathan is not worried, because at 9 PM the “fangs of G-8” will appear.
What he means is the inner lake becomes so shallow that the Going Merry is stranded on a reef. With no water, the Merry is stuck in the mud while the marines mobilize. When Luffy commands the ship to go full speed ahead, a hole was torn in the hull by the rocks on the harbor floor, so they stop. The harbor eventually reaches a very low tide, rendering the ship unable to move. Jonathan gloats via megaphone how he had captured the Straw Hat Pirates. However, the Straw Hat Pirates decide to launch a plan of their own; they use Usopp’s Impact Dial to launch the ship into the air, then uses an Octopus Balloon inflated with Breath and Flame Dials to float in the air. Jonathan orders his men to fire a “warning shot” at the balloon. However, Shepherd also aims for the balloon with his bazooka, only to instead miss and shoot down the Marines’ cannon, with the Straw Hats escaping, once and for all. As the Straw Hats are seen flying towards the sunset. Usopp begins working on fixing the hole in the hull, as they continue to sail away from the base and onto the open sea.
Water 7 Saga
Long Ring Long Land Arc
Oceans Dream Arc
One night aboard the Going Merry, Robin is reading late at night while the others are sleeping. Suddenly, a mysterious figure appears in the ocean and plays an instrument resembling a seahorse. Nami wakes up in the morning, but cannot recognize Robin. Chopper, Usopp, Sanji, and Luffy also wake up soon after, all of which are confused as to why they woke up on the ship; their memories were erased. Usopp lies and says that he was a famous pirate, but his lie is seen through.
The Straw Hats all meet at the deck and notice Chopper, wondering who he is. Robin explains that they were on the Grand Line, and that they were on a pirate ship led by Luffy. Nami then goes to her room and finds her logbook, finding that the notes were written in her handwriting. Nami decides that she must return to Cocoyasi Village. She escapes the ship using a Waver.
Zoro also decides to leave, and jumps in the water and swims. Meanwhile, the mysterious figure watches from a hill. After Zoro swims to the nearby island, he starts to have a flashback of his time in Shimotsuki Village, with Zoro telling Kuina that either one of them will become the world’s strongest swordsman. Kuina’s father tells Zoro that Kuina’s dream has been passed to him, giving him the Wado Ichimonji. Back in present day, the boy approaches Zoro, but is noticed, so he leaves.
The next day, after the other Straw Hats reach the island, the boy approaches Zoro again, but this time hypnotizes Zoro into joining his side. As Usopp and Chopper find Zoro and they bring him back to everyone else, he suddenly starts to attack Luffy. As the Straw Hats believe that Zoro was hypnotized, Luffy tells the others to go ahead to the temple, while he stayed behind to battle Zoro. As Luffy tries to avoid fighting Zoro, Zoro seemingly defeating Luffy with an Oni Giri move. However, Luffy gets up and they continue to their fight in the forest.
After the others reach the palace, they are approached by the mysterious boy. As Sanji kicks the boy to get everyone’s memories back, which caused the seahorse horn to release the Straw Hats’ memories and also play a sound. Because the boy was briefly unconscious from the kick, he lost his memories. The boy, confused as to where he was, flees. Robin explains that the real thief was the seahorse horn.
It tries to flee, but is caught by Sanji. Sanji beats the seahorse until it coughed up the Straw Hats’ memories. Having regained their memories, they wonder if Zoro has regained his memories. Zoro approaches them, and Sanji is prepared to fight him. The seahorse communicates via Chopper that it still had its last resort.
As Zoro approaches the Straw Hats, prepared to fight them, Sanji battles Zoro, but Luffy launches himself forward, hitting Zoro and Sanji both. When they wake up, Zoro reveals that he regained his memory when the seahorse coughed up his memory, with Luffy right behind him. Sanji was mad that Zoro still looked scary after regaining his memory. Zoro then jumps into the lake to chase the seahorse. After Zoro catches it, the seahorse uses his last resort: he sprays a gas into the air that makes the Straw Hats hallucinate people from their past memories (Bell-mere, Hiriluk, Kaya, Kuina, Zeff, Ace, and Shanks), then their past enemies (Arlong, Wapol, Kuro, Krieg, Crocodile, and Enel). The seahorse then steals the Straw Hats’ memories, causing it to inflate and be able to float; claiming that it became a Sennenryu. Despite having lost all of his memories, Luffy decides that he wants to ride the seahorse and unintentionally uses his Devil Fruit powers to fly into it and wrap his arms around it. This causes the seahorse to return Luffy’s memories, so he beats up the seahorse until everyone’s memory returns and sends it flying off the island. As the crew comes down to the village thinking they will be rewarded for getting everyone’s memories back, they are instead attacked. Drim, the boy who carried the seahorse around, misinterpreted the situation and thought the Straw Hat Pirates were the ones who took everyone’s memories and warned the entire village, so the crew is forced to rush back to the ship and leave.
Baron Omatsuri And The Secret Island
On a calm day, the Straw Hats receive a message in a bottle advertising Omatsuri Island as a resort, promising spas and salons, good food, and many beautiful women, with Grand Line Pirates being especially welcome, the stronger the better. The crew are delighted at their luck, and Luffy decides that this is an opportunity they could not ignore. They set a course for the island. When they reach the island, they see an uninhabited jungle but the crew follow strange sounds throughout the jungle, which leads them directly to the resort, and they are in awe by its dazzling rides and attractions. Soon, the owner of the island, Baron Omatsuri comes out on an elephant with a small talking flower sprouting from his shoulder to greet his guests.
The crew notices the flower, and also notice that the dancers and performers, all have a small plants sprouting out of their heads as well. As the Baron welcomes the crew to his island and says they are welcome to enjoy all the delights he is offering, Luffy and the others are happy to hear this, but first he suggests that they prove their worth by taking part in a competition called the ‘Trial of Hell, which he explains is similar to the Davy Back Fight. Despite the crew being unsure whether or not to consider the trial, Luffy is filled with excitement by this challenge, saying that it might be fun, and that his friends are capable of handling any trial, officially excepting the proposal. As he accepts the proposal, the plaza they are in mechanically converts into an enormous round pool with a platform in the middle, as the first competition is goldfish catching, with the rules being that the winning team will be the one who catches the most goldfish in three minutes using only the net they are given, which is about three inches long and made of water-soluble tissue paper. When Usopp volunteers to take on the challenge, he immediately changes his mind when he sees his opponent, Muchigoro and the massive goldfish that they have to catch, Rosario.
As Nami, Sanji, Zoro and Luffy all try to catch the giant fish using their normal attacks, but only succeed in breaking the tiny net. Just as they decide that it’s an impossible task, Muchigoro takes his turn. He reveals that he was hiding a net big enough to catch Rosario all along, much to the crew’s fury. He calls Rosario into his net and flings him toward his prize bucket, with Robin intervening with her powers to bounce the fish back into the platform, where Chopper knocks him into own bucket using his Guard Point, just as the time limit ends. The Baron is furious at the Straw Hats for beating him, as well as insulting him and Muchigoro.
He demands that they compete in another challenge. Nami had been hoping for a chance to relax at this island, and refuses on behalf of the rest. Luffy, however, overrules as before, having enjoyed the first trial and is looking forward to more. Nami, furious, tries to lead the crew back to the ship, but the forest seems to move around them and they become lost. Luffy, following them, continues to try to convince them to go back to the Trials.
When they finally manage to leave the forest, they find themselves before the Baron again as he announces that they have arrived at the second trial – a complex game of ring toss, taking place between two teams of four people, each in two gondola-like waver boats. To win, a team must throw rings over every member of the other team. Due to Luffy, Robin, and Chopper all being Devil Fruit eaters, the teams for the next trial ended up with Zoro and Sanji being partnered together, and Usopp and Nami teaming up as well, and their opponents, were the so-called; Four Wise Men, a group of four tiny, frog-like people. With the trial starting at a canal, the participants have to throw rings at their opponents while speeding through what appears to be a city. As Zoro and Sanji complain about being partnered together, they avoid machine gun fire from Keroshot and Kerodeek’s tooled-up boat.
As the race continues Zoro and Sanji do not seem to make much progress together as they continually bicker, but both of them finally catch up to Keroshot and Kerodeek’s ship. Before Zoro makes his move with the ring, though, the two wise men use their boat’s mechanically operated arms to try and catch him with a ring. Zoro finally slices them up and orders Sanji to pull in closer. Before Zoro makes a second attempt, Keroshot pulls out another piece of artillery and starts to shoot at him. He dodges again and again and blames Sanji for his reckless driving.
For that, Sanji goes a bit faster and eventually makes Zoro an easy target for Keroshot again. Zoro eventually leaps out of the boat into the sides and runs to keep up with the boat. He finally leaps high into the air, and after seconds in flight, falls back into his own boat. Both Zoro and Sanji continue to fight, while Keroshot and Kerodeek smile at their success in getting them riled up. Zoro becomes determined to get them this time, but fails as their opponent’s boat backs off.
Trying to maintain his balance, he then realizes that they are out of sight when the path splits up between them. He cannot help but attack Sanji another time. As they both argue, the paths merge. Without them noticing, Keroshot’s boat appears ahead of them, ready to ensnare them with a ring. As Zoro and Sanji are ready to duke it out on the boat, Keroshot and Kerodeek tries to get their attention.
They shoot at them, but every single shot misses. Then they provoke Zoro so much he slices up their boat. Kerodeek, within mere seconds patches up the boat, and presents a larger, more intimidating version of their shark-like boat. They pull up near Sanji and continue to make some noise. Sanji finishes them off with his kicks, and Kerodeek is forced to patch up once more.
A massive version of their boat pulls from behind. Its power is so great the boat even begins to float. Its golden drill is able to plow through the bridges extending across the water. Zoro and Sanji had enough of their interruptions, so they break the massive boat apart together, sending Keroshot and Kerodeek into the air. Finally they were at peace and they could properly fight.
Nami catches their attention and orders them to throw the rings since she’s tied up herself, being hung up at the strings which held the city’s lanterns. Sanji stops the boat and throws the two rings to ensnare the two wise men. As the duo try to help Nami, Kerojii appears and gets in their way, with all of them just barely missing each other with their attacks. Annoyed by this, Zoro and Sanji try to stop the frog with Nami’s help, only for Kerojii to dodge and for Zoro’s katana to cut Nami’s string instead, sending her to the water below. They try a second time, but end up hitting each other and landing in their boat.
As they fight, Kerojii falls from above with a ring in each hand. Zoro pushes Sanji to save himself, causing Sanji to be ensnared by the strange self-wrapping ring. This gave Zoro the chance to take Kerojii out himself and thought that he’d insult Sanji before doing so. Even without the use of his arms, Sanji attempts to attack Zoro on the boat. Zoro continues to swing his katana but misses with each thrust.
Before performing Oni Giri, Kerojii kicks a sandal to his head and gets ready to catch Zoro. Thinking that he ensured his victory, a voice comes from above. There was one person left of the Straw Hats team, which was Usopp. Usopp lets go of his glider and comes down with his 5 ton hammer, pounding Kerojii down into the water. Usopp throws a ring on Kerojii, ending the game, even though Zoro was caught in the process, the score was 4 to 3.
Usopp smiles and laughs about his aid to their victory, until Nami stands up and slaps him and accuses him of betrayal. She slaps him again when Usopp abruptly replies that Nami is the one who specializes in betraying people. Zoro and Sanji aren’t happy with each other either. As the victory fireworks appear in the sky, it seems as if the crew is starting to crumble apart. Despite their victory, everyone was on edge and angry at one another back at the hotel, confusing Robin and Luffy.
As Robin questions Usopp if he saw anything that resembled a flower while he was gliding in the air, Zoro interrupts him and asks the crew where Chopper is. Usopp answers, but the question gets asked again by Sanji. Usopp answers again, but Nami asks the question again a third time, then snaps at Usopp and said that she wasn’t asking him. Usopp is stunned at the length of Nami’s anger towards him for his spiteful words earlier, but they are interrupted by the introductory drumming of the Baron as he presents them with a dinner party for a gift. The water pool near them changes and one of Baron’s men Kotetsu emerges from below, equipped with two giant grilling spatulas strapped on his back.
The flooring underneath him becomes a giant iron grill as the grill itself is surrounded by walls of flames. As the performance soon turns into a cooking challenge between Kotetsu and Sanji, an unimpressed Zoro simply takes a nap through the event. As the event ends and Luffy wakes Zoro up to eat, he gets up but Sanji does not give him permission to eat, stating his usually his wanting nobody to go hungry belief was overridden by his rivalry and anger with Zoro, coupled with the fact that he slept through his performance. With Zoro now annoyed, Sanji spends no more time with Zoro and runs through the tables searching for Robin but she’s no where to be found. With Sanji not being able to find Robin, Zoro tells him that she was off to investigate a flower on the island.
The four Straw Hats then gather and realize that Usopp was gone too, and that they didn’t know where Chopper was. Sanji begins to put all the blame on Zoro for not watching them properly, but Zoro counters back telling him that they weren’t children. It was outrageous to Sanji that none of them noticed the disappearance of three of their crewmates, leading him to angrily ask Luffy for his response since it was his idea to come to this island, leaving Luffy surprised and feeling guilty. With the Baron calling forth the final Trial of Hell and DJ Gappa showing up wearing Usopp’s hat, Zoro and Sanji immediately demanded to know where their three missing crewmates are. As the Baron demands that they accept another Trial of Hell, Sanji backs away and decides to look for the three himself, and Zoro decides to do the same and runs off to the opposite direction, as the final trial is revealed to be the trial of shooting, where the island residents ruthlessly hunt down the opposing pirate crew.
With the trial officially started, everyone began hunting the remaining Straw Hats down, with Zoro being hunted down specially by DJ Gappa, after already dealing with Sanji and Nami. DJ Gappa walks up towards Zoro, but discovers that he was still alive. Zoro strangles him, throws him, and uses his Oni Giri. It was clear that the technique connected, but DJ stood there with a frightful, smiling face. He realize that he was just cut, but he did not die.
There wasn’t any blood, and he was still okay. He does not understand what was happening. Zoro attempts to get him a second time, thinking that DJ used some sort of technique to shield himself. The same thing happens. While baffled, Zoro is caught by surprise and is hit with an arrow by the Baron, which causes Zoro to collapse.
After which, Zoro is later taken prisoner by the Lily Carnation, and is eventually absorbed into the monstrous plant in front of Luffy, becoming apart of it. With Luffy and the other pirates trapped on the island banding together to stop Baron Omatsuri, the Lily Carnation takes it true form, with the entirety of the Straw Hats now assimilated into it and the Baron. Despite an uphill battle now ensuing, one of the pirates manages to fire an arrow into the Lily, critically injuring it in the process, causing all the inhabitants on the island to become lifeless again, and a shocked Baron to lose his connection with the Lily. With a now enraged Baron trying to finish everyone off, before he takes a step further, Luffy steps into the puddle of the Lily’s innards and strikes him with a death-rendering punch, sending the Baron into oblivion, and ending the struggle. With the Lily Carnation’s destruction, everyone that was absorbed earlier returned, completely confused about what had happened to them in the first place. As the five of them emerge safe and sound, Luffy smiles in relief and closes his eyes. The Straw Hats spot him and quickly go to see him. With Nami calling out to him wondering what happened and how he could lay there and sleep in a place like this, Luffy couldn’t help but laugh, as the struggle on Omatsuri Island was finally over.
The Giant Mechanical Soldier Of Karakuri Castle
During a raging storm, the crew searches a wrecked pirate ship for any treasure only to find a single chest. On the Going Merry, they open it only to find an old woman who hid there to escape the storm. As they contemplate what to do with her, even suggesting to put her back in the box, the woman tells them about a legendary Golden Crown on her island that she will let them have if they return her there. Though the rest of the crew thinks this sounds suspicious, Luffy agrees. As it turns out, it is impossible to reach using a Log Pose, requiring the use of a “Turtle Pose”, which uses a small turtle that always points to the island.
As they come up to the island, the crew hears a fisherman singing an old folk song about the Golden Crown known as the Yurari Uta. The woman explains that the island is known as Mecha Island and as the pirates get closer, they set off a defense system involving arrow-firing robots. When the island’s leader, Ratchet, sees the old lady, his mother, on the ship, he launches a hand glider and retrieves her from the ship. Then, one of Ratchet’s subordinates, General Maji, activates the robots, sending hundreds of arrows flying towards the ship, but Zoro deflects all of them. Maji then activates a giant fan to blow the ship away, but the arrow robots end up getting sucked into it.
Though the metal parts being blown out of the fan wreck the Going Merry’s main sail, the fan is destroyed while Maji gets his back broken by Robin’s Clutch. Due to this, the crew cannot leave the island, so they decide to stay and search for the Golden Crown. They realize that there may be hints in the song they heard earlier, which Robin had thankfully written down. The two possible clues they find in the song refer to “the white snake’s eyes” and “the two moons”. They manage to figure out that the white snake is referring to a rock shaped like a snake head, but cannot understand what the two moons refer to.
Usopp suggests that maybe it is the moon and its reflection, but that is wrong too. As it turns out, Ratchet is also trying to figure out the same thing, but he decides to leave the Straw Hats alone for now, believing that it is impossible for them to solve the mystery. During a contest between him and Usopp, Luffy breaks off one of the snake rock’s eyes, and Robin realizes that they may have misinterpreted the lyrics of the song. Luffy breaks off the other eye, revealing an entrance into the island. When Ratchet hears about this from Maji, who was watching the crew, he freaks out for a bit but eventually calms down and decides to use them to get the treasure for himself.
Maji then invites the crew to a party at Ratchet’s castle, which they begrudgingly accept. As the Straw Hats reach the castle, Luffy happily begins eating as the crew look around the venue as the party starts. As they look around they notice that the entire staff are all robots dressed like maids, except for the Butler. At the party, Ratchet asks for the Straw Hats to help him find the treasure. Though the rest of the crew finds this suspicious, Luffy agrees to help.
The next day, the crew along with Ratchet and his friends enter the cave. They pass through a narrow passage and fall down a waterfall before crashing their ship on land. Luffy comes across a beautiful lake surrounded by animal statues with light shining through the top, and Robin finds a pillar with the final part of the song written on it. At first, they think it means to say that it is time to drink up the lake, but they soon realize that it actually means that the Ibis statue can drink up the lake. Luffy unintentionally knocks down a giant statue of this bird into the lake, and all of the water drains away.
At the bottom of the lake is a passage, which Robin, Chopper, and Sanji go through while the others stay to investigate the newly exposed surroundings. As Robin’s group manage to reach the top of the mountain and investigate the temple located there, they make a discovery that literally causes the entire island to shake and fall apart, as the island itself was actually a Giant sleeping turtle. As it turns out, the song actually serves as instructions to awaken the island-sized turtle, with the island itself onto of its shell, which Ratchet reveals he knew this entire time, though he also points out that he still has not figured out what the Golden Crown is referring to, so there may still be a treasure. At this point, Ratchet reveals his true intentions: he will use the turtle to take over the world, which everyone immediately thinks is stupid. As his group manages to escape from the pirates, he activates his giant mechanical castle which takes the turtle and manipulates it using giant cables in order to force it to move, to advance his world domination plot.
The Straw Hats gather together and break into the castle in order to stop him, but Chopper goes off on his own when the turtle starts speaking to him. The remaining six are caught in a trap, where they have to deal with Ratchet and one his inventions, a mechanized battle suit, which empresses Luffy, up until he easily destroys it and Ratchet escapes, leaving them trapped. The Straw Hats remain trapped, only to be released by Gonzo. He and Ratchet’s mother arrive and beg the crew to stop Ratchet, as he uses the castle to take control of the turtle. At this point, Chopper learns that the turtle is to be awakened every 1000 years to lay its eggs.
The island turtle starts moving, and when Usopp notices this, he starts to run back outside to make sure the Going Merry is alright. As Luffy runs on ahead, Zoro and Nami get separated from Sanji and Robin, landing in a roller coaster cart. As they travel along the track, getting farther away from the castle, they are attacked by Maji in a robotic cart. Zoro gets off the roller coaster cart and easily defeats Maji and destroys his cart, as Nami goes on ahead. Eventually Zoro catches up with Sanji and Luffy. Nami’s group, who had retrieved the ship, meet up with everyone and tell them that the turtle is going to crash into a nearby island. Using a combination of attacks from Usopp, Sanji, and Zoro, Luffy executes an attack called Gomu Gomu no Kaiten Ono on the castle. Luffy breaks the castle apart, releasing the turtle, yet Zoro and Sanji had to stop Luffy before he accidentally hurt the turtle. The turtle stops and successfully lays its eggs. As the crew start to leave, one of the eggs hatched. Luffy sees this and realizes that the Golden Crown is referring to the broken turtle egg shells, which are literally made of gold. They take one of the shells with them as they leave what’s left of Mecha Island, but it ends up sinking into the water as they sail off towards their next adventure.
Foxys Return Arc
On the Going Merry, the Straw Hats find themselves dealing with a storm that keeps growing larger. Zoro and Usopp try to keep the mast in place while Nami tries to find a way out of the storm. As this is happening, Luffy spots Foxy, Hamburg, and Porche on a raft in trouble, and decides to pull them in. As the three stay till the morning, Nami spots the Sexy Foxy and the two boats dock next to each other. Foxy is then surprised to learn that his ship and crew have been taken over by the Fanged Toad Pirates, who then challenge Foxy to a Davy Back Fight. As Foxy loses one-sidedly, Luffy is upset that the Fanged Toad Pirates captain, Kibagaeru cheated, leading to an argument and Foxy encouraging Luffy to fight him on his behalf. Despite Luffy helping Foxy take his ship and crew back, Foxy betrays the Straw Hats by using his powers on them and letting them fall into a pit trap. As the crew easily brakes out of the trap, Foxy gets in the way of their escape with his powers, putting Zoro and Sanji in a compromising position as the others hunt Foxy down. Luckily, Luffy and the others manage to escape and force Foxy to end all hostilities. As the Straw Hats leave and disembark on another island for a barbecue, Foxy and his subordinates attack in a large crab-shaped submarine, leading Luffy to mistakenly try to cook and eat the crab. When he couldn’t, he throws the submarine onto the beach and it explodes, officially ending Foxy’s pursuit of the crew. Despite this, however, the crew’s worries were not over as they go into the nearby jungle, only to find a mysterious, sleeping man, who a terrified Robin states is one of the strongest individuals in the Marines; Admiral Aokiji.
Postenies Lobby Arc
Thriller Bark Saga
Ice Hunter Arc
The Straw Hats, onboard their new ship, the Thousand Sunny encounter a damaged ship, whose members led by a man named Stansen they decide to help, but who then try to trick them. They are then revealed to be working for the bounty hunter group named Accino Family, led by a man named Don Accino. At the same time, Salchow of the Accino family receives Stansen’s report and tricks the Straw Hats into moving into a field of icebergs near Hyokaido, an area that is sometimes known as the frozen highway. Once trapped in the Hyokaido, the two boats have nowhere to go as the icebergs seem to move according to the Sunny’s movements and lock them in. Meanwhile, the Straw Hats learn that the former Phoenix Pirates reportedly sailed into the New World but were heavily beaten there, losing the life of Vigaro, a crew member and vice-captain.
Thereafter, they lost their flag to the Accino Family and became their soldiers-though only Stansen shows any “loyalty” to them. When their heavily injured captain, Puzzle recovers, he says that Stansen’s decision “wasn’t bad”, that they will no longer be pirates or sail to the New World and that they will stay the bounty hunters’ underlings. No one in the crew agrees with this, especially the very young and passionate member named Jiro, but the captain is not moved at all. Luffy, who was with Chopper on the Phoenix’s ship to look on the injured Puzzle, head back, but the rope that was used to hold the ship close to the Sunny breaks in a rampage of several mysterious underwater “eruptions”, separating the two ships. The group trapped on the Sunny are encountered by Lil, Salchow, Arbell, and Hockera.
They claim that it’s impossible for them to escape and that all the crew will die. Zoro, however, decides to jump off the ship and begin cutting through the icebergs as Franky gets the ship out by using a “Coup de Burst”. However after this happens, one of Lil’s flying fish manages to steal the Straw Hats flag, and Zoro still focused on cutting the icebergs, gets left behind by the others as a result. As the others begin their goal to reclaim their flag and battle the Accino Family, Zoro wanders the snow, coming to a huge, strange mansion in the ice, which turns out to be Lovely Land, the Accino Family’s headquarters. Eventually Zoro reaches Lovely Land, and begins wandering around the area.
Eventually Zoro unknowingly comes across the Boss of the Accino Family, Don Accino himself, and as Zoro confronts Don Accino and two end up drinking together. Accino boasts at his pirate flag collection, just as one of Lil’s birds brings in the Straw Hats’ Jolly Roger, much to Zoro’s chagrin. Don Accino then reveals he knew all along who Zoro was and seemingly prepares for battle. With this, Zoro finally understands who he is and demands to know where he got their flag. Don Accino simply explains that it doesn’t matter and that he is out for his 120,000,000 bounty.
As the two prepare to battle, The Don reveals the power of the Atsu Atsu no Mi: the power to heat himself up and melt any substance with his intense heat. As Zoro confronts the Don, his slash flies right through him, as his heat protects him. He almost hits one of Accino’s flags, which gets Accino boiling, so much that his children decide to end the fight before it starts and their father melts everything around them. They then manage to get Zoro to fall down a trap door to make sure he will not get the Don angrier. With this, Zoro falls down into an underground ice chamber, trapped with the other captured Straw Hats, unaware of what’s going on.
As the others bring Zoro up to speed, the crew try to think of a way out, when they are then sent food on the request of Robin. Amongst the food are 3 bottles of cola, which allows Franky to regain his strength. As Franky’s Coup de Vent blows away the cap of their prison, and his Coup de Boo brings everyone back to the top, this allows the group to escape before freezing. After escaping, they all go and search for the flag. The newly freed Straw Hats search for the room with Don Accino’s “collection”, but they make the mistake of letting Zoro lead them, which ends in them getting hopelessly lost.
While wandering around the Accino Family’s castle, they encounter Robin and know she is safe. She departs, intending to let Lil show her to her father’s room. Just as she leaves, the Straw Hats hear Luffy’s screaming and notice he has arrived after following Campacino and his twin brother Brindo. In order to get the flag back before Luffy, they then split, with most of them getting out to help him fight the whole Accino Family (excluding Lil and Don Accino). With all of them doing this, Zoro continues to look for the Don’s room, and eventually Zoro finally manages to find Don Accino’s room.
With Luffy preparing to fight against Accino, the others took the opportunity to go back into the mansion, with Nami staying with Luffy to monitor him and the others go to retrieve the flag. As the others manage to get to the room, Luffy and the Don fight on, and Lovely Land starts melting away before their eyes due to the Don’s devil fruit ability, as the Chopper and Jiro struggle to find the flags and are nearly crushed by the rubble until Zoro and Puzzle appear just in time to save them. Sanji, Usopp and Robin enter the room, the Straw Hats and the Phoenix Pirates manage to recover their flags. After this, Luffy and Accino’s intense battle reaches its end, with Luffy withstanding Accino’s heat and managing to deliver the finishing blow. After the intense battle between Accino and Luffy ends, wherein the Don is defeated and Hyokaido was completely melted, The Straw Hats then depart as Hyokaido begins to fall apart, while ensuring to put the flag back on the ship before Luffy notices its actually gone. As they sail away from the area, with the defeated Accino Family sail away with the Don in tow, Campacino and the remaining grunts follow them and try to get revenge. Then suddenly, the Phoenix Pirates arrive and Puzzle challenges Campacino instead. While they sail off, Chopper is worried about them, but Luffy says to see how determined they are and that nothing will happen to them. As Puzzle promises to meet the Straw Hats again in the New World, the crew sail away from the once frozen area, and continue onward toward their next adventure.
Romance Dawn Story
Spa Island Arc
As the Straw Hats relax on Spa Island, they met Lina, her sister Sayo, and her pet sea raccoon, Nukky, who can shape-shift. While most of the crew are helping the two sisters out, and dealing with the unexpected return of Foxy, Zoro is off mediating under a waterfall. While the commotion of dealing with Foxy and the island’s owner Doran is underway, Zoro is seen trying to find his way back to the others, while also noticing that people on the island are starting to leave and the island itself is starting to shake from the commotion. After finding the others and learning about the sisters’ situation, Zoro helps begin destroying the island, an angry Doran decides to stop the bunch by showing them Sayo tied to a stake and a gigantic cannon aimed at her. To show he was serious, he fires a warning shot that barely misses Sayo.
Doran then demands the notebook for Sayo’s life. Lina tempted to do it was stopped by Sayo, telling her not to give up on their father or his goal, and managed to convince Lina to refuse giving up the notebook. The Straw Hats then proceed to stop Doran and rescue Sayo, with Zoro cutting the cannon apart. After Luffy saves the sisters and stops Doran, Lina notices an x-shaped crack under the island. After telling the crew this, they all realized that the clue was under the island the whole time. The heat from the lava soon makes steam form around the group and the reflection from the sun causes a circular rainbow effect. The sisters then realize that the steam is the final clue to make the gem. A few days later, the Straw Hats’ continue their journey when Nukky flies in and delivers a letter to the crew from his owners. Sayo and Lina succeeded in making the rainbow gem and are living happily with their father who returned, alive and well, just in time to see the creation of the gem. They even sent the gem to the Straw Hats as a thank you, and while the crew gather around to look at the gem, it starts to rain candy out of nowhere, and the candy knocks the gem out of Luffy’s hand, causing Nami to panic and demand that everyone search for it on the deck.
Summit War Saga
Little East Blue Arc
As the Straw Hats sail through the seas trying to refill their rations by fishing, they are attacked by a large horned beetle. As the crew deal with the beetle eating all of the fish that they catch, a young girl on a ship named Yoko orders the beetle, who she calls Boss, to attack the Thousand Sunny. As Luffy tries to fight the beetle, it takes Luffy, Usopp, Sanji, and Zoro away to a nearby island. As they reach the island, Boss gets caught on a cliff, leaving Luffy and the others to make their way to the ground. Once they made to the ground, Yoko pops out of nowhere and bits Luffy, as Sanji, Usopp, and Zoro show up and eventually they are all surrounded by the locals.
When Yoko tells them that they are pirates, they start bowing before Luffy and the others, until an old man arrives and tells them that they are the Straw Hat Pirates, which led to them showing the Straw Hats through a maze, until they reach the town, known to everyone as Little East Blue. Luffy and the others were amazed by the town, as Zoro sees a training hall that was made to look like the one from his hometown, Shimotsuki Village. After Usopp calls Nami on the Sunny and tells her that the locals want her to come to the back of the island, Zoro goes off to see the area of the town that resembles his hometown. He sees the dummies in the training hall and remembers the past when Kuina was practicing and battling with him when they were younger. Then, a teacher from the dojo along with his students come out.
As they see Zoro, the teacher tells his students to battle him, thinking that Zoro is a challenger who wants to battle them. But another man stops them and says that he is “Pirate Hunter” Zoro-san. The students (and teacher) all want autographs from him, with an angry Yoko spying on them from afar. Eventually the town throws a banquet for the Straw Hats, to which Luffy stuffs himself beyond proportion. However in the midst of the celebration, Corto and the Amigo Pirates appear and crash the party demanding Boss.
As Luffy and the others easily fend off Corto and his men, suddenly a spiked net appears out of nowhere and captures Luffy. It is then revealed that the one who released the net was a man named Largo. Largo reveals that he had eaten the Ami Ami no Mi, making him able to create nets from his body. As Zoro and Sanji try to fight Largo, he quickly catches both of them in nets as well, leaving the three Straw Hats unable to fight. As Yoko tries to fight back with Boss backing her up, Largo eats a torch and then creates a flaming net to catch the beetle, as the rest of the Amigo Pirates shoot him down to the ground.
As Largo creates an iron net for the beetle to get into, Boss begins to surrender itself to the Amigo Pirates, until an angry Luffy punches him away, telling him to stay. As the Villagers realize that Boss tried to surrender itself for them, they began attacking the Amigo pirates. Suddenly, Boss’ skin starts to shed, he grows in size, and starts to breath fire. As Boss frees Luffy, Sanji, and Zoro from their nets, Boss gets caught by Largo due to his recent transformation. As Largo taunts the Beetle for getting caught, Luffy prepares for battle, saying that it’s not over yet. As Luffy knocks Largo far away into the forest for one last showdown, they end up at the shore where they continue their fight, while Zoro, Nami, Sanji, Usopp, and the citizens of Little East Blue along with Boss take care of Corto and his men. After Luffy defeats Largo, he and Boss have a rematch that ends in a draw, due to both being exhausted from their earlier fights. With every one of the Amigo Pirates dealt with, the Straw Hats set sail once again, but not before Luffy promises to see Yoko and Boss again someday.
One Piece Film Strong World
On board the Thousand Sunny, the Straw Hats read news of attacks on East Blue. Luffy said they would return to East Blue to protect it when Shiki’s ship appeared overhead. After warning him of the storm ahead, he came down to meet them. There, he revealed he has a Devil Fruit power to make any inanimate object he touches ignore gravity and float. After learning it was Nami that delivered the warning, and that they were heading to East Blue, Shiki offered to take them there and used his power on the Sunny.
Together, the two ships traveled to the floating island seen before, where Shiki suddenly kidnapped Nami. Zoro and the others tried to rescue her, but by controlling the Thousand Sunny using his power, Shiki escaped them and scattered them among the fragments of the island. Zoro and Chopper ended up on a snow mountainscape. Upon riding around on a Mammoth Dense, they found and rescued a young girl named Xiao and were lead to her village. Along the way, they learned that the large poisonous plants, called Daft Green, located around the village emit a stink so powerful that the animals stay away.
However, long term exposure to the plants is poisonous to humans and Xiao’s grandmother had become ill from it. When the rest of the crew showed up at the village, Robin informed them of Shiki’s plan. They learned that Shiki was planning to let loose the animals on the island into the East Blue in a gambit to force the World Government to surrender. They also learned that to prove the power of the animals, Shiki was planning a demonstration by targeting a village on the floating island. Shiki then arrived sometime later and confronted the Straw Hats.
Zoro attacked with Nanajuni Pound Ho slashes, which Shiki easily deflected. Sanji then launched Zoro into the air as he tried again to fight Shiki, who sent him back down to the ground with one blow. Despite some initial success in the others fending him off, Zoro and the Straw Hats were defeated, and Nami was coerced into rejoining Shiki by him agreeing to spare them and her hometown. Xiao reappeared and gave them the Dial Nami left for them. Her mother, who earlier had expressed relief about the animals being sent to East Blue, apologized for saying how happy she was for Shiki leaving for East Blue.
They then played the message, and the crew, except Luffy, listened to the whole thing. The Straw Hats later arrived at Shiki’s palace, broke down the gates, and made short work of the guards outside. They then marched into the main meeting room brandishing various firearms and a new wardrobe. After a short confrontation, where Shiki called them simply a suicide squad, he revealed hundreds of men around them. They unloaded their firearms in the room, defeating most of those gathered, before splitting up to defeat the rest.
Luffy chased after Shiki, as Zoro clashed swords with Dr. Indigo. Zoro later showed up at Indigo’s lab and challenged Indigo for the antidote. Indigo mocked him and stated that the world would not care if East Blue was annihilated. This comment enraged Zoro, due to his origins and most of his crew being born and raised in that area of the world.
He knocked Indigo through the wall and the two began to fight on a bridge. Indigo showed off his Chemical Juggling ability, attacking the swordsman with his chemical orbs. Zoro was unable to keep up and was hit by them. This merely annoyed Zoro, who stated that he did not have time for his acrobatics. Indigo then used the Mass Juggling ability, creating one giant ball of energy and threw it at him. Zoro survived the attack with little damage and defeated Indigo in one strike using his Ashura: Ugui technique. He handed Chopper the antidote and headed back to the ship. After Shiki was defeated by Luffy, the other Straw Hats escaped on board the Thousand Sunny, using Shiki’s pirate sail as a parachute. Zoro was seen much later on the ship as Nami recovered.
One Piece 3d Straw Hat Chase
One night on the Thousand Sunny, while everyone else was asleep, Zoro was awake training when a mysterious bird makes it way onto the ship. The following day, Luffy wakes up and frantically searches for his Straw Hat, which has gone missing. Zoro ends up saving Luffy from drowning when he attempts to look for his hat in the ocean, then the crew has an emergency meeting about the hat, with Usopp stating that a strange bird appeared the night before, leading said bird to become a possible culprit. As they all go out to search for it, Chopper and Usopp find a ship, and aboard it they find a strange man, who passed out from coughing up blood. As they bring the man aboard the Sunny to be treated, a giant bird lands on the ship, with Luffy’s hat in its beak.
As Luffy orders the crew to go after it, a Marine ship mysteriously appears behind them. As Franky tells the others that they all need to head back to the ship, the chase is already on as they go through a series of glaciers, a Marine Blockade, into a cave, off a waterfall, and even into a nest of Sea Kings, with Luffy being the one most determined to catch the bird. He chases it into a volcanic region, as Chopper manages to get Schneider to finally wake up, with Schneider asking the doctor to let him see his precious dog, Buzz; who ate the Tori Tori no Mi, Model: Eagle devil fruit, with Luffy finding out about this as he sees Buzz both in his dog form and his hybrid form. After revealing to Chopper that in order to make sure his dog did not watch him slowly die, he gave the dog the impossible task of stealing the straw hat of Monkey D. Luffy, Chopper tells Schneider that his dog was on the ship, and Schneider springs to action, demanding that the ship goes after his friend.
Meanwhile Luffy’s chase for Buzz leads to the two of them getting captured on a marine base. Just as the marine commander was about to finish Luffy, Zoro arrives to save him. As Luffy tries to get his hat back, he is stopped the bases’ three giants. The pair fight the giants off to exhaustion, and just as they are about to get crushed, Schneider arrives, piloting the Thousand Sunny as he has come for his dog Buzz. As Schneider crashes the ship into the base, the Straw Hats use this as an opportunity to regroup, while Schneider apologizes to Buzz for driving him away.
After doing so, the three giants attack again, only this time they taken down by the Straw Hats’ teamwork. After this, Luffy goes after the Marine that still has his hat. The commanding officer throws the Hat into the ocean when he sees Luffy coming, which leads to an angry Luffy using Gear 3rd to punch one of the giants into the gate that he is standing on, with the giants’ weapon landing right onto the marine, as the gate begins to break. As water begins to flood the base, the Straw Hats, Schneider and Buzz all escape onto the Thousand Sunny. As everyone gets to safety, Luffy is still chasing after his hat, with it seeming like he will fall to his doom before he can safely reach it. However, Buzz arrives and catches Luffy, which finally allows Luffy the chance to finally catch his hat. Later, Chopper reveals to Schneider what was causing him to cough up blood, a fork that he apparently swallowed by accident and assures him that he will not die. With all that settled, the crew return Schneider and Buzz back to their own ship and part ways, with Schneider telling Luffy to take good care of his straw hat.
Toriko X One Piece Collaboration Special
One Piece 3d Trap Coaster
As the journey begins with the Straw Hats escaping from cannon fire from a Marine fleet, Robin notices that the cannons are missing them on purpose. Then the leader of the fleet orders a Marine ship to come out from behind a rock and intercept the crew, bumping into the Thousand Sunny. As the crew recovers from the impact, Nami notices that the marine ship is mysteriously empty, till they all see something jumping around the ship and onto the Sunny. Nami recognizes it as a Kung-Fu Dugong, and tries and fails to stop Franky from attacking it. When he asks why, Robin explains that a Kung-Fu Dugong will become his disciple if he defeats it.
The dugong, who was laying defeated on the Sunny’s deck, gets up and swears allegiance to Franky. Zoro asks what they are doing there, after which the marine officer in charge, Trap, reveals that the dugong completed its mission and will proceed to capture Luffy and his crew. After realizing that they were surrounded by crew of Kung-Fu Dugongs, the Straw Hats are cornered by the Marines into an alcove of a nearby island. Trap pushes a lever, and a loud noise begins from beneath the Thousand Sunny. Suddenly, the ship is raised out of the sea, revealing the intricate Trap Tower.
The Sunny is resting on the top of the tower in the hand of a Kung-Fu Dugong statue, and Trap laughs while taking a drink from a bottle. He tells them all that the bottom of the floor is made of seastone, and tells them to enjoy their trip, as he pulls another lever and the statue’s arm sends the Sunny sliding down the mouth of the statue, entering the Trap Tower in the process. As the crew are forced to ride down the path of the tower, they reach the first trap, known as the “Cutting Hell”, which is a large wheel of spinning blades inside of a tube. As the Sunny falls towards it, Luffy simply destroys the trap with a Gomu Gomu no Pistol as the crew falls through the tunnel into another one filled with seawater, as the Sunny begins to spin and crash into a series of waves, as the devil fruit user of the crew are weakened in the process of going through the water tunnel. Soon, they reach the second trap, a giant gorilla-like machine known as the “Hammer Hell” that punches large metal fists together in the path the ship is headed.
As Sanji deals with the trap by destroying the fists, an angry Trap presses a button to active more traps at the end of the tunnel, including four harpoon shooting mechanisms, but Zoro deflects the harpoons, making Trap even angrier as he presses the button again. As Sanji and Zoro deal with the harpoons and fight with each other, with the Dugongs egging them on with a boxing bell. Trap hits a different button to activate the main ride, and hundreds of dugong-operated cannons come out of the walls of a large room the Sunny has stopped in. Luffy, still groggy from the seawater ride gets up after Nami shocks him awake, and he goes onto the masthead of the Sunny and uses Gomu Gomu no Ballon to deflect the cannonballs. The resulting explosions cause the dugongs to abandon the cannons and jump into the water for safety.
The explosions also causes debris to fall from Trap Tower. With the ride momentarily stopped, the crew discussed what to do next, as the Dugong that Franky attacked earlier goes into the water. Despite Franky telling him to come out of the water, the crew realize that they are surrounded by Kung Fu Dugongs, but want to avoid fighting them and accidentally making them their disciples. Brook uses his music to make them all fall asleep instead, and Trap curses them for harming his dugongs. The water in the room starts to drain and the Sunny falls through a hole, but Robin uses her powers to lower the ship to safety, after which Luffy punches through the wall and the crew successfully escape Trap Tower, but start to fall back down into the sea as a result.
Instead, they fall onto a giant slide, as Trap releases a group of Giants known as the Giant Nine, with each one of the nine giants ordered to swing a spiked club at the Straw Hats’ ship, destroying a part of the slide behind them with every missed swing. Luffy and Usopp manage to each attack one of the giants, but the ship continues down the slide. As the ship reaches the first giant again, Franky’s Dugong reappeared with three barrels of cola it stole from the tower. Franky loads the barrels and uses Coup de Burst to launch the Sunny at the giant and Gaon Cannon to knock him over. The giant’s club goes flying into the air and hits the tower above, causing the upper half of it to collapse. As Trap and his Tower finally fall, the Thousand Sunny flies away from the Coup de Burst, and Franky praises his Dugong, as the rest of the dugongs begin to awaken. Chopper translates for them and tells the crew that they want to fight again, Luffy agrees, and Nami slaps and scolds him while he laughs. Luffy, Zoro, and Sanji prepare to fight them, and Nami shouts at Brook to just put them all to sleep.
Postwar Arc
Fishman Island Saga
Episode Of Nami
With Nami having stolen the Going Merry and headed back to Arlong Park. Zoro, Usopp and Johnny had already went after her earlier, and Luffy, Sanji, and Yosaku follow suit. In the meantime, it is revealed that Nami is a member of the Arlong Pirates as she reports back to Arlong, who soon celebrates her return with a rowdy party. At the same time, Zoro’s group arrives on the island at the destroyed Gosa Village. Zoro roams off by himself, and Usopp and Johnny are quickly spotted by a Fish-Man patrol.
Later as Usopp runs from an enraged Arlong, at the same time, Zoro roams into Arlong Park, making quick work of the Fish-Men there, and then leaves. Arlong returns with a captured Usopp, devastated at the loss. Luffy, Sanji, and Yosaku eventually crash recklessly on the island and run into Zoro (literally). Johnny runs up to them shortly afterwards and tells of Nami’s betrayal; Luffy doesn’t believe him and angrily threatens to beat him up. Nami arrives, however, and tells Luffy coldly to leave the island; her words don’t register with him, and he simply lays down to take a nap, claiming he refuses to listen to her.
She runs away infuriated at his stubbornness, and when the crew refuse to budge, Johnny and Yosaku leave, wary of the situation. Usopp then shows up at Luffy and the crew’s location, alive, and tells them how Nami actually saved his life. Initially puzzled by her behavior, the crew then realizes that there must be some deeper motive and goal than just money going on in Nami’s head, and just then, Nami’s sister Nojiko comes up to them. Wishing to make them understand why they have to leave, she solemnly offers to tell her and Nami’s backstory; Luffy opts not to listen and goes on a walk, and the rest of them stay behind to listen (although Zoro almost immediately falls asleep). Johnny and Yosaku also listen, hiding in the bushes.
After listening to the story, the others meet up with Luffy after Nami finally asks him for help. Angry and pumped up, the crew head to Arlong Park. Upon arrival, Luffy slips past the Fish-Men thugs and decks Arlong, who goes flying into the wall. While Luffy deals with Arlong, Zoro is fighting with Hatchan. Although wounded from fighting Mihawk a few days earlier, he easily defeats Hatchan, breaking Hatchan’s swords and sending him flying into the air with a Tatsu-maki.
As Arlong’s crew is taken down one by one, Arlong becomes enraged at their defeat, and he and Luffy viciously trade blows, eventually ending up Nami’s cartography room. Luffy notices Nami’s blood-stained pen while Arlong talks on his intent to use Nami; both of which get Luffy very, very angry. Luffy then begins to destroy the room while Nami watches from below. Arlong attempts to stop him by biting him. But then, Luffy uses a single Gomu Gomu no Axe to defeat Arlong and completely destroys Arlong Park in the process, and he emerges from the rubble and screams to Nami that they are friends. The village celebrates Arlong’s defeat, and the crew promptly beats up Nezumi and the Marines (which contributed to Luffy’s first bounty). Everybody celebrates at a village wide festival, and later that day, Genzo makes Luffy promise to always keep Nami happy, which he complies with. Nami then gets her Arlong tattoo replaced with her own symbol, and the crew sets sail from Cocoyasi Village, to which an older Nami finishes reminiscing about her past two years ago, as everyone is on the coated Thousand Sunny at the Sabaody Archipelago, as she and the crew, Zoro included, prepare to sail to Fish-Man Island.
Toriko X One Piece Collaboration Special
Dressrosa Saga
Episode Of Luffy
During some spare time on the Thousand Sunny, the Straw Hats have a mock introductory show with Usopp hosting. Once Luffy’s turn was done, they are interrupted by an attack from several Marine battleships. During the battle, the Straw Hats are forced to make an emergency Coup de Burst in order to escape a sudden attack from above, in the form of an immensely large cannonball. Crash landing on a nearby island, they decide to explore while Franky repairs and moves the ship. While Franky works on a way to move the ship back into the water, the rest of the Straw Hats explore the local town to re-supply what was broken or lost in the landing.
However they all notice that the town is in short supply of everything and that only women, children or the elderly run the shops. Later, Luffy comes across what appears to be a fruit stall on the outskirts of the town. Trying to eat several pieces, he quickly discovers that they are actually fake fruits made of wax. From behind, an old man approaches and quickly bursts into laughter over Luffy’s mistake, then introduces himself as Diego, the man who had sculpted the fruits. Going inside, Diego is suddenly left dumbstruck as the entirety of his home had been blown away except the front wall and, upon looking over the hill discovers that it was the Thousand Sunny which had caused the damage in its crash landing.
Apologizing for the destruction they had caused, Luffy is then led underground where he discovers the pride of Diego’s collection, a multitude of life-like wax sculptures of famous pirates. Luffy recognizes many of the sculptures in the collection room, but after seeing Shanks’ sculpture, he is reminded of his childhood and the days when Shanks and his crew had visited Foosha Village, which culminated with his consumption of the Gomu Gomu no Mi and a near lethal encounter with the mountain bandit Higuma where Shanks had sacrificed his arm to save Luffy, earning the boy’s eternal respect and admiration. Later, Usopp and Chopper discover the underground section and marvel at the wax figures, leading Diego to show them how his particular wax was created. Noting a poorly crafted figure of Whitebeard on a nearby shelf, Diego mentions that the wax itself is of a much higher quality then the one he can create and demonstrates this by easily destroying his own wax by knocking the sculpture against it though notes that it is weak against fire. Asking who had created it, Diego admits that the man was no longer around and had left him to join the Marines, which was his son, Regis.
Diego then explains the island’s situation. Hand Island is an island of artisans that was once under the protection of Whitebeard. However, after he died in the Summit War of Marineford, rival pirates quickly set their sights on his territory. Marines quickly stepped in and built a base nearby which restored peace. Eventually, during mid-construction, Commodore Bilić was put in command.
He called for a meeting of the townspeople and asked that they help build a cannon to help ward off pirate attacks which the people happily agreed to. Among them was Regis, who had joined the Marines to help the island, much to the dismay of Diego, who had hoped he would follow in his footsteps. However, once the cannon was completed, Bilic fired on the town as “practice”, destroying several buildings and killing a few innocents as well. It soon became obvious that he just wanted the cannon for his own ends and used the families of the builders as his own hostages lest he fire the cannon on the rest of the town. After telling this tale, Diego starts to head off to the Marine base to give Regis the Whitebeard figurine.
But Luffy offers to go instead. Luffy later regroups with the entire crew and tells them his intention. After hearing this the others draw lots to see who’ll go with him with Sanji and Usopp chosen. The next day the three head for the Marine base on the Mini Merry. Once they reach the base, the marines open fire once they notice Luffy forcing Sanji and him to invade the base which quickly leads into a chase.
Eventually, the two find Regis and give him the figurine but Luffy is captured in a seastone cage once he steps on the platform where Regis’s cell is. The wheel turns towards the water submerging the two. Sanji manages to jump in and free the pair and they escape into ocean via a sewer fan where they regroup with Usopp. The four rest on a reef where Regis explains he made the doll when he was six. When he went to join the Marines, Diego tried to at least have him take the figurine with him but he declined.
Regis feels that he disappointed his father for not following the path he wanted. But after seeing the figure and being told that Diego always treasured it, he realizes that his father still believes in him. Likewise Diego, after being told why Regis was thrown in jail, is happy of his conviction to protect the island. After hearing this, the four then notice that Bilic has started firing on the town, thinking the villagers are hiding the Straw Hats and demands they turn them over or he will destroy the town. Luffy’s group head back to the base and make their way inside with Usopp and Sanji distracting the Marines while Luffy and Regis sneak in.
Bilic, thinking the townspeople sent the Straw Hats after him, fires another cannon at the town but it’s sliced in half by Zoro. As Zoro continues to defend the town from Bilic’s cannon, Luffy and Regis make their way into the base and gather as much wax as they can. The Straw Hats fight against the Marines while Regis makes his way up to the cannon’s barrel and activates the wax, causing it to backfire and destroy itself. Bilic emerges from the rubble of the cannon, obviously angered. He burns Regis’s Whitebeard figure to mock Luffy as well as him then reveals he has a mobile cannon as a back up.
Luffy faces off against him, but suffers trouble due to the cannon’s speed, the constant bombardment Bilic fires into his rubber body and the spinning tops fitted with blades sent after him. His crew (along with some help from Koby) help take out the tops and Luffy finally manages to beat Bilic by getting in close enough to grab his snake puppet and pummel him with an Elephant Gatling, destroying his cannon in the process. Kizaru suddenly shows up much to the shock of everyone. The Marines believe he was the one who stopped Bilic and cheer for him as the Straw Hats make a hasty exit. However it turns out the Kizaru is really another wax sculpture created by Diego who made it on the request of Koby. Using the charade (as well as Diego throwing his voice to imitate the Admiral), Koby places Bilic under arrest and states he is likely to be court martialed while declaring that it was never the Marines’ intention to enslave the island. He orders the Marines to help rebuild the island while Diego and Regis reconcile. Koby watches the Straw Hats go, promising he’ll catch up to Luffy soon to which Luffy, seemingly hearing this, laughs in agreement. However as the crew flees, they realize they accidentally left Zoro on Hand Island.
Zs Ambition Arc
As the Straw Hats finally arrive in the New World, they find themselves in the middle of a storm, surrounded by a fleet of Marine Warships. As the crew gets ready for a fight, Nami stops them and points out that what they are seeing are actually just mirages. She tells them that they have entered the Maubeugemour Sea, an area filled with dangerous weather phenomena. As the Straw Hats manage to counter all the random and dangerous weather patterns the sea throws at them, they manage to finally enjoy some peace, despite it now being a hot day at sea. As Sanji begins preparing food for everyone, he turns away and then notices that the food is gone.
He immediately blames Luffy, Usopp, and Chopper for this, but none of them knows what happened. Chopper then hears a voice coming from the soup pot, which was now empty. Suddenly, food began disappearing in the kitchen, leading to a hunt for whatever was causing this to happen. After a brief scuffle on deck, Luffy finds the person who ate the food and it turns out to be a miniature woman. Realizing that there is no escape she prepares to fight back and grew to the size of a giant scaring half of the crew.
She attempts to strike Luffy but he blocks her weapon and with his superior strength threw her in the sea where she was rescued by Sanji before she drowned. After being rescued and thanking them for the food, the woman introduces herself as Lily Enstomach, and explains that she is a giant that ate the Mini Mini no Mi, which allows her to become tiny. She then tells the crew that she out to save her father from being sent to Impel Down for stealing food from the World Government and that she found out that a fleet of Marine Warships were escorting her father through the Maubeugemour Sea. She tells them that her father, Panz Fry is famous in the New World for his “Volcano Cooking” and for giving stolen food to starving people. After hearing this, Luffy decides to help her save her father, because he want to try some of her father’s cooking.
After agreeing to help, the crew catch up the Marine fleet, with Luffy excited to battle the marines. After catching up to the fleet, they see Panz Fry being held on a raft heavily guarded by four warships. As Luffy wants to rush in and fight, Nami stops him and says that need a plan to save Lily’s father. After getting permission from Lily, Nami organizes the entire rescue plan for Panz Fry. The rescue team consisting of Sanji, Usopp, and Zoro will go with Lily on the Shark Submerge III to sneak aboard the raft and free Lily’s father, then they will separate the raft from the warship, connect it to the Sunny and escape with a Coup de Burst.
Robin, Luffy, Chopper, and Brook will be the diversion team and keep the marines busy while the rescue is in process, Franky will stay on the Sunny to get everything ready for the escape, and Nami will supervise from a distance and watch the weather using the Shiro Mokuba I. The plan goes into motion, With Zoro and Sanji breaking the chains binding Panz Fry. However, Robin tells Nami that Luffy isn’t with her group, and Nami finds out that Luffy left with the rescue team because it seemed more exciting, leading Nami to yell at Luffy not to board the raft or else the plan will be ruined. The plan continues and they manage to free Panz Fry and confuse the Marines, however, Vice Admiral Momonga spots Luffy and tries to attack him, but Zoro intercepts and fights him instead. Lily is reunited with her father, but the reunion is cut short when a mystery man named Shuzo arrives and attacks Panz Fry.
With everyone shocked by his arrival, Shuzo states that all pirates should be killed rather than imprisoned, and that he, along with the Neo Marines and their leader Z will execute all pirates in the world, starting with Panz Fry. Shuzo decides to kill Panz Fry himself and goes to attack him, but Sanji intercepts and Shuzo is tackled to the ground. Luffy attempts to attack too, but is thrown into the water prompting Zoro to abandon his fight with Momonga and save Luffy. Luffy is eventually saved and prepares to fight Shuzo himself while Zoro fights Momonga. As several of Shuzo’s men join the fight against both the pirates and the marines, Luffy’s fight with Shuzo and Zoro’s fight with Momonga both begin.
As this is happening, Nami notices the waves changing and tells Franky to fire the anchors at Panz Fry’s raft before a Thrust-up Stream comes for them, with Usopp asking if it was similar to the Knock-up Stream, which Nami confirms by saying that it’s smaller, but still powerful enough to destroy a Marine ship. While the others continue with the rescue, Zoro fights Momonga, with the two stopping each others attacks and even destroying a battleship in the process. With the fight getting more intense, the series of Thrust-up Streams begin to erupt and destroy the remaining marine ships, leading Luffy, Zoro and the others to cut their battles short in order to escape. As Franky tells Nami that using the Coup de Burst won’t work because the raft is too big, Nami decides to use the Thrust-up Streams to launch them all instead. As her plan works, Shuzo manages to attach a Vivre Card onto what’s left of Panz Fry’s raft to track him later.
The Straw Hats are later seen docked behind a reef, now out of the Maubeugemour Sea. As Chopper finishes tending to Panz Fry’s wounds, Luffy begins hounding him to make his famous food for them. Sanji kicks Luffy in anger, as Chopper tells Luffy he needs to rest. Lily then reveals that she was able to steal the food and booze from the Marine ship wreckage before they left. Panz Fry agrees he will cook for Luffy and the others to help repay them for saving him, and to fulfill his duty as a cook.
As everyone helps Panz Fry prepare to cook, Shuzo and his men arrive, ready to attack them all. As Shuzo orders his men to sacrifice themselves by launching their submarines at the reef like torpedoes, Zoro and Sanji manage to stop some of them, and Panz Fry manages to repel some more, but Shuzo’s submarine docks on the reef, and he begins his own attack. As the others question Shuzo and his sanity, Panz Fry tries to swat him away, only to be knocked back by Rokushiki skills. Lily tries and fails to fight him off as Shuzo goes in for the kill against Panz Fry, only to be stopped by Luffy in Gear 2nd, who knocks Shuzo into a nearby rock. As Luffy and Shuzo have their final bout, Lily ends up inside of Luffy and expands inside of Luffy’s body, causing him to stretch and contort until he grows to the size of a giant.
Now the size of a Giant, Luffy goes into Gear 2nd and attacks Shuzo with a Giant Jet Spear, but Shuzo and Alapcacino try to counter with a combined attack of their own. The attempt fails, however as Luffy finally manages to defeat Shuzo and his pet and send them crashing into the rocks below. The force blows the Sunny a distance away, as Luffy now shrunken back down to normal size lands safely on it. He thanks Lily for helping, as she comments she was happy to help. Luffy finds the food they were planning to use completely ruined.
Chopper tells him it was from his fighting that it got ruined. Nami tells Luffy they’ll pick some food up along the way and find a volcano, which helps cheer Luffy up. Franky builds a new and better raft for Lily and Panz Fry to travel on, as the marines catch up and capture Shuzo. Later, the Straw Hats are seen traveling around with the two Giants fishing and helping to gather food. As they collect enough, Panz Fry is able to make his famous food for them under the heat of an active volcano. They share a large feast together, and after much celebrations depart. Lily thanks them for all their help, and tells Luffy he was the strongest Giant she has ever known. Luffy makes a promise for them to meet again and have a rematch, as the Straw Hats continue their journey in the New World.
Episode Of Merry
Glorious Island
As the crew leisurely mess around on the Thousand Sunny, Luffy, Nami and Brook are seen relaxing in the inflatable pool outside the Sunny, with Zoro taking his usual nap. As Luffy enjoys the pool, he soon notices the presence of a Sea Monster with the appearance of a horse towering the Sunny. As everyone notices the monster, Zoro wakes up when Sanji mentions to Luffy that he should catch it and turn the sea monster into dinner. After Luffy defeats the monster, he accidentally knocks his away, forcing everyone to chase after it with the Sunny. As the chase begins, they eventually reach where the monster landed, with Luffy excited to eat it.
As Zoro reminds Sanji not to forget the booze as well, Sanji comments on how that’s all he thinks about, leading to the two of them arguing. Franky gets involved and tries to calm Zoro down, which only makes him annoyed at Franky, until Franky suggests that they should have a party. As Franky starts to talk about having a cherry blossom party, everyone is confused but interested. Later, Franky explains to the other guys that their party should be a buffet. With everyone originally against the idea, Franky goes on to list the different number of foods that they can have thanks to the sea monster meat, which gets the others dreaming and imagining the food as well. After getting everyone excited about the idea, Luffy starts imagining an whole island filled with meat, with Zoro imagining a waterfall made of booze to go with it. Franky adds the idea of gigantic hamburgers with fries and cola, and Chopper wants clouds of cotton candy and cow milk bath. Brook gets so excited about this glorious dream island that he boldly asks Nami if he could see her panties, making her mad enough to kick him and tell him to come back to reality. As Brook lays on the ground, Sanji shows up telling everyone that the real meat is ready. As he hands out the food, he also throws a barrel of booze towards Zoro, telling him that everyone is equal when it comes to food and drink, with Zoro stating that he’s not complaining. As the cherry blossoms start to rain down and the party starts, Zoro asks Brook to bring the mugs, Brook starts singing as they watch Franky make cherry blossoms rain down across the Sunny.
One Piece Film Z
Luffy and the Straw Hat Pirates are having a cherry blossom party. Luffy is goofing off, stuffing himself with meat while Brook is singing. Chopper becomes distressed when inhaling poison drifting in the air, while Brook is inspired to write a song about it. The smell is shown coming from Usopp spraying poison over his Pop Greens, as Robin happily waters some of the plants. Usopp reassures Luffy that the poison is merely meant for killing worms with Zoro showing a liking to the tainted flavor of his alcohol.
Volcanic ash suddenly begins to rain from the sky much to their confusion. Nami studies her Log Pose and finds the needle spinning where the volcano had erupted from. She realizes that the needle must be spinning around because the volcano must have destroyed the island and the needle no longer has a magnetic field to lock on. Franky says it is impossible, but she points out that they are in the New World, anything is possible. Usopp whispers to her that they have to hide this from Luffy and choose a safer route.
Despite it, Luffy notices the spinning needle, deciding to head in that direction. Usopp whines, but Nami tells him to trust in her navigational skills. He warns her that the paths they choose could cost them their lives, but she tells him the matter is out of their hands now. As Usopp continues to whine, Luffy spots the battered body of Z clinging to life on a piece of driftwood out at sea, and attempts to rescue him. When he grabs ahold of his mechanical arm, he becomes weak and Sanji and Usopp having to help pull Z aboard.
Chopper examines Z, but finds that he should be fine. Nami shows signs of suspicion, worrying that they picked up someone problematic. Robin notices his arm is built out of Seastone, the reason why Luffy became weak when he touched him. Sanji reminds them all that Seastone is used against Devil Fruit users with him and Zoro debating whether to throw him overboard. Chopper defends him, with Luffy ordering him to save his life and that he would deal with him if he was an enemy.
Z awakens later in Chopper’s infirmary, with Zoro and Sanji standing guard outside. He thanks Chopper for his care, calling him a great medic and meets Luffy who remained in the room during Z’s treatment. Z immediately tags him as the ship’s captain. Luffy asks him what he plans to do next, as Z tells him he is carrying a Vivre Card and his comrades should find him soon. Luffy begins asking questions about Z, his arm, and what he is doing.
Things seem to go fine at first. At least until Luffy reveals he is a pirate. Z instantly attacks and throws Luffy through the wall. He asks Luffy why he is a pirate to which Luffy proudly responds he will be the Pirate King. This comment infuriates Z, as he madly swings his Battle Smasher around.
Luffy, Zoro, and Sanji all begin fighting him with Z able to hold them all off with relative ease. Ain and Binz then arrive with a fleet of ships and board the Sunny, announcing they will be confiscating it. Franky attacks, with Binz summoning vines that are able to subdue him. Robin tries attacking, but he proves too quick for her to grab him with her arms. Z overpowers the Monster Trio and throws them out into the deck of the ship.
He grabs Luffy with his Battle Smasher, sapping away his powers and chastises Luffy’s dream, telling him he will never be Pirate King with his strength. Curiosity piqued, he asks Luffy his name. When he tells him, Z connects him as Garp’s grandson before throwing him onto the deck with the other Straw Hats. He announces to the Straw Hats he will destroy all pirates and orders the Neo Marines to attack the Sunny, bombarding her with cannons. While Luffy wishes to continues his battle with Z, the pleas of his crewmates force him to retreat.
He frees Franky from his bonds who quickly heads for the steering and he uses a Coup de Burst to escape much to the surprise of the Neo Marines. Luffy and the Straw Hats are recovering on a nearby island, where Franky goes to work on fixing the Sunny. He tells Luffy to go after Z while he repairs the damage done. Chopper regrets saving Z’s life, but Sanji tells him a pirate should live without regrets of what he believes in. Nami tells him that they must track them down, or else she will never get her original body back.
She would not be as helpful a Navigator to them without her full grown body. Nami proposes gathering intel on their enemy as the first place to start. Mobston, an old man approaches them and asks if they had a run in with Z. He tells them many pirate ships that have come to the island have been attacked by him. He tells that many who had been attacked by him, lost their will to continue and left the New World.
He is pleasantly surprised Luffy still wishes to fight him, after losing so badly to him and offers up his finest equipment to use in their quest. Nami tells the crew to not arouse suspicion, they need a new change of clothes first. They are told their best place to start is to take the Sea Train to Secon Island. As they head to their next destination, they split up their search. Luffy, Brook, Sanji, and Zoro, all relax in a local hot spring to rest, recover, and prepare for the upcoming fight.
Sanji comments Devil Fruit users are a pain, seeing Luffy and Brook become quite weak. Sanji tells Luffy to keep a low profile since the island is crawling with Marine soldiers. As Luffy and the others relax in the hot springs, Luffy vows to not let his guard down around Z again. Sanji tells him as long as he is a Devil Fruit user and lets himself get caught by his arm he will lose, offering to let him and Zoro to fight him instead. Luffy turns him down, knowing to avoid his arm for their next fight.
However, a familiar voice calls out to them, claiming he was getting tired waiting for them. The group finds it belongs to Kuzan who is resting in a nearby bath. The group instantly go on guard. Save for Brook who does not recognize him, but panics when they fill him in that he is an Admiral. Kuzan reassures them he is not there to capture them, and had given up being an Admiral.
Brook asks what he is then, with Kuzan finding being questioned bothersome. He thinks on the question, and is unable to think of a proper answer confusing them further. However, he tells them again he is not their enemy anymore and reminds them if he was he would not be in a hot spring where he cannot use his powers. As Kuzan gets out of the water, the Straw Hats see his battle scarred body, and his missing leg that he regrows with his ice powers. Noticing their shocked expressions, he merely notes he “got into a bit of mischief”.
Kuzan and the Straw Hats talk some more, with Luffy asking him what happened to his leg. Kuzan takes offense and tells him there are some things that should not be asked. Luffy tries to change the subject and asks about Akainu on why the two of them fought, believing they were friends. Kuzan refuses to comment on that. He does go on say that he wishes his only reason for coming was to enjoy the hot springs, but is chasing Z.
He guessed that they had gone against him, remarking how strong he is. Kuzan and Luffy’s group soon leave the spa as he talks about the great age of pirates. He ponders to himself if pirates are made from the One Piece existing, or if the One Piece exists because of the pirates. Telling them how when some follow their dreams, it can lead to pain and sadness of others. He tells them that Z plans to destroy piracy by destroying the One Piece.
He has chosen to follow Z’s journey, but is unsure what actions he himself must take. He then departs, telling Luffy he will find Z on the island. Luffy thinks back to his encounter of Z pondering over him, until the rest of the Straw Hats catch up with them with a group of Marines chasing them. Luffy dispatches them all with his Supreme King Haki. Reluctantly, the Marine Captain tells him the location of Z.
The Dyna Stones on the island explode, causing the volcano to erupt. Z informs his men the destruction the Second Point has been a success and they need only destroy one more island. With Z in front of them once more, Luffy charges forth and attacks with his Gomu Gomu no Rifle technique. Z blocks it, showing mild surprise to see Luffy. Luffy demands Z change his friends back to normal, as Ain and Binz attack.
Sanji and Zoro intercept them, fiercely battling them both. Z tells Luffy if he wants something, he has to take it like a pirate. Luffy and Z both strike, the shock setting off the volcano to explode forth with magma. Kuzan saves the lives of some civilians by knocking away a volcanic rock and tells them to get to the Sea Train. Kuzan looks on at the devastation, wondering if Z has finally lost his mind.
As Luffy and Z’s fight grows more intense, Z mocking Luffy telling him if he keeps being afraid of his Battle Smasher, he’ll never land any hits on him. He strikes the ground, sending Luffy flying away. He catches up and fires more bullets at Luffy that he deflects back at him. Luffy tells him his bullets will never harm him, until Z pulls out a small pistol and fires a bullet into his shoulder made from Seastone. Mocking Luffy further, he tells him the strongest people in the New World would have never have let themselves be hit with it and he relies too much on is Devil Fruit power.
He takes Luffy’s hat, promising to bury it himself once he has finished destroying the age of pirates. Luffy tries to grab it from him, telling Z the hat was given to him by Shanks. He grabs Luffy in his powerful grips and tells him Shanks, along with the rest of the Four Emperors will all die before they know what is happening. Luffy is enraged, screaming at him to not mock Shanks as Z blasts Luffy away. Zoro and the others find Luffy, and help carry him to safety as the deadly ash cloud rolls down the mountain.
Usopp uses one of his Pop Greens to make a banana shaped boat they ride against the wind with. They are unable to escape and just as their deaths seemed imminent, Kuzan encases the magma and ash in a gigantic layer of ice giving them time to escape. Luffy and the Straw Hats board the sea train and flee, just before the island blows. The Straw Hats return to Dock Island, as Luffy is patched up and has the Seastone bullet removed. Kuzan appears before the crew again, telling Luffy to stop moping.
Nami, Usopp, Chopper and Robin are shown terrified, but Luffy assures them it is alright. Kuzan explains Z’s plan to the crew of destroying the three Endpoints with the Dyna Stones to release the Grande Imbuto, a fissure line underneath the Grand Line. If Z destroys the last one, this will allow the magma flow to be release and flood the sea with fire. Though doing so will not only kill pirates, but innocents as well. Now that two of the Endpoints have been destroyed, Z is about to go to the last one, Piriodo, and unless the Straw Hats stop him, the Pirate Era will end.
The Endpoints had been considered a legend, with most thinking it was nonsense. The government covered up the truth about them, to dissuade pirates from using it. That only the World Government and highest ranking officers of the Marines know about it. He laments that it is an Admiral abusing this knowledge above all else. He reminds them that he is not doing this out of power, but to punish pirates.
Luffy remains undeterred despite being defeated twice by Z, vowing to chase him down and get his hat back. If he lets Z keep his hat, he could never face Shanks or be worthy of the Pirate King title. Kuzan then gives the crew an Eternal Pose leading to Piriodo. If they lose to Z, they will be destroyed along with the New World. Or, if they win they will be attacked by the Marines.
With that said he leaves them to their own fates. Franky then reminds the crew about the equipment they were promised earlier, showing a large stash of armor and weapons Mobston had saved up from the previous crews that suffered from Z’s wrath. hey suit up in their new gear and head out. As they are leaving, Gari approaches Luffy telling him he wants to grow up to be a hero but cant decide whether he wants to be an Admiral or a pirate. Sanji flatly states pirates are not heroes.
But Luffy chimes in saying if both feel the same, then it is okay and just do whatever he pleases. Gari watches the Straw Hat Pirates leave, filled with admiration for them. The Straw Hats intercept a blockade of Neo Marine warships guarding Piriodo. They blast through their defenses with the Gaon Cannon before landing on the beaches with an army waiting for them. The Straw Hats begin fighting, using their new weapons to help.
Zoro finds himself separated from the group, and is met once again by Ain. She announces she will not let Zoro reach her master. Zoro tells her he has nothing against her, but will fight with everything he has. Ain admits she probably will not win, but will buy Z as much time as she can and will gladly die for him. Zoro remarks he felt hesitation in her sword, angering her.
Zoro and Ain battle as she uses her powers to turn the hardened volcanic rock around them back into flowing magma. Zoro slashes the magma aside easily. Zoro chases Ain through the volcanic lands, both of them clashing their swords against one another. Zoro is shown to be physically dominating the match, as she desperately tries using two pistols against him. Zoro cleaves through the bullets easily and then cuts the guns out of her hands.
He finishes the match by performing his Santoryu Seiryu In: Ryusui slash. Ain collapses to the ground, as Zoro stands victorious. After Ain’s defeat, her effects begin to wear off. Nami grows back to her adult size, with the armor she is sporting now barely fitting her body. Chopper reverts back growing slightly, along with Robin and Brook (though it does not seem to show any signs of change on him).
The group head on to catch up with Luffy. The Straw Hats catch up to the battle, seeing Luffy had fought hard against Z and had managed to leave an imprint of his fist inside Z’s giant metal fist. Z asks him why he wants to fight him so much. That even if he defeats him, nobody will thank him for his efforts for the stigma of being a pirate. Luffy responds if he cannot defeat him, he will never be able to become the Pirate King.
The Battle Smasher breaks then and there and falls from Z’s arm, revealing a smaller mechanical arm he can still use. Z tells Luffy he is going to dedicate his life to ending his ambition, challenging him for a final bout. Z and Luffy activate their Armament Haki, their arms turning a hardened black. The two engage in a brutal fist fight, both striking each other with imbued Haki. Kuzan is seen watching their match from a distance, stating “Black Arm” Zephyr has returned.
Z and Luffy both give each other hard punches to the chest and stomach, giving Luffy a moment to recoil and puke. Luffy strikes back a punch that knocks Z’s glasses right off. A brief flashback is seen in his mind of his early childhood, rattling his early memories. Z becomes elated, that he is being given such a good fight. Both Luffy and him are worn out, still pushing each other with punches back and forth.
He corners Luffy and begins pounding on him, with Luffy showing little sign he can defend himself anymore. As Z begins to gain the upper hand, Luffy pushes him back with a kick. Fighting on their last reserves, Luffy shouts he is going to be the Pirate King with Z shouting his name in absolute confidence. After exchanging a few more blows to one another, Luffy finally collapses from exhaustion. Z falls to the ground after, unable to fight anymore too.
Z bitterly says he’s gotten old, and his body cannot keep up with him anymore. He finds it disappointing, telling Luffy he was enjoying fighting him. As the battle ends, the Straw Hats rush over to Luffy’s aid, with Ain and Binz doing the same for Z. Z tells Luffy to finish him, but Luffy merely tells him he is already satisfied as he regains his straw hat, giving him a smile. He offers to continue fighting him, if he wants but Z turns him down, also being satisfied.
Kizaru then arrives with his army, telling them he is going to kill them all. Z says he’s done everything he’s wanted to do, and now will face the price for it as he marches towards the Marine army. He dismisses Luffy, and tells him to leave the rest to him. Ain tries to rush to his side, but Kuzan summons a giant wall of ice dividing everyone from him. Luffy silently looks on, honoring his sacrifice. The Straw Hats depart the island, watching the battle unfold in grim silence as Z gives up his life to save them. During the credits, it is revealed that after Z’s defeat, the Straw Hats returned to Dock Island one last time, to return the gear and weapons Mobston had given them. They bid them farewell, and Gari decided to become a pirate, wearing Luffy’s borrowed attired.
Toriko X One Piece X Dragon Ball Z Collaboration Special
Caesar Retrieval Arc
After the Straw Hats and Trafalgar Law leave Punk Hazard with Caesar Clown captured, they are wary of being attacked by Doflamingo. As the ship’s residents sleep, a mysterious figure named Breed boards the ship with his animal forces and attacked everyone on board. Zoro alongside everyone else fought back, at least until Breed mysteriously called off his forces, having successfully kidnapped Caesar in the process. With Caesar being taken, and large ship approaching, Law, Luffy and Chopper decide to board the Shark Submerge III to go after Breed, while the everyone else deals with the ship. After Breed is defeated and Caesar is retrieved, Luffy, Chopper and Law return to the Sunny, saying their goodbyes to the Kung Fu Dugong and his freed animal friends. As dawn breaks, the Straw Hat Pirates receive the morning newspaper saying that Doflamingo has resigned from the Seven Warlords of the Sea.
Episode Of Chopper Plus Bloom In Winter Miracle Sakura
While sailing the ocean, Nami notices a storm coming in, and alerts the rest of the crew, allowing them to quickly take action and launch the Thousand Sunny away with a Coup De Burst. Almost immediately afterward, Nami collapses from a high fever, and as none of the crew know enough about medicine, they decide to find a doctor to save her, leading them to sail to Drum Island. Upon arrival, the residents give them a cold reception, as they demand that the crew leave because they are pirates. Luffy begs them to save Nami, and they allow the crew to take her to the shore, with Luffy, Sanji, Robin and Usopp taking Nami ashore while Franky and Zoro stay behind. While the others learn about the the island’s king, Wapol and how he took all of the doctors on the island away with him during a pirate invasion, with only one doctor, Dr.
Kureha being left on the island, living on top of the mountain. Meanwhile, back at the ship, Franky notices a strange ship, the Bliking, and he and Zoro investigate with the Shark Submerge. Soon after they reach the ship, Wapol’s men attack them, and Zoro and Franky defeat them. As Luffy and the others reaches the top of the mountain thanks to Chopper, and Sanji and Nami also get brought in for treatment, Zoro and Franky find a snowmobile and use it to head toward the mountain. As Luffy and the others are being treated at Drum Castle, they learn more about Chopper’s past, and about Dr.
Hiriluk, and thank Chopper and Kureha for saving them and Nami. Unfortunately, they soon come under attack from Wapol and his men, who have come to take back the island. While Chopper and Sanji fight off Wapol’s men, Wapol attempts to shoot down Hiriluk’s flag with his Baku Baku no Mi powers. As he does this, Luffy gets to the top of the castle and protects the flag, but soon ends up in a fight with Wapol’s brother, Musshuru. Musshuru initially has the advantage in speed and easily defeats Luffy with his Noko Noko no Mi powers, poisoning him with his spores.
Chopper tries to fight back, but he is defeated, too. Before Musshuru can give the final blow he stopped by the arrival of the rest of the Straw Hats, who stop him and manage to give Luffy an antidote to the poison. As he finishes recovering, Luffy then uses Gear Second allowing him to keep up with Musshuru and ultimately dominates Musshuru in battle. Wapol escapes into the castle and eats Musshuru, fusing with him and the Bliking Cannon, in an attempt to gain his power and combine it with his own to make a poison bomb to annihilate everyone in Drum so he can replace them with his soldiers. As he tries to fire the bomb, Chopper uses Arm Point and manages to launch Wapol into the roof. Despite managing to fire the bomb, it is destroyed by the Straw Hats before it can explode, then Luffy manages to defeat him and send him flying with Gear Third’s Gum Gum Gigant Pistol. Some of Musshuru’s poisonous spores drift down, but Franky incinerates them before they can do any damage. After the battle, Luffy asks Chopper to join his crew, and despite initially not trusting humans before, Chopper decides to go with Luffy. Chopper tells Kureha, who berates him, claiming that he is not ready to leave home, and chases him out of the castle. As he leaves with the Straw Hats off the mountain, Kureha then orders the Drum guards to fire off Hiriluk’s Sakura mixture, which mixes with the snow, resulting in a pink snowfall and causing the mountain on which the castle stands to resemble a Sakura tree. As Chopper sees this, he realizes that Hiriluk’s dream has been accomplished, and starts to cry. With the Cherry Blossoms in the distance, the Straw Hats sail away from Drum Island, with Chopper now a member, as they go toward their next adventure.
Adventure Of Nebulandia
The Straw Hats were lured onto Kinoko Island by the Foxy Pirates, who posed as a marooned crew. Luffy agreed to a Davy Back Fight rematch, and Zoro, Luffy, and Sanji took part in the first round, where they had to eat as many mushrooms as possible. However, the mushrooms caused the three of them to become lethargic, and they were captured along with Porche and Hamburg as the Foxy Pirate Komei revealed that this was part of his plan to take down the Straw Hats. Komei then captured Zoro, Sanji, Porche, and Hamburg and took them to Nebulandia, where he imprisoned them. Zoro and Sanji were later taken outside and chained to a rock formation along with the other captured Straw Hats in order to lure Luffy to Komei. However, Chopper and Brook came with an antidote and reinforcements, and Zoro and Sanji were freed and restored to their old selves. They then helped beat back the Marines, and the Straw Hats and Foxy Pirates returned to Kinoko Island afterwards, where they parted ways. The Straw Hats then held a banquet to celebrate their victory.
Whole Cake Island Saga
Silver Mine Arc
As the Straw Hats and Barto Club slept for the night, Luffy and Bartolomeo were suddenly kidnapped by the Silver Pirate Alliance. The two crews woke up to confront the kidnappers, but Peseta and his men fired Adhesive Shells at the Going Luffy-senpai. Zoro sliced them up, but became covered in a sticky substance which rendered him and everyone else immobile. The next day, the Straw Hats and Barto Club reached Silver Mine, where Luffy and Bartolomeo were being held. As Peseta was forcing Luffy, Bartolomeo, and their allies to surrender by taking hostages, Zoro freed the hostages and confronted Peseta. Peseta mocked Zoro about his predicament the previous night and fired more Adhesive Shells at him. However, Zoro sliced them up without getting any adhesive on him and sent Peseta and his men flying far away with Kokujo: O Tatsumaki. Zoro and Kin’emon prepared to take Luffy and Bartolomeo back to the Going Luffy-senpai, but the Silver Pirate Alliance leader Bill cut the two groups off, and Luffy told Zoro to go on ahead while he dealt with Bill. Zoro and Kin’emon returned to the Going Luffy-senpai, attacking some of the Battle Boats besieging it. Luffy and Bartolomeo later returned, and the Straw Hats and Barto Club set sail for Zou.
Heart Of Gold
While at sea, the Straw Hats encountered a girl named Myskina Olga, who fruitlessly tried to threaten them. Olga revealed the existence of the great treasure Pure Gold to the Straw Hats, and they wished to go after it with her. Suddenly, they were attacked by Mad Treasure and his crew, who were also after the Pure Gold. The Straw Hats easily repelled Treasure’s crew, but Treasure pulled Olga to him with a chain, starting a tug of war between him and the Straw Hats. Eventually, Zoro cut Olga free and returned her to the Sunny, but her ring fell into the ocean into the process.
This caused a giant fish named Bonbori to emerge and consume the ring, and the Straw Hats sailed into Bonbori after hearing that the Pure Gold was inside it. Treasure followed the Straw Hats into Bonbori, and rammed his ship into the Sunny, nearly causing it to hit Bonbori’s uvula. However, Luffy prevented a collision, but was blown far away after being shot by Treasure’s subordinate Naomi Drunk. Olga went to rescue Luffy as the Sunny fell into Bonbori’s throat. Zoro, Sanji, and Franky later ended up in Bonbori’s second stomach along with the Sunny.
Zoro, Sanji, and Franky later reunited with Luffy when he and his companion Myskina Acier came into Bonbori’s second stomach. Upon hearing that the rest of their crewmates were captured by Treasure, Zoro and Sanji accompanied Luffy and Acier to the island of Alchemi, where the Pure Gold lay. They were attacked by Treasure’s crew at the coast of Alchemi, but Zoro and Sanji stayed behind to deal with them as Luffy and Acier continued on. While easily dispatching Treasure’s masses, Zoro confronted Naomi Drunk, who repeatedly and unsuccessfully shot arrows at him. Zoro dodged and cut apart all the arrows as he approached Naomi, and hit her with an air slash. He then knocked Naomi out by driving a sword into her cap. Zoro and Sanji returned to the rest of the crew right after Luffy defeated Mad Treasure, and they prepared to escape on the Sunny. The Straw Hats and Myskina family exited Bonbori as it vomited, and they watched as the Pure Gold was absorbed into Bonbori’s lamp. The next day, the Straw Hats parted ways with Olga and Acier, but they were disappointed at their failure to get the Pure Gold. However, Nami revealed that she had acquired a Vivre Card leading to the entertainment city Gran Tesoro, and the Straw Hats excitedly set sail for it.
One Piece Film Gold Episode 0
On the Thousand Sunny, the Straw Hats were having a barbecue. After the volleyball game between Nami and Chopper versus Robin and Franky, the Straw Hats discussed what they will do when they reach Gran Tesoro. Usopp then demonstrated a show for Gran Tesoro in case betting in the casino failed. Zoro spectated the sumo wrestling matches between Luffy versus Usopp and Luffy versus Franky. After a long match between Luffy and Franky, they both decided to use their signature attacks, but Nami punched the two because they could have destroyed the ship. Moments later, the Straw Hats approached the City of Dreams.
One Piece Film Gold
The Straw Hats entered Gran Tesoro, and were showered with gold dust at the entrance. They emerged in a pool of liquid gold that had a concert venue around it, but quickly found themselves under attack by the Long Long Pirates, who intended to rob the Straw Hats to pay off their debts. Narcy rushed toward the napping Zoro, but Zoro countered his sword strike. When Narcy attacked again, Zoro ran on top of his sword and used Oni Giri on Narcy, defeating him. The Straw Hats managed to defeat the Long Long Pirates, and watched as Gild Tesoro, the proprietor of Gran Tesoro, encased the remaining enemy pirates in gold.
The Straw Hats docked, and were approached by Baccarat, who offered them a VIP experience due to their fame. Baccarat drove them through Gran Tesoro in a turtle car, and took them to a VIP hotel at the heart of Gran Tesoro. The Straw Hats donned new outfits as they prepared to enjoy their vacation, although several kids tried to sell them flowers to pay off their families’ debts. They went to the casino, and were given 20,000,000 worth in tokens. The Straw Hats managed to get very lucky and drastically increase their earnings, and Baccarat took them to the VIP lounge, where they had the chance to become millionaires.
They played a dice game hosted by Dice and won, when Gild Tesoro arrived and challenged the Straw Hats to a game. However, Baccarat used her Devil Fruit powers to take away Luffy’s luck, causing him to lose. When the Straw Hats found out about her deception, they refused to give Tesoro their money, and Tesoro and his subordinates retaliated with force. Zoro confronted Tesoro, but as he raced toward him, Tesoro encased his legs in gold using the gold dust that had been showered on him at the entrance before blocking his sword strike with a gold tendril. Tesoro covered more of Zoro’s body in gold, rendering him helpless, and held Zoro as a hostage.
Tesoro allowed the Straw Hats to try and repay their debt by 12:00 the next night, but if they failed, then Zoro would be executed. Zoro was held in a dark room afterwards in a gold structure, with most of his body encased in gold. The next night, Tesoro came to him and mocked the Straw Hats’ hopes of beating him, and Zoro had no reaction. Later, Zoro was taken to an entertainment venue where he was to be executed and where his crewmates were to be trapped. However, thanks to a plan developed by Carina, seawater sprayed from all of Gran Tesoro’s fountains, freeing Zoro and his crewmates from their gold encasement.
Zoro rejoined his crewmates, and Tesoro blew up the hotel, causing a deluge of gold to fall on them. However, Sanji, Robin, and Franky carried their crewmates to safety, and Tesoro confronted the Straw Hats inside a giant gold golem. As Luffy battled Tesoro, the Straw Hats were confronted by Dice, Baccarat, and Tanaka, who had been given golden armor and weapons by Tesoro. Dice attacked Zoro with a giant golden axe, but Zoro managed to counter his strikes. Dice managed to block Zoro’s attacked with Armament Haki, but Zoro eventually managed to disarm Dice and send him flying back in a whirlwind.
However, Tesoro summoned gold tendrils to grab Zoro’s swords, and Dice curled into a ball and rolled toward Zoro with great force, sending Zoro flying and causing him to lose grip on his swords. Dice took two of Zoro’s swords and attacked him with them, but Zoro managed to counter them with only his Armament Haki-imbued arms. He then used Tatsu Maki to send Dice flying back, and after Dice recovered, he rolled toward Zoro again. However, Zoro reclaimed one of his swords and used Shishi Sonson, cutting through Dice’s armor and defeating him. However, after Luffy managed to get the upper hand on Tesoro, Tesoro turned his golem into liquid gold, swamping everyone in it and preventing them from moving, except for the aerial Luffy. Luffy managed to defeat Tesoro, freeing everyone on Gran Tesoro, and they all rejoiced. However, a timer suddenly appeared, and Carina stated that the ship would sink once it reached zero. The Straw Hats then returned to the Thousand Sunny, but then found out that the timer was a ruse in order for Carina to take command of Gran Tesoro. However, they had no hard feelings, and were forced to depart once the Marine fleet nearby began chasing them.
Zou Arc
Wano Country Saga
Cidre Guild Arc
Out at sea, the Straw Hats were under attack by a group of bounty hunters known as the Cidre Guild and their guns that shot powerful blasts of carbonated water. They managed to escape by blasting off with Coup de Burst, but upon stopping at an island afterward they found that the Sunny’s cola supply had run out. Luffy volunteered to go to the island to buy some cola, and found that it was dotted with pools of carbonated water. A ramune saleswoman named Caramel told Luffy that he could get cola from the factory, but warned him that it was controlled by the Cidre Guild. Luffy raced toward the factory, but was confronted by a Cidre Guild platoon led by Ginger.
Ginger overwhelmed Luffy with a powerful carbonation blast, causing him to fall into a sinkhole and get swept away by an underground river. The river took Luffy to a pool where Boa Hancock was bathing, and the two reunited and started a battle against Cidre himself. Meanwhile, the other Straw Hats were fighting the rest of the Cidre Guild on the coast, but the fight soon ended as the Guild members revealed they had been enslaved by Cidre and so had no loyalty to him. As the crew dealt with the enslaved, Luffy continued his battle with Cidre. After a brief clash, Luffy eventually overpowers Cidre and defeats him. He then sees an invitation to the Pirates Festival land on the ground and Luffy picks it up. The liberated Cidre Guild slaves gave the Straw Hats barrels of cola in repayment for their freedom. Luffy reveals to Hancock that he received an invitation to the Pirates Festival, and bids her a temporary farewell. As the Straw Hats sail back out to sea, Luffy reveals the invitation to his crew, and to their shock, Robin reads that this year’s Expo will include a hunt for Gol D. Roger’s treasure. Luffy is excited to go there, and the crew sets sail to Delta Island where the Expo will be taking place, along with the other crews of the Worst Generation.
One Piece Stampede
After receiving an invitation for the Pirates Festival, the Straw Hats headed to Delta Island. After exploring and playing around a bit, they decided to take part in the main event, a Treasure Race for Gol D. Roger’s treasure. After the Straw Hats started to ascend the Knock Up Stream, they then noticed that Law has boarded their ship, who reveals he’s been chased due to coming close to a secret behind the Festival. The crew then decided to split up, with Robin, Brook and Sanji accompanying Law to further investigate his suspicions.
The rest continued to the Treasure Island atop the Stream, where an all out brawl occurred as they raced towards the treasure, with Zoro engaging Killer briefly. However, the race ended when the island was destroyed by Douglas Bullet. After also receiving news that the island was being surrounded by a Marine fleet, Zoro was assigned to take care of the crew on the Sunny. When they made it to the coast, the Pirate Hunter soon found himself facing Issho, who he held of until Bullet started to make his move. Issho left, but not before leaving a parting gift in the form of a meteor, which Zoro managed in two, though it was only blown away thanks to Dracule Mihawk, who was present to fulfill his duties as a Warlord. Bullet then altered the island’s terrain with his ability, creating walls on the edge of the island and trapping both pirates and Marines within. When Zoro noticed that Crocodile was aiming for Bullet after Luffy destroyed his colossus and ship, Zoro briefly intercepted the former Warlord. After Luffy defeated Bullet, the Straw Hat’s reunited on their ship, where they set sail and attempted to penetrate the Marine’s encirclement of the island, together with the other members of the Worst Generation, as well as several other pirate crew. In the end they were able to escape thanks to Sabo and Ann creating blazing path for them to go through.
Episode Of East Blue
Episode Of Sky Island
Wano Country Arc
Utas Past Arc
The Straw Hat’s spent a lazy day out at sea on the Sunny, while listening to a Tone Dial playing Uta’s new song, New Genesis. Later, after everyone on the crew showed interest in the singer, the crew begged Luffy to attend Uta’s concert, and the captain agreed, and the Sunny set course to Elegia.
One Piece Film Red
Uta organized a concert on Elegia in order to realize her dream of performing for the whole world. Zoro was present during the concert.
Monsters 103 Mercies Dragon Damnation
During the end credits of the special, a re-adapted version of Zoro receiving Shusui from Ryuma is shown.
Roronoa Zoro › Misc.
Introduction
Early Concepts
Originally, Zoro was planned by Eiichiro Oda to be the bodyguard of Buggy. A picture of an incarnation of him in Buggy’s crew was then later released in Volume 3 along with another picture of Buggy’s crew. Oda described Buggy’s crew as a family unit, in which Zoro was the elder brother. Zoro has occasionally appeared wearing glasses in some of the color illustrations by Oda and in the 11th opening of the anime.
Adaptation Differences
Anime Differences
Zoros Past
Zoro’s past was expanded upon in the anime. Zoro was a traveler who went around defeating dojos for their signs. However, there was one person Zoro could not beat: the sensei’s daughter, Shimotsuki Kuina. In the anime she is the reason he joins her father’s dojo in the first place. Kuina’s father made a deal that if he could defeat her Zoro would take the sign.
If not, Zoro would have to train under him. When given the opportunity to use as many swords as he wanted, he grabbed as many as he could carry and faced off against Kuina. He lost and was told he had to start with one sword before he could…
Read More about Roronoa Zoro › Misc.
If not, Zoro would have to train under him. When given the opportunity to use as many swords as he wanted, he grabbed as many as he could carry and faced off against Kuina. He lost and was told he had to start with one sword before he could use more. As per the consequences of his loss, he trained at the dojo as promised. In the manga, Zoro enters to see her dead body, eyes covered and surrounded by the students and accuses her of running away, in the anime no such scene is shown, but a funeral takes place for her instead, though later on in the Ocean’s Dream Arc in the anime, the original manga scene is shown in a flashback. His story is also extended in the anime by showing the time he first met and befriended Johnny and Yosaku. They cash in when Zoro takes out a large bounty and, given they pay his tab at the bar he was at for his food, can keep the rest of the money for themselves as an apology for taking their ‘head’. Later, Dick appears in the town with his horde of bandits, who proceed to loot the town. Johnny and Yosaku watch as a child tries to stop the thief to no avail. Johnny convinces Yosaku that they must stop him, to which Yosaku reluctantly agrees. The two are no match for Dick, but luckily Zoro comes to claim the bounty on Dick’s head to pay for a katana that he broke. After a complete victory by Zoro, Johnny and Yosaku look up to Zoro and start to call him “Aniki” (‘big bro’ in the English dub).
Straw Hat Separation
His adventure in Shikkearu Kingdom is also extended in the anime. Not only did Perona refuse to give Zoro his swords back, but she also tried to turn Zoro into her servant by using her Devil Fruit powers. She got as far as managing to dress Zoro like her former subordinate, Kumashi (covered in bandages), while he had passed out before he woke up and left the room in search of his swords. In the anime, Zoro’s training will begin by defeating the leader of the humandrills who copied the swordsmanship of Dracule Mihawk.
Running Gags
In most fillers, his lack of sense of direction is further ridiculed as he has gone in the wrong direction even though his guide was still pointing in the correct way, and even turning to the right on a straight path. Starting with Episode 111, Zoro has been called marimo (moss-head in the English dub (kelp-head in Movie 8)) by Sanji and similar names in reference to his oddly colored green hair.
Wano Country Arc
At the beginning of the Wano Country Arc, the manga first showed Zoro at the magistrate’s home where he cut down the magistrate. The anime expands on Zoro’s encounter with the magistrate. One night after drinking alcohol, Zoro ran into the culprit of the street murders before he was falsely arrested by the law enforcement. After striking down the magistrate, the anime also shows him fighting the magistrate’s men. When he retrieves his swords, Zoro destroys the magistrate’s home.
Liveaction Differences
In the live-action series, Zoro is definitively the first mate of the Straw Hat Pirates, recognized as such by Luffy, Nami, and himself. In the manga, while some characters believe him to be the first mate of the Straw Hat Pirates, he is officially the combatant. Zoro received Wado Ichimonji during Kuina’s funeral instead of after. Zoro’s fight with Mr. 7 is shown. He cuts the agent in half and brings his corpse to Shells Town. Zoro challenges Dracule Mihawk at the Baratie much earlier than in the manga. The duel takes place the day after Zoro issued the challenge instead of immediately after.
Major Battles
Filler And Movie Battles
Merchandise
As a main character, Zoro has been the choice character in many forms of merchandise. He has been featured in the series of models Portrait of Pirates. He has featured in trading figure sets such as One Piece Motion Figure box and the One Piece Styling Figures. When the Wii game, One Piece: Unlimited Adventure, was released Zoro was one of the crew produced as a figure in the One Piece Locations Trading Figures series. He also featured in One Piece Gashapon sets, including the 5 piece One Piece VS Figure Gashapon set. Another Gashapon set he featured in was the One Piece Full Color R Gashapon, of what he was featured twice. He was sold alongside Robin in the One Piece Monkey Island Mascot Keychain series. He was issued alongside Kuina in a One Piece DeQue set featuring the Straw Hats and their past mentors/loved ones.
Songs
- “Eyes of Zoro”
- “Spirit of Zoro”
- “Holy Holiday!” (as back-up singer to Luffy)
- “Respect!” (Luffy, Zoro and Sanji)
- “Family” (with other Straw Hats)
- “Utae! Jingle Bell” (with other Straw Hats)
- “You Are the One” (with other Straw Hats)
- “Sekaichi No Otoko to Yobareru Tame ni” (Zoro, Sanji and Usopp)
- “Akuma no Mi” (Luffy, Zoro, Nami, Usopp and Sanji)
- “Jungle Fever” (with other Straw Hats)
- “A Thousand Dreamers” (With other Straw Hats)
- “We Are!” (Luffy, Nami, Chopper, Zoro, Sanji, Robin and Usopp)
Other Appearances
Video Games
Playable Appearances
- One Piece: Become the Pirate King!
- Legend of the Rainbow Island
- One Piece: Treasure Wars
- Grand Battle! Swan Colosseum
- One Piece: Treasure Wars 2 Welcome to Buggyland
- Birth of Luffy’s Dream Pirate Crew!
- Grand Line Dream Adventure Log
- One Piece: Great Hidden Treasure of the Nanatsu Islands
- Aim! The King of Belly
- One Piece: Going Baseball
- One Piece: Dragon Dream!
- Set Sail Pirate Crew!
- Grand Battle!
- Grand Battle! 2
- One Piece: Ocean’s Dream!
- One Piece: Treasure Battle!
- One Piece: Grand Battle! 3
- One Piece: Grand Battle! Rush!
- One Piece: Pirates Carnival
- One Piece: Round the Land
- Fighting for One Piece
- Battle Stadium D.O.N
- One Piece: Grand Adventure
- One Piece: Unlimited Adventure
- One Piece: Unlimited Cruise
- Jump Super Stars
- Jump Ultimate Stars
- Jump Force
- One Piece: Gear Spirit
- One Piece: Gigant Battle
- One Piece: Gigant Battle! 2 New World
- One Piece Romance Dawn: The Dawn of the Adventure
- One Piece: Pirate Warriors
- One Piece: Pirate Warriors 2
- One Piece: Unlimited World Red
- One Piece: Super Grand Battle! X
- One Py Berry Match
- One Piece: Dance Battle
- One Piece: Pirate Warriors 3
- One Piece Treasure Cruise
- One Piece Thousand Storm
- One Piece: Burning Blood
- One Piece: Great Pirate Colosseum
- One Piece Bon! Bon! Journey!!
- One Piece Bounty Rush
- One Piece: World Seeker
- One Piece: Pirate Warriors 4
- One Piece Odyssey
Support Appearances
- Chopper’s Big Adventure
- One Piece
Nonplayable Appearances
- J-Stars Victory Vs
Other Media
- Zoro appears in every year of One Piece Premier Show. He also appears in the 2015 and 2018, Segment 1 shows of One Piece Water Battle, and every year of Sanji’s Pirates Restaurant except 2014.
- One of the Tokyo One Piece Tower’s exhibits, “Zoro’s Soul of Edge”, centers around the swordsman, and a statue of Zoro appears at the Straw Hat Crew’s Great Feast. Zoro appears in most Tokyo One Piece Tower special animations and stage shows, including every Live Attraction, One Piece 4D, The Great Treasure of Tongari Island, Immersive Theater: When the Box of Time Opens, Visitors from the Wrecked Ship, and Piece Trail: The Adventurers and the Amazing Spring.
- Zoro appears alongside his crew in One Piece Art NUE.
- Zoro appears in the teamLabCamera attraction of the Digital Art Island Adventure event.
- Zoro appears in Straw Hat Pirates vs. Marines vs. Seven Warlords Holographic Battle Theater and One Piece Dramatic Stage THE METAL ~Marineford of Remembrance~.
- Zoro appears in Super Kabuki II: One Piece in the retelling of the Sabaody Archipelago Arc.
- Zoro appears in the first two One Piece Water Spectacle shows.
- Zoro is the central character in one of the Hungry Days commercials. He also appears in the Nefertari Vivi-focused commercial.
- Zoro was going to appear in ONE PIECE LIVE STAGE ~Tower of Steel~, but it was postponed indefinitely.
- Zoro’s battle with Dracule Mihawk was retold by stage actors in the brass entertainment show One Piece Oto Utage.
- One Piece Variety: I Will be the Pirate King TV host Ryuichi Hamaya dressed up as Zoro in the show’s first episode.
- A bronze statue of Zoro was dedicated in Kumamoto as part of the Kumamoto Revival Project.
Cameos And Crossovers
- Zoro appeared in Kyutai Panic Adventure!, where Frieza attacks Odaiba. The Straw Hat Pirates come to Goku’s aid, but they are intercepted by and fight the Arlong Pirates. Zoro also appeared in Kyutai Panic Adventure Returns!, where Enel attacks Tokyo and Odaiba.
- Zoro and other characters also appeared in Cross Epoch.
- Zoro has appeared in the games Jump Super Stars and Jump Ultimate Stars for the DS. He also appeared in Vattroller X for the Game Boy Advance and Battle Stadium D.O.N on the GameCube and PlayStation 2. Zoro is also in Jump Force alongside Monkey D. Luffy, Sanji, Sabo, Boa Hancock, and Marshall D. Teach, released in 2019.
- Zoro makes a cameo appearance in the anime, Sayonara, Zetsubou-Sensei: during Meru’s introduction, Harumi is seen reading a yaoi manga featuring Sanji and Zoro. Also, in her room, we can see action figures of Luffy, Zoro, Sanji and Sogeking.
- In episode 21, of the anime Kuroko no Basuke an old man that is mopping the floor of the bathroom was dressed similarly to Zoro before the timeskip.
- In episode 5 of the webtoon anime adaptation Tower of God, one of the characters is dressed like Zoro before the timeskip.
References In Popular Culture
- In The Simpsons episode “Treehouse of Horror XXV”, several other incarnations from other franchises of the family are shown, each one with a respective theme. In the manga and anime theme, each of the family members was depicted as a specific manga/anime character, Homer is seen as Zoro, complete with green hair, three katana, and Zoro’s post-timeskip outfit.
- In the episode 7 from Nurarihyon no Mago Sennen Makyo, the character Itaku use two sickles in his hands and the third in his mouth as Zoro.
- Zoro appeared in the 13th episode of the third season of the popular YouTube series, “DEATH BATTLE!”, where he fought Erza Scarlet from the Fairy Tail franchise and won. Before that, he fought Kenshin Himura from the Rurouni Kenshin series in the second season of the spin-off series, “One Minute Melee” and won. Later on, he appeared in Death Battle’s other spin-off series, DBX, where he once again fought Rurouni Kenshin and won.
- In episode 2 of Re:Zero, Subaru quotes Zoro’s line to Dracule Mihawk “a wound on one’s back is the shame of a swordsman” after reviving from being stabbed in the back.
Translation And Dub Issues
- Most of Zoro’s attacks are puns and some also have religious connections. One of Zoro’s more common attacks, Oni Giri (Demon Slash), is a pun on the Japanese word onigiri (rice ball) (this being the food he was offered upon being first introduced into the series). Another common attack, the 36/72/108 Pondo Hou, is a reference to the 36 passions of Buddhism. Another one of Zoro’s powers, Ashura, also borrows from a religion by taking its name from a group of Hindu demons. This is a bit ironic considering that Zoro is a stated apatheist, and Nami and Chopper have both claimed that Zoro is more arrogant than the self-proclaimed “god” Enel.
- In the 4Kids English dub of One Piece, Zoro is referred to as “Zolo”, however when Funimation picked up the series, they reverted his name back to “Zoro”, only keeping “Zolo” for the broadcast Skypiea episodes for consistency. Originally, the English version of the manga by VIZ spelled his name as “Roronoa Zoro”, but it was changed to “Zolo” in chapter 50. It is possible that this name change was either a result of trademark issues with Zorro – who shares a similar name – or to maintain similarities to the 4Kids dub. In the book The Anime Encyclopedia – A guide to Japanese animation since 1917 (2001), Zoro’s name was spelled “Zorro” in the One Piece entry. Such cases as this have been common in many translations across the world, mostly because of the similarity between the two names. To date, however, this has yet to raise concerns over copyright between the two characters. However, in the second 2011 volume of the U.S. Shonen Jump magazine, Zoro’s name was changed back to “Zoro”.[citation needed] This is the first time VIZ has called the character this since its first printings of chapter 50. It was changed back to “Zolo” in the following issues, however.
- In Japanese promotions and in some artwork, the character is often referred to as “Zoro” but is also spelled “Zolo” in a few cases, mostly in promotions.[citation needed] However, there are fans that claim that “Zoro” was the creator’s intended spelling, since it is almost always spelled that way in art, and it is supposed to be based off the aforementioned character “Zorro”. However, the appearance of “Zolo” in Japan can be explained without relating it to 4Kids or copyright laws due to interchangeable L and R sounds. Other characters who have displayed this problem include Franky (Flanky) and Robin (Lobin). In the end, in noted cases English speaking fans may choose to specifically refer to the dub version of Zoro as “Zolo”, while referring to the original version as “Zoro”.
- In the English dub by 4Kids, Kuina’s death was removed. Instead, she was rewritten to have been seriously injured by a group from a nearby town, leaving her unable to fight; a situation which, ironically, is more violent than the original. Zoro’s commitment, therefore, is to continue fighting for her sake, instead of in honor of her death. During the Drum Island Arc in the 4Kids dub, when the ankle scars, he obtained during his fight with Mr. 3 were exposed, they were rewritten to have been gained from a bear trap since the Straw Hats never visited Little Garden in that version.
Errors And Corrections
- Zoro has quite a few art errors during the serialization in the chapters. They have been corrected in their respective volumes.
- In Jump’s edition of Chapter 598, he was shown to have a scar on his right eye, but in the next chapter, it is moved to his left eye. Oda wrote in 599 that the right eye scar was an error, and that the one with the scar on the left eye is the correct one. The error was corrected in volume 61.
- In the last panel of page 16 of Chapter 698, Zoro is seen with the wrong scar on his chest. Instead of the thin diagonal line given by Dracule Mihawk, he had the thick cross Monkey D. Luffy got from Akainu. This was corrected in Volume 70.
- On the cover art of Chapter 699, Zoro is seen missing the scar on his left eye. This was corrected in Volume 70.
- In the anime, Zoro’s wanted poster did not include Usopp’s shadow the first time that the bounty was issued, but this was later corrected in Episode 152. When the second bounty was issued Usopp’s shadow was inexplicably omitted again.
- On the cover of Chapter 77, a chicken is seen holding a newspaper that says “Wanted, Roronoa Zoro, 1,000,000”. This bounty is not canon however, because the covers do not relate to the main series (unless it is a cover story).
- In Chapter 599, Zoro’s Shusui was shown with a different saya strongly resembling that of Law’s nodachi. Although Oda did not write anything about it, it could be taken as a mistake as Zoro is then seen holding Shusui with its traditional sheath with no comments about the change. This error is fixed in the anime chapter that adapts this scene from the manga.
- The original Shonen Jump magazine printing of Chapter 1058 erroneously wrote Zoro’s bounty as 1,100,001,100. Oda’s staff informed the official translations of the error before the chapter was published, so the number was written correctly as 1,111,000,000 in the VIZ release. Additionally, Oda’s staff posted about the error on Twitter.
Trivia
- Zoro has his own jolly roger, like all the Straw Hat crew. It features Zoro’s bandana, two swords instead of crossbones, and a sword in its mouth (the white hilt suggests that it is Wado Ichimonji, which is always the one that Zoro holds in his mouth when using Three Sword Style).
- After the timeskip, the skull gains Zoro’s three earrings and the left eye is closed with a vertical scar over it to match Zoro’s own eye. The swords that make up the crossbones are more detailed: the blade pointing towards the right is dark, suggesting that it is Shusui while the other is Sandai Kitetsu.
- Another jolly roger is seen on his armor in the cover of Chapter 699. This jolly roger is a regular skull with three swords crossing behind it.
- Zoro is the only member of the crew that Luffy personally sought out to invite before they actually met.
- It was revealed in an interview with Oda and Rurouni Kenshin author Nobuhiro Watsuki, whom Oda worked for as an assistant before starting One Piece, that Oda intended to make Zoro a one-eyed character very shortly after starting One Piece, around a decade before Zoro would go on to lose his left eye.
- Zoro is the first known person since Shimotsuki Ryuma to kill a dragon, an act which made the latter a legend. Both of them also killed the dragon the same way, by decapitation in the air.
- Zoro would later repeat this feat in the fight against King, this time decapitating a fiery construct of a dragon.
- Despite not killing the latter, Zoro also fought against Kaidou, who is able to turn into a dragon thanks to the powers of the Uo Uo no Mi, Model: Seiryu, and came close to striking him in midair, but missed and instead ended up cutting off one of the horns of the Skull Dome of Onigashima.
- Zoro would later repeat this feat in the fight against King, this time decapitating a fiery construct of a dragon.
- Zoro is the first known person in two decades since Kouzuki Oden to permanently scar the Emperor Kaidou with his swords, a feat Kaidou himself was shocked by.
- Additionally, both swordsmen achieved this feat with the same sword, Enma.
- Zoro shares some things with the other members of the Worst Generation:
- He, Monkey D. Luffy, and Eustass Kid are the only known members who can use Supreme King Haki.
- He and Killer are the only known members who are subordinates (with a lack of an apparent position in their crew) rather than a captain, they are both swordsmen, and they are the only ones who do not have a Devil Fruit power (although Killer has the weaknesses of a user after eating a defective SMILE).
- As a result, Zoro is the only member of the Worst Generation not to have a Devil Fruit at all.
- Zoro’s reintroduction to the series after the timeskip is reminiscent of how Dracule Mihawk was introduced. Both sliced a galleon in two and both seemingly did so due to an interrupted nap.
- Zoro is tied with Sanji for having the most English dub voice actors out of all the Straw Hats (3 as an adult, 4 as a child in Zoro’s case).
- In Japanese fan polls, Zoro was consistently the second most popular character, until his position was usurped by Trafalgar Law in the fifth poll, but he reclaimed it in the sixth poll. Furthermore, in the attack popularity polls his Santoryu Ogi: Sanzen Sekai came in 2nd.
- Prior to Zoro’s first official bounty of 60,000,000 at the end of the Arabasta Arc, a newspaper on the cover page of Chapter 77 listed him as “wanted” with a bounty of 1,000,001. However, this is not considered canon due to being part of the Animal Theater rather than a Cover Story.
- Zoro has the highest known starting bounty for a native of the East Blue with a 60,000,000 bounty, surpassing Luffy’s initial bounty of 30,000,000. This does not count Sanji (77,000,000), however, since he is technically from the North Blue.
- Zoro’s desire in earning the epithet, Jigoku no Ō (地獄の王?) mirrors Silvers Rayleigh’s own epithet, Meiō (冥王?), both referencing an abode of the dead, Hell and the Underworld respectively.
- Zoro has several connections to the number 11.
- In dice gambling, “Zoro-me” is an expression that means “to roll double ones”, that is, getting snake eyes.
- Zoro was born on November 11th, or 11/11.
- Zoro’s current bounty is of 1,111,000,000.
- Zoro hails from Shimotsuki Village, “Shimotsuki” being a traditional Japanese name for November, the eleventh month. The same can be applied to the Shimotsuki Family, of which Zoro is part.
- Zoro is the first character outside the manga to stick up the middle finger.
Sbsbased Trivia
- Zoro’s surname, Roronoa, is the Japanese pronunciation of real-life 17th century French pirate François l’Olonnais.
- Because of this, Zoro is the only member of the Straw Hat Pirates to be named after a real-life pirate.
- Oda has hinted that one of the reasons why Zoro uses sushi-based puns in his Nigiri attacks are because he has never tried sushi and has some sort of fascination with it. However, this can be considered one of Oda’s SBS jokes.
- A fan asked Oda if Shimotsuki Ushimaru is Zoro’s father, and Oda answered no. Although he has frequently noted the similarities in appearance between Zoro and Ushimaru.
- Zoro’s family tree was later revealed by Oda and in there was confirmed that Ushimaru was Zoro’s great-uncle rather than father and that the similarities came due to them looking alike, as Ushimaru was the brother of Zoro’s grandmother.
- A nod to their relationship is alluded to in the English dub, with Sabat voicing the two characters.
- Zoro’s family tree was later revealed by Oda and in there was confirmed that Ushimaru was Zoro’s great-uncle rather than father and that the similarities came due to them looking alike, as Ushimaru was the brother of Zoro’s grandmother.
- Zoro’s chest size is about 110 cm (43 inch).
- Zoro’s favorite foods are white rice, Sea Beast meat, and stuff that goes with sake. Also, his favorite food from Wano Country is sushi. His least favorite food is chocolate because it is too sweet.
- He shares his like of one kind of meat with Luffy.
- Zoro does not eat ice cubes, the same as Nami, Sanji and Franky.
- Despite this, he is seen eating ice in Chapter 701. Oda jokingly implied that this person was not Zoro, due the disguise he was wearing.
- Zoro’s favorite dish to cook is sashimi.
- Zoro likes fried egg, over easy, slow cooked with shoyu (soy sauce).
- Zoro has the second highest tolerance to alcohol among the Straw Hat Pirates.
- Zoro’s favorite type of island and season is autumn on an autumn island.
- Zoro’s specific number is 02.
- Zoro’s specific color is green.
- Zoro smells like steel.
- If the Straw Hat Pirates were a family, then Zoro would be the eldest son.
- Zoro’s animal resemblance is a shark, and the cover of Chapter 3 (in which he was introduced) shows a picture of Luffy riding on the back of a shark.
- However, in Chapter 651 when all the Straw Hat Pirates were represented as animals, Zoro was shown as a tiger and he was turned into a tiger in the video game Chopper’s Big Adventure. He had dragon-based attire in the video game Unlimited Cruise.
- If One Piece was set in the real world, then Zoro would be from Japan.
- Zoro’s thoughts are “Sword, Sword, Strength, Train, Sleep”, and like the rest of the Straw Hat Pirates, “Friendship”.
- When a fan asked which flower Zoro resembles the most, Nico Robin’s Japanese voice actress answered he most resembles a thistle.
- When another fan later asked Oda what flowers he thought best represented the members of the Worst Generation, Oda gave an alternate answer for Zoro: Wisteria.
- Zoro bathes once a week, the same as Luffy and Brook.
- Trafalgar D. Water Law calls Zoro according to his name, Zoro-ya.
- Zoro represents the prefecture of Hokkaido.
- Other than taking naps, Zoro typically sleeps at 4:00 A.M. and gets up at 7:00 A.M.
- If the Straw Hat Pirates were not pirates, then Zoro would be a police officer.
- Zoro’s hobbies are conduct training and drinking alcohol.
- If the Straw Hat Pirates had a 50-meter race, then Zoro would come in fifth place. Oda clarifies that Zoro would be ranked higher in a shorter distance race, but Zoro would get lost in a longer race.
- When Sanji is in his raid suit, Zoro calls him “Idiot”.
- If Zoro were to be given a Devil Fruit, he would have the Uo Uo no Mi, Model: Seiryu, albeit “consumed” by one of his swords.
- In SBS 91, Oda showed Zoro’s possible appearances at ages 40 and 60 in two separate timelines.
Site Navigation
Straw Hat Pirates
Crew:
| Name | Link(s) |
|---|---|
| Monkey D. Luffy | View on Wiki |
| Roronoa Zoro | Current Page |
| Nami | View on Wiki |
| Usopp | View on Wiki |
| Sanji | View on Wiki |
| Tony Tony Chopper | View on Wiki |
| Nico Robin | View on Wiki |
| Franky | View on Wiki |
| Brook | View on Wiki |
| Jinbe | View on Wiki |
| Nefertari Vivi | View on Wiki |
Companions:
| Name | Link(s) |
|---|---|
| Zeus | View on Wiki |
| Karoo | View on Wiki |
Main Ships:
| Name | Link(s) |
|---|---|
| Going Merry | View on Wiki |
| Thousand Sunny | View on Wiki |
Soldier Dock System:
| Name | Link(s) |
|---|---|
| Shiro Mokuba I | View on Wiki |
| Mini Merry II | View on Wiki |
| Shark Submerge III | View on Wiki |
| Kurosai FR-U IV | View on Wiki |
| Brachio Tank V | View on Wiki |
Other Ships:
| Name | Link(s) |
|---|---|
| Shimashima Shopping | View on Wiki |
| Karasumaru | View on Wiki |
| Taru Tiger | View on Wiki |
| Tarumanma | View on Wiki |
| Ma Ikkada | View on Wiki |
| Sexy Foxy | View on Wiki |
Abilities
Devil Fruit Based:
| Name | Link(s) |
|---|---|
| Gomu Gomu no Mi | View on Wiki |
| Main Techniques | View on Wiki |
| Gear 2 | View on Wiki |
| Gear 3 | View on Wiki |
| Gear 4 | View on Wiki |
| Gear 5 | View on Wiki |
| Hito Hito no Mi | View on Wiki |
| Hana Hana no Mi | View on Wiki |
| Yomi Yomi no Mi | View on Wiki |
Fighting Style Based:
| Name | Link(s) |
|---|---|
| Haki | View on Wiki |
| Observation | View on Wiki |
| Armament | View on Wiki |
| Supreme King | View on Wiki |
| No Sword Style | View on Wiki |
| Black Leg Style | View on Wiki |
| Diable Jambe | View on Wiki |
| Ifrit Jambe | View on Wiki |
| Fish-Man Karate | View on Wiki |
| Fish-Man Jujutsu | View on Wiki |
Weapon Based:
| Name | Link(s) |
|---|---|
| Three Sword Style | View on Wiki |
| One Sword Style | View on Wiki |
| Two Sword Style | View on Wiki |
| Nine Sword Style | View on Wiki |
| Sandai Kitetsu | View on Wiki |
| Enma | View on Wiki |
| Yubashiri | View on Wiki |
| Shusui | View on Wiki |
| Foxfire Style | View on Wiki |
| Art of Weather | View on Wiki |
| Usopp Tactics | View on Wiki |
| Franken | View on Wiki |
| Soul Solid | View on Wiki |
| Raid Suit | View on Wiki |
| Nidai Kitetsu | View on Wiki |
| Peacock Slashers | View on Wiki |
Creations:
| Name | Link(s) |
|---|---|
| Kuro Kabuto | View on Wiki |
| Chopperphage | View on Wiki |
| Armored Me | View on Wiki |
| General Franky | View on Wiki |
| Clima-Tact | View on Wiki |
| Perfect Clima-Tact | View on Wiki |
| Standard Sorcery Clima-Tact | View on Wiki |
| Grow Up Sorcery Clima-Tact | View on Wiki |
| Ginga Pachinko | View on Wiki |
| Kabuto | View on Wiki |
| Cyborg Tactics | View on Wiki |
| Omni-Cannon | View on Wiki |
Support:
| Name | Link(s) |
|---|---|
| Wapometal | View on Wiki |
| Voice of All Things | View on Wiki |
Related Articles
Associated Locations:
| Name | Link(s) |
|---|---|
| Goa Kingdom | View on Wiki |
| Foosha Village | View on Wiki |
| Mt. Colubo | View on Wiki |
| Rusukaina | View on Wiki |
| Shimotsuki Village | View on Wiki |
| Kuraigana Island | View on Wiki |
| Oykot Kingdom | View on Wiki |
| Conomi Islands | View on Wiki |
| Cocoyasi Village | View on Wiki |
| Arlong Park | View on Wiki |
| Weatheria | View on Wiki |
| Gecko Islands | View on Wiki |
| Boin Archipelago | View on Wiki |
| Germa Kingdom | View on Wiki |
| Baratie | View on Wiki |
| Momoiro Island | View on Wiki |
| Drum Island | View on Wiki |
| Torino Kingdom | View on Wiki |
| Ohara | View on Wiki |
| Arabasta Kingdom | View on Wiki |
| Baltigo | View on Wiki |
| Water 7 | View on Wiki |
| Karakuri Island | View on Wiki |
| Florian Triangle | View on Wiki |
| Kenzan Island | View on Wiki |
| Fish-Man Island | View on Wiki |
| Tongari Island | View on Wiki |
Former Memberships:
| Name | Link(s) |
|---|---|
| Dadan Family | View on Wiki |
| Impel Down | View on Wiki |
| Arlong Pirates | View on Wiki |
| Usopp Pirates | View on Wiki |
| Germa 66 | View on Wiki |
| Foxy Pirates | View on Wiki |
| Baroque Works | View on Wiki |
| Revolutionary Army | View on Wiki |
| Tom’s Workers | View on Wiki |
| Franky Family | View on Wiki |
| Rumbar Pirates | View on Wiki |
| Ammo Knights | View on Wiki |
| Sun Pirates | View on Wiki |
| Seven Warlords of the Sea | View on Wiki |
| Big Mom Pirates | View on Wiki |
Instigated Events:
| Name | Link(s) |
|---|---|
| Davy Back Fight | View on Wiki |
| Celestial Dragon Hit-and-Run Incident | View on Wiki |
| Impel Down Great Escape Incident | View on Wiki |
| Nightmare of Baldimore | View on Wiki |
| Legend of the Sacred Burning Beast of Baldimore | View on Wiki |
| Operation SOP | View on Wiki |
| Raid on Onigashima | View on Wiki |
| Egghead Incident | View on Wiki |
| Operation TSO | View on Wiki |
Other:
| Name | Link(s) |
|---|---|
| Super Rookie | View on Wiki |
| Worst Generation | View on Wiki |
| Will of D. | View on Wiki |
| Inherited Will | View on Wiki |
| Straw Hat | View on Wiki |
| Straw Hat Grand Fleet | View on Wiki |
| Ninja-Pirate-Mink-Samurai Alliance | View on Wiki |
| Four Emperors | View on Wiki |
Straw Hat Grand Fleet
Senior Captain:
| Name | Link(s) |
|---|---|
| Monkey D. Luffy | View on Wiki |
Senior Officers:
| Name | Link(s) |
|---|---|
| Roronoa Zoro | Current Page |
| Nami | View on Wiki |
| Usopp | View on Wiki |
| Sanji | View on Wiki |
| Tony Tony Chopper | View on Wiki |
| Nico Robin | View on Wiki |
| Franky | View on Wiki |
| Brook | View on Wiki |
| Jinbe | View on Wiki |
Representatives:
| Name | Link(s) |
|---|---|
| Cavendish | View on Wiki |
| Bartolomeo | View on Wiki |
| Sai | View on Wiki |
| Ideo | View on Wiki |
| Leo | View on Wiki |
| Hajrudin | View on Wiki |
| Orlumbus | View on Wiki |
Crews:
| Name | Link(s) |
|---|---|
| Beautiful Pirates | View on Wiki |
| Barto Club | View on Wiki |
| Happo Navy | View on Wiki |
| Ideo Pirates | View on Wiki |
| Tontatta Pirates | View on Wiki |
| New Giant Warrior Pirates | View on Wiki |
| Yonta Maria Grand Fleet | View on Wiki |
Ships:
| Name | Link(s) |
|---|---|
| Thousand Sunny | View on Wiki |
| Sleeping White Horse of the Forest | View on Wiki |
| Going Luffy-senpai | View on Wiki |
| Happosai | View on Wiki |
| Usoland | View on Wiki |
| Naglfar | View on Wiki |
| Yonta Maria | View on Wiki |
| Nita Maria | View on Wiki |
Abilities
Devil Fruit Based:
| Name | Link(s) |
|---|---|
| Gomu Gomu no Mi | View on Wiki |
| Hito Hito no Mi | View on Wiki |
| Hana Hana no Mi | View on Wiki |
| Yomi Yomi no Mi | View on Wiki |
| Bari Bari no Mi | View on Wiki |
| Buki Buki no Mi | View on Wiki |
| Nui Nui no Mi | View on Wiki |
| Mushi Mushi no Mi, Model: Kabutomushi | View on Wiki |
| Mushi Mushi no Mi, Model: Suzumebachi | View on Wiki |
Fighting Style Based:
| Name | Link(s) |
|---|---|
| Haki | View on Wiki |
| Three Sword Style | View on Wiki |
| One Sword Style | View on Wiki |
| Two Sword Style | View on Wiki |
| Nine Sword Style | View on Wiki |
| No Sword Style | View on Wiki |
| Foxfire Style | View on Wiki |
| Art of Weather | View on Wiki |
| Usopp Tactics | View on Wiki |
| Black Leg Style | View on Wiki |
| Armored Me | View on Wiki |
| General Franky | View on Wiki |
| Soul Solid | View on Wiki |
| Fish-Man Karate | View on Wiki |
| Fish-Man Jujutsu | View on Wiki |
| Hasshoken | View on Wiki |
| Jao Kun Do | View on Wiki |
| Tontatta Combat | View on Wiki |
Weapon Based:
| Name | Link(s) |
|---|---|
| Enma | View on Wiki |
| Sandai Kitetsu | View on Wiki |
| Wado Ichimonji | View on Wiki |
| Durandal | View on Wiki |
Related Articles
Story Arcs:
| Name | Link(s) |
|---|---|
| Dressrosa Arc | View on Wiki |
| Zou Arc | View on Wiki |
| Levely Arc | View on Wiki |
Cover Stories:
| Name | Link(s) |
|---|---|
| The Stories of the Self-Proclaimed Straw Hat Grand Fleet | View on Wiki |
Locations:
| Name | Link(s) |
|---|---|
| Bourgeois Kingdom | View on Wiki |
| Loguetown | View on Wiki |
| Kano Country | View on Wiki |
| Jewel Ice Sheet | View on Wiki |
| Green Bit | View on Wiki |
| Elbaph | View on Wiki |
| Standing Kingdom | View on Wiki |
| Dressrosa | View on Wiki |
Other:
| Name | Link(s) |
|---|---|
| Straw Hat Pirates | View on Wiki |
| Super Rookie | View on Wiki |
| Corrida Colosseum | View on Wiki |
| Chinjao Family | View on Wiki |
| Longarm Tribe | View on Wiki |
| Longleg Tribe | View on Wiki |
| Dwarves | View on Wiki |
| Giants | View on Wiki |
Swordsmen
Canon
Pirates:
Marines:
| Name | Link(s) |
|---|---|
| Helmeppo | View on Wiki |
| Bogard | View on Wiki |
| Tashigi | View on Wiki |
| Brannew | View on Wiki |
| Mozambia | View on Wiki |
| Momonga | View on Wiki |
| Onigumo | View on Wiki |
| Strawberry | View on Wiki |
| Doberman | View on Wiki |
| Borsalino | View on Wiki |
| John Giant | View on Wiki |
| Yamakaji | View on Wiki |
| X Drake | View on Wiki |
| Lacroix | View on Wiki |
| Stainless | View on Wiki |
| Isuka | View on Wiki |
| Kadar | View on Wiki |
| Yarisugi | View on Wiki |
| Bakezo | View on Wiki |
| Jero | View on Wiki |
| Issho | View on Wiki |
| Bastille | View on Wiki |
Bounty Hunters:
| Name | Link(s) |
|---|---|
| Johnny | View on Wiki |
| Yosaku | View on Wiki |
| Miss Catherina | View on Wiki |
| Mr. 7 | View on Wiki |
| Akumai | View on Wiki |
| Zambai | View on Wiki |
| Kiev | View on Wiki |
| Tamagon | View on Wiki |
| Kop | View on Wiki |
| Schollzo | View on Wiki |
| Mozu | View on Wiki |
| Kiwi | View on Wiki |
| Minoruba | View on Wiki |
| Kairiken | View on Wiki |
Samurai:
| Name | Link(s) |
|---|---|
| Shimotsuki Ryuma | View on Wiki |
| Kin’emon | View on Wiki |
| Kouzuki Momonosuke | View on Wiki |
| Inuarashi | View on Wiki |
| Raizo | View on Wiki |
| Hihimaru | View on Wiki |
| Kouzuki Sukiyaki | View on Wiki |
| Kikunojo | View on Wiki |
| Denjiro | View on Wiki |
| Kawamatsu | View on Wiki |
| Hyougoro | View on Wiki |
| Kurosawa | View on Wiki |
| Toyama Tsujigiro | View on Wiki |
| Giro Chintaro | View on Wiki |
| Yatappe | View on Wiki |
| Cho | View on Wiki |
| Ukon | View on Wiki |
| Monjiro | View on Wiki |
| Jujiro | View on Wiki |
| Kakunoshin | View on Wiki |
| Kojuro | View on Wiki |
| Dotaku | View on Wiki |
| Fujin | View on Wiki |
| Kazekage | View on Wiki |
| Gattenshochinosukeo | View on Wiki |
Others:
| Name | Link(s) |
|---|---|
| Shimotsuki Koushirou | View on Wiki |
| Pell | View on Wiki |
| Chaka | View on Wiki |
| Erik | View on Wiki |
| Ohm | View on Wiki |
| Kuzan | View on Wiki |
| Kaku | View on Wiki |
| Peepley Lulu | View on Wiki |
| Spandam | View on Wiki |
| Kerville | View on Wiki |
| Humandrills | View on Wiki |
| Francois | View on Wiki |
| Tsunokkov | View on Wiki |
| Usakkov | View on Wiki |
| Manboshi | View on Wiki |
| Ryuboshi | View on Wiki |
| Caesar Clown | View on Wiki |
| Run | View on Wiki |
| Kyros | View on Wiki |
| Dagama | View on Wiki |
| Rebecca | View on Wiki |
| Riku Doldo III | View on Wiki |
| Hera | View on Wiki |
| Wanda | View on Wiki |
| Shishilian | View on Wiki |
| Concelot | View on Wiki |
| Giovanni | View on Wiki |
| Vinsmoke Niji | View on Wiki |
| S-Hawk | View on Wiki |
| Figarland Garling | View on Wiki |
| Roronoa Pinzoro | View on Wiki |
| Ethanbaron V. Nusjuro | View on Wiki |
Deceased:
| Name | Link(s) |
|---|---|
| Cyrano | View on Wiki |
| D.R. | View on Wiki |
| Gol D. Roger | View on Wiki |
| Higuma | View on Wiki |
| Shimotsuki Kuina | View on Wiki |
| Hyota | View on Wiki |
| Arrow | View on Wiki |
| Mont Blanc Noland | View on Wiki |
| Yorki | View on Wiki |
| Jigoro | View on Wiki |
| Lola | View on Wiki |
| Ryuma | View on Wiki |
| Buhichuck | View on Wiki |
| Hippo Gentleman | View on Wiki |
| Mizuta Madaisuki | View on Wiki |
| Mizuta Mawaritosuki | View on Wiki |
| Porchemy | View on Wiki |
| Fisher Tiger | View on Wiki |
| Jorul | View on Wiki |
| Pedro | View on Wiki |
| Kouzuki Oden | View on Wiki |
| Shimotsuki Ushimaru | View on Wiki |
| Uzuki Tempura | View on Wiki |
| Rocks D. Xebec | View on Wiki |
| Kouzuki Toki | View on Wiki |
| Ashura Doji | View on Wiki |
| Fugetsu Omusubi | View on Wiki |
| Kurozumi Orochi | View on Wiki |
| Roronoa Arashi | View on Wiki |
| T Bone | View on Wiki |
Non-Canon
Pirates:
| Name | Link(s) |
|---|---|
| Sham | View on Wiki |
| Golass | View on Wiki |
| Woonan | View on Wiki |
| Pin Joker | View on Wiki |
| Pesca | View on Wiki |
| Killer Giant | View on Wiki |
| Nisezoro | View on Wiki |
| Kimmel | View on Wiki |
| Banzai | View on Wiki |
| Zabal | View on Wiki |
| Zau Ra Zau | View on Wiki |
| Donai | View on Wiki |
| Helsing | View on Wiki |
| Nuru | View on Wiki |
| Kitajima | View on Wiki |
| Thatch | View on Wiki |
| Girarin | View on Wiki |
| Bill | View on Wiki |
| Psycho P | View on Wiki |
| Long Long | View on Wiki |
| Narcy | View on Wiki |
| Hakuto | View on Wiki |
| Mugon | View on Wiki |
| Charlotte Mondée | View on Wiki |
| Charlotte Basskarte | View on Wiki |
| Charlotte Dosmarche | View on Wiki |
| Charlotte Mobile | View on Wiki |
| Charlotte Nusstorte | View on Wiki |
| Desan and Croquis | View on Wiki |
| Fune | View on Wiki |
| Wolf | View on Wiki |
| Eboshi | View on Wiki |
| Gardar | View on Wiki |
| Black | View on Wiki |
| Terrance | View on Wiki |
| Bens | View on Wiki |
| Bulaniki | View on Wiki |
| Bulototo | View on Wiki |
| Margin | View on Wiki |
| Milena | View on Wiki |
| Biezom | View on Wiki |
| Dejide | View on Wiki |
| Kardia | View on Wiki |
| Gavivel Papelchinoir | View on Wiki |
Marines:
| Name | Link(s) |
|---|---|
| Saga | View on Wiki |
| Toma | View on Wiki |
| Bismarck | View on Wiki |
| Sharinguru | View on Wiki |
| Yukimura | View on Wiki |
| Dojaku | View on Wiki |
| Gal | View on Wiki |
| Shimoi Zappa | View on Wiki |
| Marron | View on Wiki |
| Diomis | View on Wiki |
| Kuroba | View on Wiki |
| Gage | View on Wiki |
| Barricade | View on Wiki |
| Bufflo | View on Wiki |
Others:
| Name | Link(s) |
|---|---|
| Guardian Deity | View on Wiki |
| Guko | View on Wiki |
| Silk | View on Wiki |
| Ann | View on Wiki |
| Heaby | View on Wiki |
| Geronimo | View on Wiki |
| Carragan | View on Wiki |
| Billy | View on Wiki |
| Maasu | View on Wiki |
| Lacos | View on Wiki |
| Mendo | View on Wiki |
| Ain | View on Wiki |
| Binz | View on Wiki |
| Zangirimaru | View on Wiki |
| Hareji | View on Wiki |
| Hanji | View on Wiki |
| Gannot | View on Wiki |
| Mad | View on Wiki |
| Moyas | View on Wiki |
| Idor | View on Wiki |
| Gillian | View on Wiki |
| Piista | View on Wiki |
| Eliza | View on Wiki |
| Musashi | View on Wiki |
| Atori | View on Wiki |
| Hiwa | View on Wiki |
| Fanto | View on Wiki |
| Umeno Nazawa | View on Wiki |
Combatants
Combatants:
| Name | Link(s) |
|---|---|
| Lucky Roux | View on Wiki |
| Roronoa Zoro | Current Page |
| Gin | View on Wiki |
| Take | View on Wiki |
| Mani | View on Wiki |
| Ross | View on Wiki |
| Hamburg | View on Wiki |
| Capote | View on Wiki |
| Pickles | View on Wiki |
| Big Pan | View on Wiki |
| Killer | View on Wiki |
| Hammond | View on Wiki |
| Pekoms | View on Wiki |
| Tamago | View on Wiki |
| Bobbin | View on Wiki |
| Buffalo | View on Wiki |
| Dellinger | View on Wiki |
| Gotti | View on Wiki |
| Capone Bege | View on Wiki |
Abilities
Fighting Style Based:
| Name | Link(s) |
|---|---|
| Haki | View on Wiki |
| Man-Demon Tactics | View on Wiki |
| Fish-Man Karate | View on Wiki |
| Electro | View on Wiki |
Devil Fruit Based:
| Name | Link(s) |
|---|---|
| Kame Kame no Mi | View on Wiki |
| Tama Tama no Mi | View on Wiki |
| SMILE | View on Wiki |
| Guru Guru no Mi | View on Wiki |
| Shiro Shiro no Mi | View on Wiki |
Weapon Based:
| Name | Link(s) |
|---|---|
| Three Sword Style | View on Wiki |
| Two Sword Style | View on Wiki |
| Nine Sword Style | View on Wiki |
| Sandai Kitetsu | View on Wiki |
| Yubashiri | View on Wiki |
| Shusui | View on Wiki |
| Enma | View on Wiki |
| Firearm | View on Wiki |
Shimotsuki Village
Inhabitants:
| Name | Link(s) |
|---|---|
| Shimotsuki Koushirou | View on Wiki |
| Roronoa Zoro | Current Page |
| Shimotsuki Kuina | View on Wiki |
| Shimotsuki Kouzaburou | View on Wiki |
| Shimotsuki Furiko | View on Wiki |
| Roronoa Pinzoro | View on Wiki |
| Roronoa Arashi | View on Wiki |
| Tera | View on Wiki |
| Saga | View on Wiki |
| Himari | View on Wiki |
Locations:
| Name | Link(s) |
|---|---|
| Isshin Dojo | View on Wiki |
Abilities
Weapons:
| Name | Link(s) |
|---|---|
| Wado Ichimonji | View on Wiki |
Fighting Styles:
| Name | Link(s) |
|---|---|
| Three Sword Style | View on Wiki |
| Two Sword Style | View on Wiki |
Related Articles
Story Arcs:
| Name | Link(s) |
|---|---|
| Romance Dawn Arc | View on Wiki |
| Arabasta Arc | View on Wiki |
| Post-Enies Lobby Arc | View on Wiki |
| Post-War Arc | View on Wiki |
| Chapter 0 | View on Wiki |
| Wano Country Arc | View on Wiki |
| Egghead Arc | View on Wiki |
| One Piece novel ZORO | View on Wiki |
Cover Stories:
| Name | Link(s) |
|---|---|
| From the Decks of the World | View on Wiki |
| From the Decks of the World: The 500,000,000 Man Arc | View on Wiki |
Specials:
| Name | Link(s) |
|---|---|
| Episode of East Blue | View on Wiki |
Other:
| Name | Link(s) |
|---|---|
| Wano Country | View on Wiki |
| Sunacchi | View on Wiki |
Shimotsuki Family
Members:
| Name | Link(s) |
|---|---|
| Shimotsuki Koushirou | View on Wiki |
| Toko | View on Wiki |
| Shimotsuki Furiko | View on Wiki |
| Shimotsuki Ryuma | View on Wiki |
| Shimotsuki Kouzaburou | View on Wiki |
| Shimotsuki Kuina | View on Wiki |
| Shimotsuki Ushimaru | View on Wiki |
| Shimotsuki Yasuie | View on Wiki |
Allies:
| Name | Link(s) |
|---|---|
| Kouzuki Family | View on Wiki |
| Onimaru | View on Wiki |
| Shimotsuki Village | View on Wiki |
| Roronoa Zoro | Current Page |
| Ebisu Town Citizens | View on Wiki |
| Ninja-Pirate-Mink-Samurai Alliance | View on Wiki |
Abilities
Devil Fruit Based:
| Name | Link(s) |
|---|---|
| SMILE | View on Wiki |
| Hito Hito no Mi, Model: Onyudo | View on Wiki |
Weapons:
| Name | Link(s) |
|---|---|
| Katana | View on Wiki |
| Shusui | View on Wiki |
| Enma | View on Wiki |
Related Articles
Story Arcs:
| Name | Link(s) |
|---|---|
| Romance Dawn Arc | View on Wiki |
| Post-Enies Lobby Arc | View on Wiki |
| From the Decks of the World | View on Wiki |
| From the Decks of the World: The 500,000,000 Man Arc | View on Wiki |
| Wano Country Arc | View on Wiki |
Locations:
| Name | Link(s) |
|---|---|
| Flower Capital | View on Wiki |
| Hakumai | View on Wiki |
| Ringo | View on Wiki |
| Shimotsuki Village | View on Wiki |
Others:
| Name | Link(s) |
|---|---|
| Swordsman | View on Wiki |
Bounty Hunters
Canon
Current:
| Name | Link(s) |
|---|---|
| Mr. 9 | View on Wiki |
| Miss Monday | View on Wiki |
| Minoruba | View on Wiki |
| Kairiken | View on Wiki |
| Jean Ango | View on Wiki |
Former:
| Name | Link(s) |
|---|---|
| Roronoa Zoro | Current Page |
| Johnny | View on Wiki |
| Yosaku | View on Wiki |
| Miss Wednesday | View on Wiki |
| Mr. 8 | View on Wiki |
| Mr. Beans | View on Wiki |
| Miss Catherina | View on Wiki |
| Mr. Shimizu | View on Wiki |
| Daz Bonez | View on Wiki |
| Franky | View on Wiki |
| Zambai | View on Wiki |
| Mozu | View on Wiki |
| Kiwi | View on Wiki |
| Tamagon | View on Wiki |
| Kiev | View on Wiki |
| Schollzo | View on Wiki |
| Kop | View on Wiki |
| Dago | View on Wiki |
| Ottoland | View on Wiki |
| Footbianco | View on Wiki |
| Abdullah | View on Wiki |
| Jeet | View on Wiki |
Non-Canon
Current:
| Name | Link(s) |
|---|---|
| Daddy Masterson | View on Wiki |
| Shuraiya Bascùd | View on Wiki |
| Accino | View on Wiki |
| Campacino | View on Wiki |
| Brindo | View on Wiki |
| Arbell | View on Wiki |
| Salchow | View on Wiki |
| Hockera | View on Wiki |
| Lil | View on Wiki |
| Gardoa | View on Wiki |
| Cidre | View on Wiki |
| Guarana | View on Wiki |
| Ginger | View on Wiki |
| Hercules | View on Wiki |
| Anikin | View on Wiki |
| Otogin | View on Wiki |
| Sekken De Tearai | View on Wiki |
| Sekken De Tearai Jr. | View on Wiki |
Former:
| Name | Link(s) |
|---|---|
| Scorpion | View on Wiki |
| Mad | View on Wiki |
Abilities
Devil Fruit Based:
| Name | Link(s) |
|---|---|
| Supa Supa no Mi | View on Wiki |
| Atsu Atsu no Mi | View on Wiki |
Fighting Style Based:
| Name | Link(s) |
|---|---|
| Three Sword Style | View on Wiki |
| Combination Play | View on Wiki |
| Tsurupika Mochi Mochi Floral | View on Wiki |
Weapon Based:
| Name | Link(s) |
|---|---|
| Nakiri Swords | View on Wiki |
| Wado Ichimonji | View on Wiki |
| Peacock Slashers | View on Wiki |
| Cyborg Tactics | View on Wiki |
| Carbonation Equipment | View on Wiki |
Related Articles
Organizations:
| Name | Link(s) |
|---|---|
| Millions | View on Wiki |
| Franky Family | View on Wiki |
| Accino Family | View on Wiki |
| Cidre Guild | View on Wiki |
| Otearai Pirates | View on Wiki |
Others:
| Name | Link(s) |
|---|---|
| Bounties | View on Wiki |
| Justice | View on Wiki |
| Scurvy | View on Wiki |
Worst Generation
Members:
| Name | Link(s) |
|---|---|
| Monkey D. Luffy | View on Wiki |
| Roronoa Zoro | Current Page |
| Capone Bege | View on Wiki |
| Jewelry Bonney | View on Wiki |
| Basil Hawkins | View on Wiki |
| Scratchmen Apoo | View on Wiki |
| Eustass Kid | View on Wiki |
| X Drake | View on Wiki |
| Urouge | View on Wiki |
| Killer | View on Wiki |
| Trafalgar D. Water Law | View on Wiki |
| Marshall D. Teach | View on Wiki |
Crews:
| Name | Link(s) |
|---|---|
| Straw Hat Pirates | View on Wiki |
| Fire Tank Pirates | View on Wiki |
| Bonney Pirates | View on Wiki |
| Hawkins Pirates | View on Wiki |
| On Air Pirates | View on Wiki |
| Kid Pirates | View on Wiki |
| Drake Pirates | View on Wiki |
| Fallen Monk Pirates | View on Wiki |
| Heart Pirates | View on Wiki |
| Blackbeard Pirates | View on Wiki |
Ships:
| Name | Link(s) |
|---|---|
| Thousand Sunny | View on Wiki |
| Mini Merry II | View on Wiki |
| Shark Submerge III | View on Wiki |
| Nostra Castello | View on Wiki |
| Jewelry Margherita | View on Wiki |
| Grudge Dolph | View on Wiki |
| Stay Tune | View on Wiki |
| Victoria Punk | View on Wiki |
| Liberal Hind | View on Wiki |
| Hanjomaru | View on Wiki |
| Polar Tang | View on Wiki |
| Saber of Xebec | View on Wiki |
Abilities
Devil Fruit Based:
| Name | Link(s) |
|---|---|
| Gomu Gomu no Mi | View on Wiki |
| Shiro Shiro no Mi | View on Wiki |
| Toshi Toshi no Mi | View on Wiki |
| Wara Wara no Mi | View on Wiki |
| Oto Oto no Mi | View on Wiki |
| Jiki Jiki no Mi | View on Wiki |
| Ryu Ryu no Mi, Model: Allosaurus | View on Wiki |
| SMILE | View on Wiki |
| Ope Ope no Mi | View on Wiki |
| Yami Yami no Mi | View on Wiki |
| Gura Gura no Mi | View on Wiki |
Sword Based:
| Name | Link(s) |
|---|---|
| Wado Ichimonji | View on Wiki |
| Sandai Kitetsu | View on Wiki |
| Shusui | View on Wiki |
| Enma | View on Wiki |
| Warabide Sword | View on Wiki |
| Saber | View on Wiki |
| Kikoku | View on Wiki |
Projectile Weapon Based:
| Name | Link(s) |
|---|---|
| Firearms | View on Wiki |
| KX Launcher | View on Wiki |
Other Weapon Based:
| Name | Link(s) |
|---|---|
| Punishers | View on Wiki |
| Four-Bladed Axe | View on Wiki |
| Seastone Spear | View on Wiki |
Fighting Style Based:
| Name | Link(s) |
|---|---|
| Three Sword Style | View on Wiki |
| Foxfire Style | View on Wiki |
| Haki | View on Wiki |
Related Articles
Related Groups:
| Name | Link(s) |
|---|---|
| Four Emperors | View on Wiki |
| Seven Warlords of the Sea | View on Wiki |
| Ninja-Pirate-Mink-Samurai Alliance | View on Wiki |
| Kid-On Air-Hawkins Alliance | View on Wiki |
| Straw Hat Grand Fleet | View on Wiki |
| Beasts Pirates | View on Wiki |
| Big Mom Pirates | View on Wiki |
| Sanji Retrieval Team-Fire Tank Alliance | View on Wiki |
Story Arcs:
| Name | Link(s) |
|---|---|
| Sea of Survival: Super Rookies Saga | View on Wiki |
| Marineford Arc | View on Wiki |
| Post-War Arc | View on Wiki |
| Return to Sabaody Arc | View on Wiki |
| Fish-Man Island Arc | View on Wiki |
| Punk Hazard Arc | View on Wiki |
| Dressrosa Arc | View on Wiki |
| Zou Arc | View on Wiki |
| Whole Cake Island Arc | View on Wiki |
| Levely Arc | View on Wiki |
| Wano Country Arc | View on Wiki |
| Egghead Arc | View on Wiki |
Cover Stories:
| Name | Link(s) |
|---|---|
| Caribou’s Kehihihihi in the New World | View on Wiki |
| “Gang” Bege’s Oh My Family | View on Wiki |
Movies:
| Name | Link(s) |
|---|---|
| One Piece: Stampede | View on Wiki |
Others:
| Name | Link(s) |
|---|---|
| Pirate | View on Wiki |
| Super Rookie | View on Wiki |
| Bounties | View on Wiki |
| Duel on Banaro Island | View on Wiki |
| Sabaody Archipelago | View on Wiki |
| Celestial Dragon Hit-and-Run Incident | View on Wiki |
| Summit War of Marineford | View on Wiki |
| Will of D. | View on Wiki |
| Rocky Port Incident | View on Wiki |
| Payback War | View on Wiki |
| Wano Country | View on Wiki |
| Egghead Incident | View on Wiki |
Super Rookie
Members:
| Name | Link(s) |
|---|---|
| Worst Generation | View on Wiki |
| Roronoa Zoro | Current Page |
| Capone Bege | View on Wiki |
| Jewelry Bonney | View on Wiki |
| Basil Hawkins | View on Wiki |
| Scratchmen Apoo | View on Wiki |
| Eustass Kid | View on Wiki |
| X Drake | View on Wiki |
| Urouge | View on Wiki |
| Killer | View on Wiki |
| Trafalgar D. Water Law | View on Wiki |
| Portgas D. Ace | View on Wiki |
| Cavendish | View on Wiki |
| Caribou | View on Wiki |
| Coribou | View on Wiki |
| Bartolomeo | View on Wiki |
Crews:
| Name | Link(s) |
|---|---|
| Worst Generation | View on Wiki |
| Fire Tank Pirates | View on Wiki |
| Bonney Pirates | View on Wiki |
| Hawkins Pirates | View on Wiki |
| On Air Pirates | View on Wiki |
| Kid Pirates | View on Wiki |
| Drake Pirates | View on Wiki |
| Fallen Monk Pirates | View on Wiki |
| Heart Pirates | View on Wiki |
| Spade Pirates | View on Wiki |
| Caribou Pirates | View on Wiki |
| Beautiful Pirates | View on Wiki |
| Barto Club | View on Wiki |
Ships:
| Name | Link(s) |
|---|---|
| Thousand Sunny | View on Wiki |
| Mini Merry II | View on Wiki |
| Shark Submerge III | View on Wiki |
| Nostra Castello | View on Wiki |
| Jewelry Margherita | View on Wiki |
| Grudge Dolph | View on Wiki |
| Stay Tune | View on Wiki |
| Victoria Punk | View on Wiki |
| Liberal Hind | View on Wiki |
| Hanjomaru | View on Wiki |
| Polar Tang | View on Wiki |
| Piece of Spadille | View on Wiki |
| Numabou | View on Wiki |
| Sleeping White Horse of the Forest | View on Wiki |
| Going Luffy-senpai | View on Wiki |
Abilities
Devil Fruit Based:
| Name | Link(s) |
|---|---|
| Gomu Gomu no Mi | View on Wiki |
| Shiro Shiro no Mi | View on Wiki |
| Toshi Toshi no Mi | View on Wiki |
| Wara Wara no Mi | View on Wiki |
| Oto Oto no Mi | View on Wiki |
| Jiki Jiki no Mi | View on Wiki |
| Ryu Ryu no Mi, Model: Allosaurus | View on Wiki |
| SMILE | View on Wiki |
| Ope Ope no Mi | View on Wiki |
| Mera Mera no Mi | View on Wiki |
| Numa Numa no Mi | View on Wiki |
| Bari Bari no Mi | View on Wiki |
Sword Based:
| Name | Link(s) |
|---|---|
| Wado Ichimonji | View on Wiki |
| Sandai Kitetsu | View on Wiki |
| Yubashiri | View on Wiki |
| Shusui | View on Wiki |
| Enma | View on Wiki |
| Warabide Sword | View on Wiki |
| Saber | View on Wiki |
| Kikoku | View on Wiki |
| Durandal | View on Wiki |
Projectile Weapon Based:
| Name | Link(s) |
|---|---|
| Firearms | View on Wiki |
| KX Launcher | View on Wiki |
Other Weapon Based:
| Name | Link(s) |
|---|---|
| Punishers | View on Wiki |
| Four-Bladed Axe | View on Wiki |
| Seastone Spear | View on Wiki |
Fighting Style Based:
| Name | Link(s) |
|---|---|
| Three Sword Style | View on Wiki |
| Foxfire Style | View on Wiki |
| Haki | View on Wiki |
Related Articles
Related Groups:
| Name | Link(s) |
|---|---|
| Four Emperors | View on Wiki |
| Seven Warlords of the Sea | View on Wiki |
| Whitebeard Pirates | View on Wiki |
| Ninja-Pirate-Mink-Samurai Alliance | View on Wiki |
| Kid-On Air-Hawkins Alliance | View on Wiki |
| Straw Hat Grand Fleet | View on Wiki |
| Beasts Pirates | View on Wiki |
| Big Mom Pirates | View on Wiki |
| Sanji Retrieval Team-Fire Tank Alliance | View on Wiki |
Story Arcs:
| Name | Link(s) |
|---|---|
| Sea of Survival: Super Rookies Saga | View on Wiki |
| Marineford Arc | View on Wiki |
| Post-War Arc | View on Wiki |
| Return to Sabaody Arc | View on Wiki |
| Fish-Man Island Arc | View on Wiki |
| Punk Hazard Arc | View on Wiki |
| Caesar Retrieval Arc | View on Wiki |
| Dressrosa Arc | View on Wiki |
| Silver Mine Arc | View on Wiki |
| Zou Arc | View on Wiki |
| Whole Cake Island Arc | View on Wiki |
| Wano Country Arc | View on Wiki |
| Egghead Arc | View on Wiki |
Cover Stories:
| Name | Link(s) |
|---|---|
| Caribou’s Kehihihihi in the New World | View on Wiki |
| The Stories of the Self-Proclaimed Straw Hat Grand Fleet | View on Wiki |
| “Gang” Bege’s Oh My Family | View on Wiki |
Movies:
| Name | Link(s) |
|---|---|
| One Piece: Stampede | View on Wiki |
Others:
| Name | Link(s) |
|---|---|
| Pirate | View on Wiki |
| Bounties | View on Wiki |
| Duel on Banaro Island | View on Wiki |
| Sabaody Archipelago | View on Wiki |
| Celestial Dragon Hit-and-Run Incident | View on Wiki |
| Summit War of Marineford | View on Wiki |
| Will of D. | View on Wiki |
| Rocky Port Incident | View on Wiki |
| Wano Country | View on Wiki |
| Egghead Incident | View on Wiki |
Haki Users
Observation Haki
Canon:
Non-Canon:
| Name | Link(s) |
|---|---|
| Patrick Redfield | View on Wiki |
| Portgas D. Ace | View on Wiki |
Armament Haki
Canon:
Non-Canon:
| Name | Link(s) |
|---|---|
| Shuzo | View on Wiki |
| Alpacacino | View on Wiki |
| Z | View on Wiki |
| Komei | View on Wiki |
| Kung-Fu Dugong | View on Wiki |
| Byrnndi World | View on Wiki |
| Dice | View on Wiki |
| Prodi | View on Wiki |
| Charlotte Cabaletta | View on Wiki |
| Douglas Bullet | View on Wiki |
| Batman | View on Wiki |
| Speed | View on Wiki |
| Alpacaman | View on Wiki |
| Fujin | View on Wiki |
| Fugetsu Omusubi | View on Wiki |
| Uzuki Tempura | View on Wiki |
Supreme King Haki
Canon:
| Name | Link(s) |
|---|---|
| Shanks | View on Wiki |
| Monkey D. Luffy | View on Wiki |
| Silvers Rayleigh | View on Wiki |
| Boa Hancock | View on Wiki |
| Edward Newgate | View on Wiki |
| Portgas D. Ace | View on Wiki |
| Donquixote Doflamingo | View on Wiki |
| Chinjao | View on Wiki |
| Charlotte Linlin | View on Wiki |
| Charlotte Katakuri | View on Wiki |
| Kouzuki Oden | View on Wiki |
| Eustass Kid | View on Wiki |
| Sengoku | View on Wiki |
| Kaidou | View on Wiki |
| Gol D. Roger | View on Wiki |
| Roronoa Zoro | Current Page |
| Yamato | View on Wiki |
| Monkey D. Garp | View on Wiki |
| Topman Warcury | View on Wiki |
| Marcus Mars | View on Wiki |
| Scopper Gaban | View on Wiki |
| Jaygarcia Saturn | View on Wiki |
| Joy Boy | View on Wiki |
Non-Canon:
| Name | Link(s) |
|---|---|
| Naguri | View on Wiki |
| Douglas Bullet | View on Wiki |
Related
Groups:
| Name | Link(s) |
|---|---|
| Vice Admirals | View on Wiki |
| Admirals | View on Wiki |
| Fleet Admirals | View on Wiki |
| Kuja | View on Wiki |
| Five Elders | View on Wiki |
| God’s Knights | View on Wiki |
Locations:
| Name | Link(s) |
|---|---|
| Skypiea | View on Wiki |
| Wano Country | View on Wiki |
Officers
Canon
Straw Hat Grand Fleet:
| Name | Link(s) |
|---|---|
| Roronoa Zoro | Current Page |
| Nami | View on Wiki |
| Usopp | View on Wiki |
| Sanji | View on Wiki |
| Tony Tony Chopper | View on Wiki |
| Nico Robin | View on Wiki |
| Franky | View on Wiki |
| Brook | View on Wiki |
| Jinbe | View on Wiki |
| Cavendish | View on Wiki |
| Bartolomeo | View on Wiki |
| Sai | View on Wiki |
| Ideo | View on Wiki |
| Leo | View on Wiki |
| Hajrudin | View on Wiki |
| Orlumbus | View on Wiki |
Red Hair Pirates:
| Name | Link(s) |
|---|---|
| Benn Beckman | View on Wiki |
| Lucky Roux | View on Wiki |
| Yasopp | View on Wiki |
| Limejuice | View on Wiki |
| Bonk Punch | View on Wiki |
| Monster | View on Wiki |
| Building Snake | View on Wiki |
| Hongo | View on Wiki |
| Gab | View on Wiki |
Cross Guild:
| Name | Link(s) |
|---|---|
| Crocodile | View on Wiki |
| Dracule Mihawk | View on Wiki |
Buggy Pirates/Buggy’s Delivery (Former)‡:
| Name | Link(s) |
|---|---|
| Alvida | View on Wiki |
| Galdino | View on Wiki |
| Mohji | View on Wiki |
| Cabaji | View on Wiki |
| Richie | View on Wiki |
Black Cat Pirates:
| Name | Link(s) |
|---|---|
| Sham | View on Wiki |
| Buchi | View on Wiki |
Krieg Pirates:
| Name | Link(s) |
|---|---|
| Gin | View on Wiki |
| Pearl | View on Wiki |
| Ideaman | View on Wiki |
Arlong Pirates (Former)‡:
| Name | Link(s) |
|---|---|
| Chew | View on Wiki |
| Kuroobi | View on Wiki |
| Hatchan | View on Wiki |
| Nami | View on Wiki |
Baroque Works (Former)‡:
| Name | Link(s) |
|---|---|
| Mr. 1 | View on Wiki |
| Miss Doublefinger | View on Wiki |
| Mr. 2 Bon Kurei | View on Wiki |
| Mr. 3 | View on Wiki |
| Miss Goldenweek | View on Wiki |
| Mr. 4 | View on Wiki |
| Miss Merry Christmas | View on Wiki |
| Mr. 5 | View on Wiki |
| Miss Valentine | View on Wiki |
| Mr. 6 | View on Wiki |
| Miss Mother’s Day | View on Wiki |
| Mr. 7 | View on Wiki |
| Miss Father’s Day | View on Wiki |
| Mr. 8 | View on Wiki |
| Miss Monday | View on Wiki |
| Mr. 9 | View on Wiki |
| Miss Wednesday | View on Wiki |
| Mr. 10 | View on Wiki |
| Miss Tuesday | View on Wiki |
| Mr. 11 | View on Wiki |
| Miss Thursday | View on Wiki |
| Mr. 12 | View on Wiki |
| Miss Saturday | View on Wiki |
| Previous Mr. 7 | View on Wiki |
Bliking Pirates:
| Name | Link(s) |
|---|---|
| Chess | View on Wiki |
| Kuromarimo | View on Wiki |
Whitebeard Pirates (Former: Disbanded)‡:
| Name | Link(s) |
|---|---|
| Marco | View on Wiki |
| Kouzuki Oden | View on Wiki |
| Portgas D. Ace | View on Wiki |
| Jozu | View on Wiki |
| Thatch | View on Wiki |
| Vista | View on Wiki |
| Blamenco | View on Wiki |
| Rakuyo | View on Wiki |
| Namur | View on Wiki |
| Blenheim | View on Wiki |
| Curiel | View on Wiki |
| Kingdew | View on Wiki |
| Haruta | View on Wiki |
| Atmos | View on Wiki |
| Speed Jiru | View on Wiki |
| Fossa | View on Wiki |
| Izou | View on Wiki |
God’s Army:
| Name | Link(s) |
|---|---|
| Ohm | View on Wiki |
| Satori | View on Wiki |
| Shura | View on Wiki |
| Gedatsu | View on Wiki |
Thriller Bark Pirates:
| Name | Link(s) |
|---|---|
| Hogback | View on Wiki |
| Absalom | View on Wiki |
| Perona | View on Wiki |
Kuja Pirates:
| Name | Link(s) |
|---|---|
| Boa Sandersonia | View on Wiki |
| Boa Marigold | View on Wiki |
Golden Lion Pirates:
| Name | Link(s) |
|---|---|
| Indigo | View on Wiki |
| Scarlet | View on Wiki |
Spade Pirates (Former: Disbanded)‡:
| Name | Link(s) |
|---|---|
| Masked Deuce | View on Wiki |
| Skull | View on Wiki |
| Mihar | View on Wiki |
Revolutionary Army:
| Name | Link(s) |
|---|---|
| Sabo | View on Wiki |
| Emporio Ivankov | View on Wiki |
| Karasu | View on Wiki |
| Belo Betty | View on Wiki |
| Morley | View on Wiki |
| Lindbergh | View on Wiki |
| Inazuma | View on Wiki |
| Jiron | View on Wiki |
| Ahiru | View on Wiki |
| Ushiano | View on Wiki |
| Gambo | View on Wiki |
| Koala | View on Wiki |
| Bartholomew Kuma | View on Wiki |
| Terry Gilteo | View on Wiki |
New Fish-Man Pirates:
| Name | Link(s) |
|---|---|
| Dosun | View on Wiki |
| Zeo | View on Wiki |
| Daruma | View on Wiki |
| Ikaros Much | View on Wiki |
| Hyouzou | View on Wiki |
Donquixote Pirates (Former: Arrested)‡:
| Name | Link(s) |
|---|---|
| Trebol | View on Wiki |
| Diamante | View on Wiki |
| Pica | View on Wiki |
| Vergo | View on Wiki |
| Donquixote Rosinante | View on Wiki |
| Sugar | View on Wiki |
| Giolla | View on Wiki |
| Violet | View on Wiki |
| Lao G | View on Wiki |
| Senor Pink | View on Wiki |
| Machvise | View on Wiki |
| Dellinger | View on Wiki |
| Gladius | View on Wiki |
| Buffalo | View on Wiki |
| Baby 5 | View on Wiki |
| Monet | View on Wiki |
Blackbeard Pirates:
| Name | Link(s) |
|---|---|
| Jesus Burgess | View on Wiki |
| Shiryu | View on Wiki |
| Van Augur | View on Wiki |
| Avalo Pizarro | View on Wiki |
| Laffitte | View on Wiki |
| Catarina Devon | View on Wiki |
| Sanjuan Wolf | View on Wiki |
| Vasco Shot | View on Wiki |
| Doc Q | View on Wiki |
| Kuzan | View on Wiki |
Big Mom Pirates:
| Name | Link(s) |
|---|---|
| Charlotte Katakuri | View on Wiki |
| Charlotte Smoothie | View on Wiki |
| Charlotte Cracker | View on Wiki |
| Charlotte Perospero | View on Wiki |
| Charlotte Compote | View on Wiki |
| Charlotte Daifuku | View on Wiki |
| Charlotte Oven | View on Wiki |
| Charlotte Mondée | View on Wiki |
| Charlotte Amande | View on Wiki |
| Charlotte Hachée | View on Wiki |
| Charlotte Effilée | View on Wiki |
| Charlotte Opera | View on Wiki |
| Charlotte Counter | View on Wiki |
| Charlotte Cadenza | View on Wiki |
| Charlotte Cabaletta | View on Wiki |
| Charlotte Custard | View on Wiki |
| Charlotte Angel | View on Wiki |
| Charlotte Zuccotto | View on Wiki |
| Charlotte Brûlée | View on Wiki |
| Charlotte Broyé | View on Wiki |
| Charlotte Nusstorte | View on Wiki |
| Charlotte Basskarte | View on Wiki |
| Charlotte Dosmarche | View on Wiki |
| Charlotte Noisette | View on Wiki |
| Charlotte Moscato | View on Wiki |
| Charlotte Mash | View on Wiki |
| Charlotte Cornstarch | View on Wiki |
| Charlotte Compo | View on Wiki |
| Charlotte Laurin | View on Wiki |
| Charlotte Mont-d’Or | View on Wiki |
| Charlotte Mozart | View on Wiki |
| Charlotte Marnier | View on Wiki |
| Charlotte High-Fat | View on Wiki |
| Charlotte Tablet | View on Wiki |
| Charlotte Citron | View on Wiki |
| Charlotte Cinnamon | View on Wiki |
| Charlotte Saint-Marc | View on Wiki |
| Charlotte Basans | View on Wiki |
| Charlotte Melise | View on Wiki |
| Charlotte Dacquoise | View on Wiki |
| Charlotte Galette | View on Wiki |
| Charlotte Poire | View on Wiki |
| Charlotte Snack | View on Wiki |
| Charlotte Bavarois | View on Wiki |
| Charlotte Prim | View on Wiki |
| Charlotte Kanten | View on Wiki |
| Charlotte Kato | View on Wiki |
| Charlotte Montb | View on Wiki |
| Charlotte Chiboust | View on Wiki |
| Charlotte Mobile | View on Wiki |
| Charlotte Marble | View on Wiki |
| Charlotte Myukuru | View on Wiki |
| Charlotte Maple | View on Wiki |
| Charlotte Brownie | View on Wiki |
| Charlotte Joconde | View on Wiki |
| Charlotte Raisin | View on Wiki |
| Charlotte Panna | View on Wiki |
| Charlotte Mascarpone | View on Wiki |
| Charlotte Joscarpone | View on Wiki |
| Charlotte Yuen | View on Wiki |
| Charlotte Decuplets | View on Wiki |
| Charlotte Nutmeg | View on Wiki |
| Charlotte Akimeg | View on Wiki |
| Charlotte Allmeg | View on Wiki |
| Charlotte Harumeg | View on Wiki |
| Charlotte Fuyumeg | View on Wiki |
| Charlotte Nougat | View on Wiki |
| Charlotte Pudding | View on Wiki |
| Charlotte Flampe | View on Wiki |
Beasts Pirates:
| Name | Link(s) |
|---|---|
| King | View on Wiki |
| Queen | View on Wiki |
| Jack | View on Wiki |
| X Drake | View on Wiki |
| Page One | View on Wiki |
| Ulti | View on Wiki |
| Who’s-Who | View on Wiki |
| Black Maria | View on Wiki |
| Sasaki | View on Wiki |
| Sheepshead | View on Wiki |
| Ginrummy | View on Wiki |
| Basil Hawkins | View on Wiki |
| Holed’em | View on Wiki |
| Speed | View on Wiki |
| Dobon | View on Wiki |
| Daifugo | View on Wiki |
| Babanuki | View on Wiki |
| Solitaire | View on Wiki |
| Bao Huang | View on Wiki |
| Usunoro | View on Wiki |
| Nokokuwa Police | View on Wiki |
| Doubt Brothers | View on Wiki |
| Briscola | View on Wiki |
| Bisley | View on Wiki |
| Fourtricks | View on Wiki |
| Hamlet | View on Wiki |
| Mizerka | View on Wiki |
| Poker | View on Wiki |
Non-Canon
Drayke Pirates:
| Name | Link(s) |
|---|---|
| Pesca | View on Wiki |
| Kaabo | View on Wiki |
| Garride | View on Wiki |
| Harry | View on Wiki |
| Dolce | View on Wiki |
| Reira | View on Wiki |
Flower Angel:
| Name | Link(s) |
|---|---|
| Mirage | View on Wiki |
| Choshi | View on Wiki |
| Maasu | View on Wiki |
| Tokkuri | View on Wiki |
Simon Pirates:
| Name | Link(s) |
|---|---|
| Din | View on Wiki |
| Zabal | View on Wiki |
| Gad | View on Wiki |
| Niphtal | View on Wiki |
Gasparde Pirates:
| Name | Link(s) |
|---|---|
| Needless | View on Wiki |
Neo Marines:
| Name | Link(s) |
|---|---|
| Ain | View on Wiki |
| Binz | View on Wiki |
| Shuzo | View on Wiki |
Silver Pirate Alliance (Former: Dissolved)‡:
| Name | Link(s) |
|---|---|
| Peseta | View on Wiki |
| Aveyron | View on Wiki |
| Desire | View on Wiki |
Gran Tesoro:
| Name | Link(s) |
|---|---|
| Baccarat | View on Wiki |
| Dice | View on Wiki |
| Tanaka | View on Wiki |
Cidre Guild:
| Name | Link(s) |
|---|---|
| Ginger | View on Wiki |
| Guarana | View on Wiki |
Crimson Soldiers:
| Name | Link(s) |
|---|---|
| Homming | View on Wiki |
| Fanto | View on Wiki |
East Blue Inhabitants
East Blue Residents
Dawn Island:
| Name | Link(s) |
|---|---|
| Foosha Village | View on Wiki |
| Monkey D. Luffy | View on Wiki |
| Makino | View on Wiki |
| Woop Slap | View on Wiki |
| Gyoru | View on Wiki |
| Chicken | View on Wiki |
| Minatomo | View on Wiki |
| Goa Kingdom | View on Wiki |
| Sabo | View on Wiki |
| Outlook III | View on Wiki |
| Didit | View on Wiki |
| Sterry | View on Wiki |
| Ahho Desunen IX | View on Wiki |
| Ahho Zurako | View on Wiki |
| Sarie Nantokanette | View on Wiki |
| Mt. Colubo | View on Wiki |
| Curly Dadan | View on Wiki |
| Dogra | View on Wiki |
| Magra | View on Wiki |
| Portgas D. Ace | View on Wiki |
| Pochi | View on Wiki |
| Higuma | View on Wiki |
| Monkey D. Garp | View on Wiki |
| Monkey D. Dragon | View on Wiki |
| Lord of the Coast | View on Wiki |
| Naguri | View on Wiki |
| Gillian | View on Wiki |
Shimotsuki Village:
| Name | Link(s) |
|---|---|
| Roronoa Zoro | Current Page |
| Shimotsuki Koushirou | View on Wiki |
| Shimotsuki Furiko | View on Wiki |
| Roronoa Pinzoro | View on Wiki |
| Shimotsuki Kuina | View on Wiki |
| Shimotsuki Kouzaburou | View on Wiki |
| Roronoa Arashi | View on Wiki |
| Tera | View on Wiki |
| Saga | View on Wiki |
| Himari | View on Wiki |
Shells Town:
| Name | Link(s) |
|---|---|
| Morgan | View on Wiki |
| Helmeppo | View on Wiki |
| Ukkari | View on Wiki |
| Rokkaku | View on Wiki |
| Ripper | View on Wiki |
| Soro | View on Wiki |
| Rika | View on Wiki |
| Ririka | View on Wiki |
| Koby | View on Wiki |
| Marine X | View on Wiki |
| Sada | View on Wiki |
Orange Town:
| Name | Link(s) |
|---|---|
| Boodle | View on Wiki |
| Chouchou | View on Wiki |
| Poro | View on Wiki |
| Hocker | View on Wiki |
Island of Rare Animals:
| Name | Link(s) |
|---|---|
| Gaimon | View on Wiki |
| Sarfunkel | View on Wiki |
| Cocox | View on Wiki |
| Usagihebi | View on Wiki |
| Lionbuta | View on Wiki |
| Kirinkodanuki | View on Wiki |
| Kabagorilla | View on Wiki |
| Kamonohitsuji | View on Wiki |
| Saikangaroo | View on Wiki |
Syrup Village:
| Name | Link(s) |
|---|---|
| Usopp Pirates | View on Wiki |
| Usopp | View on Wiki |
| Ninjin | View on Wiki |
| Piiman | View on Wiki |
| Tamanegi | View on Wiki |
| Kaya | View on Wiki |
| Klahadore | View on Wiki |
| Merry | View on Wiki |
| Mornin | View on Wiki |
| Yasopp | View on Wiki |
| Banchina | View on Wiki |
| Mansion’s Guards | View on Wiki |
| Luigia | View on Wiki |
Baratie:
| Name | Link(s) |
|---|---|
| Zeff | View on Wiki |
| Sanji | View on Wiki |
| Patty | View on Wiki |
| Carne | View on Wiki |
Conomi Islands:
| Name | Link(s) |
|---|---|
| Nami | View on Wiki |
| Nojiko | View on Wiki |
| Genzo | View on Wiki |
| Nako | View on Wiki |
| Bell-mère | View on Wiki |
| Johnny | View on Wiki |
| Yosaku | View on Wiki |
| Mummy Mee | View on Wiki |
| Daddy Dee | View on Wiki |
| Chabo | View on Wiki |
| Teru | View on Wiki |
Loguetown:
| Name | Link(s) |
|---|---|
| Gol D. Roger | View on Wiki |
| Smoker | View on Wiki |
| Tashigi | View on Wiki |
| Yu | View on Wiki |
| Sapi | View on Wiki |
| Hanger | View on Wiki |
| Ipponmatsu | View on Wiki |
| Ipponume | View on Wiki |
| Anjo | View on Wiki |
| Mashikaku | View on Wiki |
| Ed | View on Wiki |
| Raoul | View on Wiki |
| Daddy Masterson | View on Wiki |
| Carol | View on Wiki |
| Riley Brothers | View on Wiki |
| Pete | View on Wiki |
| Carmen | View on Wiki |
| Leo | View on Wiki |
| Jose | View on Wiki |
| Shutai | View on Wiki |
| Eccoli | View on Wiki |
| Dias | View on Wiki |
Nagagutsu Kingdom:
| Name | Link(s) |
|---|---|
| Furrari | View on Wiki |
| Tritobu | View on Wiki |
| Nyornyo Nyarmani | View on Wiki |
Other Marines:
| Name | Link(s) |
|---|---|
| Fullbody | View on Wiki |
| Pudding Pudding | View on Wiki |
| Nezumi | View on Wiki |
| Jango | View on Wiki |
| Lines | View on Wiki |
| Nelson Royal | View on Wiki |
| Hardy | View on Wiki |
Other Pirates:
Other Residents:
| Name | Link(s) |
|---|---|
| Pinky | View on Wiki |
| Kumate Tribe | View on Wiki |
| Moodie | View on Wiki |
| Motzel | View on Wiki |
| Roxanne | View on Wiki |
| Miss Catherina | View on Wiki |
| Kaku | View on Wiki |
| Ban Dedessinée | View on Wiki |
| Belo Betty | View on Wiki |
| Ahiru | View on Wiki |
| Ganzo | View on Wiki |
| Tobio | View on Wiki |
| Eric | View on Wiki |
| Billy | View on Wiki |
| Dick | View on Wiki |
| Harry | View on Wiki |
| Soran | View on Wiki |
| Fabre | View on Wiki |
| Mitsuboshi | View on Wiki |
| Mendo | View on Wiki |
| Ruibe | View on Wiki |
| Wier | View on Wiki |
| Meshi | View on Wiki |
| Usodabird | View on Wiki |
| Fischer’s Pirates | View on Wiki |
Non-Canon:
| Name | Link(s) |
|---|---|
| Ocean’s Navel | View on Wiki |
| Hamu | View on Wiki |
| Meroie | View on Wiki |
| Joke | View on Wiki |
| Warship Island | View on Wiki |
| Apis | View on Wiki |
| Bokuden | View on Wiki |
| Ryu | View on Wiki |
| Devil’s Tower | View on Wiki |
| Medaka | View on Wiki |
| Skid | View on Wiki |
| Clockwork Island | View on Wiki |
| Akisu | View on Wiki |
| Borodo | View on Wiki |
| Monday | View on Wiki |
| Nazawaka City | View on Wiki |
| Nazawa Family | View on Wiki |
| Matsuba Nazawa | View on Wiki |
| Taketo Nazawa | View on Wiki |
| Umeno Nazawa | View on Wiki |
| Tsubaki | View on Wiki |
Abilities
Devil Fruit Based:
| Name | Link(s) |
|---|---|
| Gomu Gomu no Mi | View on Wiki |
| Bara Bara no Mi | View on Wiki |
| Sube Sube no Mi | View on Wiki |
| Moku Moku no Mi | View on Wiki |
| Mane Mane no Mi | View on Wiki |
| Mera Mera no Mi | View on Wiki |
| Bari Bari no Mi | View on Wiki |
| Kobu Kobu no Mi | View on Wiki |
| Wapu Wapu no Mi | View on Wiki |
| Hiso Hiso no Mi | View on Wiki |
| Kama Kama no Mi | View on Wiki |
| Kachi Kachi no Mi | View on Wiki |
| Toro Toro no Mi | View on Wiki |
| Peke Peke no Mi | View on Wiki |
| Gemu Gemu no Mi | View on Wiki |
| Uta Uta no Mi | View on Wiki |
Fighting Styles Based:
| Name | Link(s) |
|---|---|
| Black Leg Style | View on Wiki |
| Man-Demon Tactics | View on Wiki |
| Fish-Man Karate | View on Wiki |
| Okama Kenpo | View on Wiki |
| Haki | View on Wiki |
Weapon Based:
| Name | Link(s) |
|---|---|
| Three Sword Style | View on Wiki |
| Wado Ichimonji | View on Wiki |
| Sandai Kitetsu | View on Wiki |
| Yubashiri | View on Wiki |
| Buggy Balls | View on Wiki |
| Usopp Tactics | View on Wiki |
| Ginga Pachinko | View on Wiki |
| Cat Claws | View on Wiki |
| Kiribachi | View on Wiki |
| Six Sword Style | View on Wiki |
| Shigure | View on Wiki |
| Yamaoroshi | View on Wiki |
| Nanashaku Jitte | View on Wiki |
| Senriku | View on Wiki |
| Ace | View on Wiki |
| King Cannon | View on Wiki |
Related Articles
Story Arcs:
| Name | Link(s) |
|---|---|
| East Blue Saga | View on Wiki |
| Reverse Mountain Arc | View on Wiki |
| Post-Alabasta Arc | View on Wiki |
| Post-Enies Lobby Arc | View on Wiki |
| Little East Blue Arc | View on Wiki |
| Chapter 0 | View on Wiki |
| Post-War Arc | View on Wiki |
Cover Stories:
| Name | Link(s) |
|---|---|
| Buggy’s Crew: After the Battle! | View on Wiki |
| Diary of Koby-Meppo | View on Wiki |
| Jango’s Dance Paradise | View on Wiki |
| From the Decks of the World | View on Wiki |
| From the Decks of the World: The 500,000,000 Man Arc | View on Wiki |
Movies, Specials, and OVA:
| Name | Link(s) |
|---|---|
| One Piece – Defeat Him! The Pirate Ganzack | View on Wiki |
| One Piece: The Movie | View on Wiki |
| Episode Special 1 | View on Wiki |
| Clockwork Island Adventure | View on Wiki |
| Episode of Nami | View on Wiki |
| Episode of East Blue | View on Wiki |
Individuals with Bounties
Active
5,000,000,000to 1,000,000,000:
| Name | Link(s) |
|---|---|
| Kaidou | View on Wiki |
| Charlotte Linlin | View on Wiki |
| Shanks | View on Wiki |
| Marshall D. Teach | View on Wiki |
| Dracule Mihawk | View on Wiki |
| Buggy | View on Wiki |
| Monkey D. Luffy | View on Wiki |
| Eustass Kid | View on Wiki |
| Trafalgar D. Water Law | View on Wiki |
| Loki | View on Wiki |
| Crocodile | View on Wiki |
| Dorry | View on Wiki |
| Brogy | View on Wiki |
| Boa Hancock | View on Wiki |
| King | View on Wiki |
| Marco | View on Wiki |
| Queen | View on Wiki |
| Roronoa Zoro | Current Page |
| Jinbe | View on Wiki |
| Charlotte Katakuri | View on Wiki |
| Sanji | View on Wiki |
1,000,000,000to 500,000,000:
| Name | Link(s) |
|---|---|
| Jack | View on Wiki |
| Charlotte Smoothie | View on Wiki |
| Nico Robin | View on Wiki |
| Charlotte Cracker | View on Wiki |
| Charlotte Perospero | View on Wiki |
| Sabo | View on Wiki |
| Charlotte Snack | View on Wiki |
| Little Oars Jr. | View on Wiki |
| Who’s-Who | View on Wiki |
| Chinjao | View on Wiki |
500,000,000to 100,000,000:
| Name | Link(s) |
|---|---|
| Usopp | View on Wiki |
| Edward Weevil | View on Wiki |
| Black Maria | View on Wiki |
| Sasaki | View on Wiki |
| Belo Betty | View on Wiki |
| Tamago | View on Wiki |
| Karasu | View on Wiki |
| Ulti | View on Wiki |
| Franky | View on Wiki |
| Brook | View on Wiki |
| Nami | View on Wiki |
| Capone Bege | View on Wiki |
| Scratchmen Apoo | View on Wiki |
| Pekoms | View on Wiki |
| Cavendish | View on Wiki |
| Gecko Moria | View on Wiki |
| Basil Hawkins | View on Wiki |
| Jewelry Bonney | View on Wiki |
| Lindbergh | View on Wiki |
| Charlotte Daifuku | View on Wiki |
| Charlotte Oven | View on Wiki |
| Caesar Clown | View on Wiki |
| Bartholomew Kuma | View on Wiki |
| Morley | View on Wiki |
| Page One | View on Wiki |
| X Drake | View on Wiki |
| Sai | View on Wiki |
| Squard | View on Wiki |
| Caribou | View on Wiki |
| Killer | View on Wiki |
| Bartolomeo | View on Wiki |
| Bellamy | View on Wiki |
| Coribou | View on Wiki |
| Orlumbus | View on Wiki |
| Charlotte Mont-d’Or | View on Wiki |
| Urouge | View on Wiki |
| Bobbin | View on Wiki |
100,000,000to 50,000,000:
| Name | Link(s) |
|---|---|
| Emporio Ivankov | View on Wiki |
| Inazuma | View on Wiki |
| Kinoko | View on Wiki |
| Vito | View on Wiki |
| Rockstar | View on Wiki |
| Albion | View on Wiki |
| Gotti | View on Wiki |
| Raccoon | View on Wiki |
| Mr. 1 | View on Wiki |
| Gyro | View on Wiki |
| Doc Q | View on Wiki |
| Gambia | View on Wiki |
| Suleiman | View on Wiki |
| Van Augur | View on Wiki |
| Kelly Funk | View on Wiki |
| Peachbeard | View on Wiki |
50,000,000to 10,000,000:
| Name | Link(s) |
|---|---|
| Laffitte | View on Wiki |
| Roshio | View on Wiki |
| Boa Sandersonia | View on Wiki |
| Boa Marigold | View on Wiki |
| Yeti Cool Brothers | View on Wiki |
| Sarquiss | View on Wiki |
| Mikazuki | View on Wiki |
| Bobby Funk | View on Wiki |
| Shoujou | View on Wiki |
| Miss Doublefinger | View on Wiki |
| Miss Goldenweek | View on Wiki |
| Mont Blanc Cricket | View on Wiki |
| Charlotte Lola | View on Wiki |
| Mr. 3 | View on Wiki |
| Foxy | View on Wiki |
| Masira | View on Wiki |
| Jesus Burgess | View on Wiki |
| Lacuba | View on Wiki |
| Krieg | View on Wiki |
| Kuro | View on Wiki |
| Bluejam | View on Wiki |
| Miss Merry Christmas | View on Wiki |
| Gin | View on Wiki |
10,000,000and under:
| Name | Link(s) |
|---|---|
| Wellington | View on Wiki |
| Mr. 5 | View on Wiki |
| Hatchan | View on Wiki |
| Curly Dadan | View on Wiki |
| Miss Valentine | View on Wiki |
| Sham | View on Wiki |
| Alvida | View on Wiki |
| Mr. 4 | View on Wiki |
| Tony Tony Chopper | View on Wiki |
| Bepo | View on Wiki |
Unknownreward:
| Name | Link(s) |
|---|---|
| Crocus | View on Wiki |
| Benn Beckman | View on Wiki |
| Aladine | View on Wiki |
| Lucky Roux | View on Wiki |
| Koala | View on Wiki |
| Yorki | View on Wiki |
| Yasopp | View on Wiki |
| Sanjuan Wolf | View on Wiki |
| Avalo Pizarro | View on Wiki |
| Catarina Devon | View on Wiki |
| Silvers Rayleigh | View on Wiki |
| Jozu | View on Wiki |
| Monkey D. Dragon | View on Wiki |
| Vista | View on Wiki |
| Vasco Shot | View on Wiki |
| Shiki | View on Wiki |
| Shiryu | View on Wiki |
| Zeff | View on Wiki |
| Charlotte Amande | View on Wiki |
| Chesskippa | View on Wiki |
Former
Over 5,000,000,000:
| Name | Link(s) |
|---|---|
| Gol D. Roger | View on Wiki |
| Edward Newgate | View on Wiki |
1,000,000,000to 100,000,000:
| Name | Link(s) |
|---|---|
| Portgas D. Ace | View on Wiki |
| Izou | View on Wiki |
| Pedro | View on Wiki |
| Donquixote Doflamingo | View on Wiki |
| Fisher Tiger | View on Wiki |
| Ginny | View on Wiki |
Under100,000,000:
| Name | Link(s) |
|---|---|
| Billy | View on Wiki |
| Trebol | View on Wiki |
| Diamante | View on Wiki |
| Pica | View on Wiki |
| Lip Doughty | View on Wiki |
| Chadros Higelyges | View on Wiki |
| Nico Olvia | View on Wiki |
| Lao G | View on Wiki |
| Devil Dias | View on Wiki |
| Senor Pink | View on Wiki |
| Mr. 2 Bon Kurei | View on Wiki |
| Gladius | View on Wiki |
| Demalo Black | View on Wiki |
| Arlong | View on Wiki |
| Dellinger | View on Wiki |
| Machvise | View on Wiki |
| Kuroobi | View on Wiki |
| Jango | View on Wiki |
| Higuma | View on Wiki |
| Chew | View on Wiki |
| Porchemy | View on Wiki |
Unknown reward:
| Name | Link(s) |
|---|---|
| Kouzuki Oden | View on Wiki |
| Rocks D. Xebec | View on Wiki |
Cross Guild Bounties
5 Crowns (5,000,000,000):
| Name | Link(s) |
|---|---|
| Sakazuki | View on Wiki |
3 Crowns (3,000,000,000):
| Name | Link(s) |
|---|---|
| Monkey D. Garp | View on Wiki |
| Borsalino | View on Wiki |
| Issho | View on Wiki |
| Aramaki | View on Wiki |
5 Stars (500,000,000):
| Name | Link(s) |
|---|---|
| Koby | View on Wiki |
| Prince Grus | View on Wiki |
| Kujaku | View on Wiki |
| Sentomaru | View on Wiki |
2 Stars (200,000,000):
| Name | Link(s) |
|---|---|
| Hibari | View on Wiki |
1 Star (100,000,000):
| Name | Link(s) |
|---|---|
| Helmeppo | View on Wiki |
Unknown reward:
| Name | Link(s) |
|---|---|
| T Bone | View on Wiki |
Non-canon
2,000,000,000to 100,000,000:
| Name | Link(s) |
|---|---|
| Adio Suerte | View on Wiki |
| Bounty | View on Wiki |
| Motoki | View on Wiki |
| Prize | View on Wiki |
| Byrnndi World | View on Wiki |
| Panz Fry | View on Wiki |
| Chameleone | View on Wiki |
| Lambor Bukini | View on Wiki |
| Puggy | View on Wiki |
| Dopp | View on Wiki |
100,000,000to 10,000,000:
| Name | Link(s) |
|---|---|
| Puzzle | View on Wiki |
| Bulaniki | View on Wiki |
| Margin | View on Wiki |
| Gasparde | View on Wiki |
| Maitei | View on Wiki |
| Tambu | View on Wiki |
| Portnoy | View on Wiki |
| Bobrad | View on Wiki |
| Woonan | View on Wiki |
| Needless | View on Wiki |
| Insk | View on Wiki |
| Olive | View on Wiki |
| Dwanger | View on Wiki |
| Kalik Meidara | View on Wiki |
| Drayke | View on Wiki |
| Milena | View on Wiki |
| Lazarus | View on Wiki |
| Gad | View on Wiki |
| Din | View on Wiki |
| Zabal | View on Wiki |
| Niphtal | View on Wiki |
| Mad | View on Wiki |
| Gillian | View on Wiki |
| Zenran | View on Wiki |
| Silk Road | View on Wiki |
| Marin | View on Wiki |
| Gannot | View on Wiki |
| Willy | View on Wiki |
| Ginger | View on Wiki |
| Bens | View on Wiki |
| Palin | View on Wiki |
| Vasco | View on Wiki |
| Vigo | View on Wiki |
| Biezom | View on Wiki |
| Bigalo | View on Wiki |
| Battler | View on Wiki |
| Wetton | View on Wiki |
| Pesca | View on Wiki |
| Moyas | View on Wiki |
| Creese | View on Wiki |
| Bear King | View on Wiki |
| Ndaho | View on Wiki |
| Dias | View on Wiki |
| Terrance | View on Wiki |
10,000,000and under:
Unknown reward:
| Name | Link(s) |
|---|---|
| Great King of Angolmois | View on Wiki |
| Patrick Redfield | View on Wiki |
| Mobu Head | View on Wiki |
| Red Arrows Pirates | View on Wiki |
| Dareda | View on Wiki |
| Dontacos | View on Wiki |
| Mad Dog Pirates | View on Wiki |
Others:
| Name | Link(s) |
|---|---|
| Gill Bastar | View on Wiki |
| Mikio Itoo | View on Wiki |
Related Articles
Bounties:
| Name | Link(s) |
|---|---|
| List of Bounties | View on Wiki |
| Gallery of Bounties | View on Wiki |
Others:
| Name | Link(s) |
|---|---|
| Pirates | View on Wiki |
| Bandits | View on Wiki |
| World Government | View on Wiki |
| Justice | View on Wiki |
| Bounty Hunters | View on Wiki |
| Cross Guild | View on Wiki |
Martial Artists
Fish-Man Karate:
| Name | Link(s) |
|---|---|
| Kuroobi | View on Wiki |
| Capote | View on Wiki |
| Tansui | View on Wiki |
| Jinbe | View on Wiki |
| Nico Robin | View on Wiki |
| Hody Jones | View on Wiki |
| Koala | View on Wiki |
| Hack | View on Wiki |
| S-Shark | View on Wiki |
| Aladine | View on Wiki |
| Sebastian | View on Wiki |
| Dandy | View on Wiki |
Fish-Man Jujutsu:
| Name | Link(s) |
|---|---|
| Jinbe | View on Wiki |
| Hody Jones | View on Wiki |
| Hack | View on Wiki |
| Aladine | View on Wiki |
Merman Combat:
| Name | Link(s) |
|---|---|
| Neptune | View on Wiki |
| Fukaboshi | View on Wiki |
Kung Fu:
| Name | Link(s) |
|---|---|
| Kung-Fu Dugongs | View on Wiki |
| Tony Tony Chopper | View on Wiki |
Okama and Newkama Kenpo:
| Name | Link(s) |
|---|---|
| Bentham | View on Wiki |
| Emporio Ivankov | View on Wiki |
| Caroline | View on Wiki |
Boxing:
| Name | Link(s) |
|---|---|
| Holy | View on Wiki |
| Foxy | View on Wiki |
| Franky | View on Wiki |
| Jerry | View on Wiki |
| Glove | View on Wiki |
| Elizabello II | View on Wiki |
| Kelly Funk | View on Wiki |
| Ideo | View on Wiki |
| Rolling Logan | View on Wiki |
Hasshoken:
| Name | Link(s) |
|---|---|
| Chinjao | View on Wiki |
| Boo | View on Wiki |
| Sai | View on Wiki |
Tontatta Combat:
| Name | Link(s) |
|---|---|
| Leo | View on Wiki |
| Rampo | View on Wiki |
| Chao | View on Wiki |
| Inhel | View on Wiki |
Electro:
| Name | Link(s) |
|---|---|
| Carrot | View on Wiki |
| Roddy | View on Wiki |
| Pedro | View on Wiki |
Rokushiki:
| Name | Link(s) |
|---|---|
| Rob Lucci | View on Wiki |
| Kaku | View on Wiki |
| Jabra | View on Wiki |
| Blueno | View on Wiki |
| Kalifa | View on Wiki |
| Kumadori | View on Wiki |
| Fukurou | View on Wiki |
| Nero | View on Wiki |
| Laskey | View on Wiki |
| Tsumonsieur Kamaya | View on Wiki |
| Koby | View on Wiki |
| Momonga | View on Wiki |
| Dalmatian | View on Wiki |
| Tashigi | View on Wiki |
| Vergo | View on Wiki |
| Stussy | View on Wiki |
| Charlotte Yuen | View on Wiki |
| Charlotte Decuplets Males | View on Wiki |
| Who’s-Who | View on Wiki |
| Guernika | View on Wiki |
| Maha | View on Wiki |
| Joseph | View on Wiki |
| Alpha | View on Wiki |
| Kibin | View on Wiki |
| Shuzo | View on Wiki |
| Binz | View on Wiki |
| Z | View on Wiki |
| Byrnndi World | View on Wiki |
| Ant De Bonham | View on Wiki |
| Shimoi Zappa | View on Wiki |
Sumo:
| Name | Link(s) |
|---|---|
| Yokozuna | View on Wiki |
| Sentomaru | View on Wiki |
| Monkey D. Luffy | View on Wiki |
| Urashima | View on Wiki |
| Atagoyama | View on Wiki |
| Kawamatsu | View on Wiki |
| Sukune | View on Wiki |
| Koni Boakeno | View on Wiki |
Other Martial Arts:
| Name | Link(s) |
|---|---|
| Sanji | View on Wiki |
| Zeff | View on Wiki |
| Jesus Burgess | View on Wiki |
| Roronoa Zoro | Current Page |
| Wanze | View on Wiki |
| Kumadori | View on Wiki |
| Bepo | View on Wiki |
| Blue Gilly | View on Wiki |
| Sabo | View on Wiki |
| Lao G | View on Wiki |
| Hotdog | View on Wiki |
| Campacino | View on Wiki |
| Brindo | View on Wiki |
| Nightin | View on Wiki |
| Ant De Bonham | View on Wiki |
| Puggy | View on Wiki |
| Hanagasa | View on Wiki |
| Rikaon | View on Wiki |
| Tequila | View on Wiki |
Davy Back Fight
Canon Participants:
| Name | Link(s) |
|---|---|
| Foxy | View on Wiki |
| Porche | View on Wiki |
| Hamburg | View on Wiki |
| Kibagaeru | View on Wiki |
| Fanged Toad Pirate Crewmembers | View on Wiki |
| Capote | View on Wiki |
| Monda | View on Wiki |
| Pickles | View on Wiki |
| Big Pan | View on Wiki |
| Nami | View on Wiki |
| Usopp | View on Wiki |
| Tony Tony Chopper | View on Wiki |
| Nico Robin | View on Wiki |
| Roronoa Zoro | Current Page |
| Sanji | View on Wiki |
| Monkey D. Luffy | View on Wiki |
Announcers:
| Name | Link(s) |
|---|---|
| Itomimizu | View on Wiki |
| Chuchun | View on Wiki |
Civilians:
| Name | Link(s) |
|---|---|
| Tonjit | View on Wiki |
| Shelly | View on Wiki |
Anime Only Participants:
| Name | Link(s) |
|---|---|
| Mashikaku | View on Wiki |
| Chiqicheetah | View on Wiki |
| Jube | View on Wiki |
| Girarin | View on Wiki |
| Komei | View on Wiki |
| Dojaku | View on Wiki |
| Kansho | View on Wiki |
| Franky | View on Wiki |
| Brook | View on Wiki |
Other:
| Name | Link(s) |
|---|---|
| Rokuroshi | View on Wiki |
Abilities
Devil Fruit Based:
| Name | Link(s) |
|---|---|
| Noro Noro no Mi | View on Wiki |
| Gomu Gomu no Mi | View on Wiki |
| Hito Hito no Mi | View on Wiki |
| Hana Hana no Mi | View on Wiki |
Fighting Style Based:
| Name | Link(s) |
|---|---|
| Fish-Man Karate | View on Wiki |
| No Sword Style | View on Wiki |
| Afro | View on Wiki |
| Gorilla Puncher | View on Wiki |
| Gorilla Puncher 13 | View on Wiki |
| Gorilla Puncher 18 | View on Wiki |
Related Articles
Story Arcs:
| Name | Link(s) |
|---|---|
| Long Ring Long Land Arc | View on Wiki |
| Adventure of Nebulandia | View on Wiki |
Locations:
| Name | Link(s) |
|---|---|
| Pirate Island | View on Wiki |
| Long Ring Long Land | View on Wiki |
| Kinoko Island | View on Wiki |
Locomotions:
| Name | Link(s) |
|---|---|
| Sexy Foxy | View on Wiki |
| Fanged Toad Pirates’ ship | View on Wiki |
| Cutie Wagon | View on Wiki |
| Going Merry | View on Wiki |
| Taru Tiger | View on Wiki |
| Harem No Tango | View on Wiki |
| Kani Crane | View on Wiki |
| Kaji King | View on Wiki |
| Oyakata Bune | View on Wiki |
| Look Special | View on Wiki |
| Mother Ship Coaster | View on Wiki |
| Tarumanma | View on Wiki |
| Ma Ikkada | View on Wiki |
Others:
| Name | Link(s) |
|---|---|
| Pirate | View on Wiki |
| Jolly Roger | View on Wiki |
Kuraigana Island
Inhabitants:
| Name | Link(s) |
|---|---|
| Dracule Mihawk | View on Wiki |
| Perona | View on Wiki |
| Humandrills | View on Wiki |
| Roronoa Zoro | Current Page |
Abilities
Devil Fruit Based:
| Name | Link(s) |
|---|---|
| Horo Horo no Mi | View on Wiki |
Weapon Based:
| Name | Link(s) |
|---|---|
| Three Sword Style | View on Wiki |
| Sandai Kitetsu | View on Wiki |
| Shusui | View on Wiki |
| Yoru | View on Wiki |
| Kogatana | View on Wiki |
Related Articles
Story Arcs:
| Name | Link(s) |
|---|---|
| Amazon Lily Arc | View on Wiki |
| Post-War Arc | View on Wiki |
| Wano Country Arc | View on Wiki |
Cover Stories:
| Name | Link(s) |
|---|---|
| Straw Hat’s Separation Serial | View on Wiki |
| From the Decks of the World: The 500,000,000 Man Arc | View on Wiki |
Early One Piece
Romance Dawn V.1:
| Name | Link(s) |
|---|---|
| Monkey D. Luffy | View on Wiki |
| Shanks | View on Wiki |
| Silk | View on Wiki |
| Gally | View on Wiki |
Romance Dawn V.2:
| Name | Link(s) |
|---|---|
| Monkey D. Luffy | View on Wiki |
| Luffy’s grandpa | View on Wiki |
| Ann | View on Wiki |
| Balloon | View on Wiki |
| Shupeal | View on Wiki |
Romance Dawn V.3:
| Name | Link(s) |
|---|---|
| Gold Roger | View on Wiki |
| Monkey D. Luffy | View on Wiki |
| Shanks | View on Wiki |
| Benn Beckman | View on Wiki |
| Lucky Roux | View on Wiki |
| Yasopp | View on Wiki |
| Limejuice | View on Wiki |
| Hongo | View on Wiki |
| Bonk Punch | View on Wiki |
| Monster | View on Wiki |
| Higuma | View on Wiki |
| Makino | View on Wiki |
| Woop Slap | View on Wiki |
| Lord of the Coast | View on Wiki |
Romance Dawn Story:
| Name | Link(s) |
|---|---|
| Monkey D. Luffy | View on Wiki |
| Nico Robin | View on Wiki |
| Nami | View on Wiki |
| Roronoa Zoro | Current Page |
| Tony Tony Chopper | View on Wiki |
| Sanji | View on Wiki |
| Franky | View on Wiki |
| Usopp | View on Wiki |
| Brook | View on Wiki |
| Silk | View on Wiki |
| Gally | View on Wiki |
Monsters:
| Name | Link(s) |
|---|---|
| Ryuma | View on Wiki |
| Flare | View on Wiki |
| Cyrano | View on Wiki |
| D.R. | View on Wiki |
| The Dragon | View on Wiki |
Defeat Him! The Pirate Ganzack:
| Name | Link(s) |
|---|---|
| Monkey D. Luffy | View on Wiki |
| Roronoa Zoro | Current Page |
| Nami | View on Wiki |
| Medaka | View on Wiki |
| Skid | View on Wiki |
| Herring | View on Wiki |
| Ganzack Pirates | View on Wiki |
| Plesiosaur | View on Wiki |
| Devil’s Tower | View on Wiki |
Ninja-Pirate-Mink-Samurai Alliance
Founders:
| Name | Link(s) |
|---|---|
| Monkey D. Luffy | View on Wiki |
| Trafalgar D. Water Law | View on Wiki |
| Kouzuki Momonosuke | View on Wiki |
| Inuarashi | View on Wiki |
| Nekomamushi | View on Wiki |
Groups:
| Name | Link(s) |
|---|---|
| Straw Hat Pirates | View on Wiki |
| Heart Pirates | View on Wiki |
| Kouzuki Family | View on Wiki |
| Mt. Atama Thieves | View on Wiki |
| Jibuemon | View on Wiki |
| Kagero | View on Wiki |
| Tabuhachiro | View on Wiki |
| Kurosawa | View on Wiki |
| Ukon | View on Wiki |
| Hidayu | View on Wiki |
| Monjiro | View on Wiki |
| Jujiro | View on Wiki |
| Kyoshiro Family | View on Wiki |
| Mokomo Dukedom | View on Wiki |
| Guardians | View on Wiki |
Other Members:
| Name | Link(s) |
|---|---|
| Yakuza | View on Wiki |
| Kid Pirates | View on Wiki |
| Marco | View on Wiki |
| Izou | View on Wiki |
| Yamato | View on Wiki |
| Kurozumi Tama | View on Wiki |
| Hihimaru | View on Wiki |
| Gifters | View on Wiki |
| Babanuki | View on Wiki |
| Gazelleman | View on Wiki |
| Daifugo | View on Wiki |
| Briscola | View on Wiki |
| Mizerka | View on Wiki |
| Poker | View on Wiki |
| Hamlet | View on Wiki |
| Armored Division | View on Wiki |
| X Drake | View on Wiki |
| Fuga | View on Wiki |
Indirect Allies:
| Name | Link(s) |
|---|---|
| Kouzuki Sukiyaki | View on Wiki |
| Caribou | View on Wiki |
| Toko | View on Wiki |
| Tsurujo | View on Wiki |
| Shimotsuki Yasuie | View on Wiki |
Ships:
| Name | Link(s) |
|---|---|
| Thousand Sunny | View on Wiki |
| Polar Tang | View on Wiki |
| Victoria Punk | View on Wiki |
Abilities
Devil Fruit Based:
| Name | Link(s) |
|---|---|
| Gomu Gomu no Mi | View on Wiki |
| Ope Ope no Mi | View on Wiki |
| Hana Hana no Mi | View on Wiki |
| Hito Hito no Mi | View on Wiki |
| Yomi Yomi no Mi | View on Wiki |
| Uo Uo no Mi, Model: Seiryu | View on Wiki |
| Fuku Fuku no Mi | View on Wiki |
| Fude Fude no Mi | View on Wiki |
| Juku Juku no Mi | View on Wiki |
| Maki Maki no Mi | View on Wiki |
| Numa Numa no Mi | View on Wiki |
| Jiki Jiki no Mi | View on Wiki |
| Tori Tori no Mi, Model: Phoenix | View on Wiki |
| Kibi Kibi no Mi | View on Wiki |
| Ryu Ryu no Mi, Model: Allosaurus | View on Wiki |
| Inu Inu no Mi, Model: Okuchi no Makami | View on Wiki |
| SMILE | View on Wiki |
Fighting Style Based:
| Name | Link(s) |
|---|---|
| Haki | View on Wiki |
| Black Leg Style | View on Wiki |
| Fish-Man Karate | View on Wiki |
| Fish-Man Jujutsu | View on Wiki |
| Electro | View on Wiki |
| Ninjutsu | View on Wiki |
| Sulong | View on Wiki |
Weapon Based:
| Name | Link(s) |
|---|---|
| Three Sword Style | View on Wiki |
| Sandai Kitetsu | View on Wiki |
| Shusui | View on Wiki |
| Enma | View on Wiki |
| Sorcery Clima-Tact | View on Wiki |
| Kuro Kabuto | View on Wiki |
| Raid Suit | View on Wiki |
| BF-37 | View on Wiki |
| Soul Solid | View on Wiki |
| Kikoku | View on Wiki |
| Foxfire Style | View on Wiki |
| Kappa Style | View on Wiki |
| Oden Two Sword Style | View on Wiki |
| One Sword Style of the Flower | View on Wiki |
Related Articles
Story Arcs:
| Name | Link(s) |
|---|---|
| Punk Hazard Arc | View on Wiki |
| Dressrosa Arc | View on Wiki |
| Zou Arc | View on Wiki |
| Wano Country Arc | View on Wiki |
Locations:
| Name | Link(s) |
|---|---|
| Wano Country | View on Wiki |
| Kuri | View on Wiki |
| Udon | View on Wiki |
| Ringo | View on Wiki |
| Hakumai | View on Wiki |
| Punk Hazard | View on Wiki |
| Dressrosa | View on Wiki |
| Zou | View on Wiki |
Other:
| Name | Link(s) |
|---|---|
| Super Rookie | View on Wiki |
| Worst Generation | View on Wiki |
| Will of D. | View on Wiki |
| Samurai | View on Wiki |
| Voice of All Things | View on Wiki |
| Operation SOP | View on Wiki |
| Fire Festival | View on Wiki |
| Raid on Onigashima | View on Wiki |
Pirates Festival
SP Guest:
| Name | Link(s) |
|---|---|
| Buena Festa | View on Wiki |
| Douglas Bullet | View on Wiki |
| Donald Moderate | View on Wiki |
| Ann | View on Wiki |
| Tabi | View on Wiki |
Attendees
Worst Generation:
| Name | Link(s) |
|---|---|
| Straw Hat Pirates | View on Wiki |
| Heart Pirates | View on Wiki |
| Kid Pirates | View on Wiki |
| On Air Pirates | View on Wiki |
| Hawkins Pirates | View on Wiki |
| Fire Tank Pirates | View on Wiki |
| Drake Pirates | View on Wiki |
| Bonney Pirates | View on Wiki |
| Fallen Monk Pirates | View on Wiki |
Seven Warlords of the Sea:
| Name | Link(s) |
|---|---|
| Kuja Pirates | View on Wiki |
| Buggy’s Delivery | View on Wiki |
| Dracule Mihawk | View on Wiki |
Other Pirates:
| Name | Link(s) |
|---|---|
| Beautiful Pirates | View on Wiki |
| Barto Club | View on Wiki |
| Foxy Pirates | View on Wiki |
| Bliking Pirates | View on Wiki |
| Macro Pirates | View on Wiki |
| Schneider Pirates | View on Wiki |
| Crocodile | View on Wiki |
| Daz Bonez | View on Wiki |
| Risky Brothers | View on Wiki |
| Perona | View on Wiki |
| Brief | View on Wiki |
| Nora Gitsune | View on Wiki |
| Desan and Croquis | View on Wiki |
| Captain Seven | View on Wiki |
Marines:
| Name | Link(s) |
|---|---|
| Sakazuki | View on Wiki |
| Borsalino | View on Wiki |
| Issho | View on Wiki |
| Momonga | View on Wiki |
| Bastille | View on Wiki |
| Smoker | View on Wiki |
| Maynard | View on Wiki |
| Hina | View on Wiki |
| Tashigi | View on Wiki |
| Koby | View on Wiki |
| Helmeppo | View on Wiki |
| Sentomaru | View on Wiki |
| Pacifista | View on Wiki |
| All-Hunt Grount | View on Wiki |
| Ant De Bonham | View on Wiki |
| Shimoi Zappa | View on Wiki |
| Jango | View on Wiki |
| Fullbody | View on Wiki |
| Marron | View on Wiki |
| Horo | View on Wiki |
Revolutionary Army:
| Name | Link(s) |
|---|---|
| Sabo | View on Wiki |
| Koala | View on Wiki |
| Hack | View on Wiki |
| Karasu | View on Wiki |
| Belo Betty | View on Wiki |
| Morley | View on Wiki |
| Lindbergh | View on Wiki |
CP0:
| Name | Link(s) |
|---|---|
| Rob Lucci | View on Wiki |
| Hattori | View on Wiki |
| Kaku | View on Wiki |
| Stussy | View on Wiki |
Others:
| Name | Link(s) |
|---|---|
| Cidre Guild | View on Wiki |
| Evil Black Drum Kingdom | View on Wiki |
| Takoyaki 8 | View on Wiki |
| Rosy Life Riders | View on Wiki |
| Carina | View on Wiki |
| Miss Monday | View on Wiki |
| Mr. 9 | View on Wiki |
| Aisa | View on Wiki |
| Conis | View on Wiki |
| Acilia | View on Wiki |
| Mikita | View on Wiki |
| Gem | View on Wiki |
| Chimney | View on Wiki |
| Gonbe | View on Wiki |
| Kokoro | View on Wiki |
| Paulie | View on Wiki |
| Peepley Lulu | View on Wiki |
| Tilestone | View on Wiki |
| Zambai | View on Wiki |
| Kiev | View on Wiki |
| Schollzo | View on Wiki |
| Kop | View on Wiki |
| Mozu | View on Wiki |
| Kiwi | View on Wiki |
| Michael | View on Wiki |
| Hoichael | View on Wiki |
| Apis | View on Wiki |
| Xiao | View on Wiki |
| Billy | View on Wiki |
| Tibany | View on Wiki |
| Pandaman | View on Wiki |
| Carmen | View on Wiki |
| Rice Rice | View on Wiki |
| Ratchet | View on Wiki |
| Spoil | View on Wiki |
| Doran | View on Wiki |
| Gedatsu | View on Wiki |
| Goro | View on Wiki |
| Baccarat | View on Wiki |
| Minokoala | View on Wiki |
| Minozebra | View on Wiki |
| Attach | View on Wiki |
| Pascia | View on Wiki |
| Moodie | View on Wiki |
Related Articles
Movies:
| Name | Link(s) |
|---|---|
| One Piece: Stampede | View on Wiki |
Story Arcs:
| Name | Link(s) |
|---|---|
| Cidre Guild Arc | View on Wiki |
Other:
| Name | Link(s) |
|---|---|
| Pirate | View on Wiki |
| Galzburg | View on Wiki |
| Galzforce | View on Wiki |
| Tragedy of Galzburg | View on Wiki |
| Delta Island | View on Wiki |
| Catapult | View on Wiki |
| Gol D. Roger | View on Wiki |
First Mates
Current:
| Name | Link(s) |
|---|---|
| Benn Beckman | View on Wiki |
| Mohji | View on Wiki |
| Okome | View on Wiki |
| Boo | View on Wiki |
| Aladine | View on Wiki |
Former:
| Name | Link(s) |
|---|---|
| Silvers Rayleigh | View on Wiki |
| Jango | View on Wiki |
| Sarquiss | View on Wiki |
Non-Canon:
| Name | Link(s) |
|---|---|
| Zap | View on Wiki |
| Pesca | View on Wiki |
| Vigaro | View on Wiki |
| Corto | View on Wiki |
| Byojack | View on Wiki |
| Roronoa Zoro | Current Page |
| Yamaguma | View on Wiki |
| Martha | View on Wiki |
| Tesak | View on Wiki |